
Before you start, enable SCIM in Plerion and copy the SCIM base URL and a readWrite organization API key. See SCIM provisioning. You also need the SAML application you created in the Okta single sign-on guide, because SCIM provisions users while SAML is used for authentication only.
Steps to configure Okta provisioning
1
Turn on SCIM for the app
- Sign in to the Okta admin console and open your Plerion app under
Applications. - On the
Generaltab, underApp Settings, clickEdit. - Set
Provisioningto SCIM and save.
Provisioning to SCIM adds the Provisioning tab you need for the next step.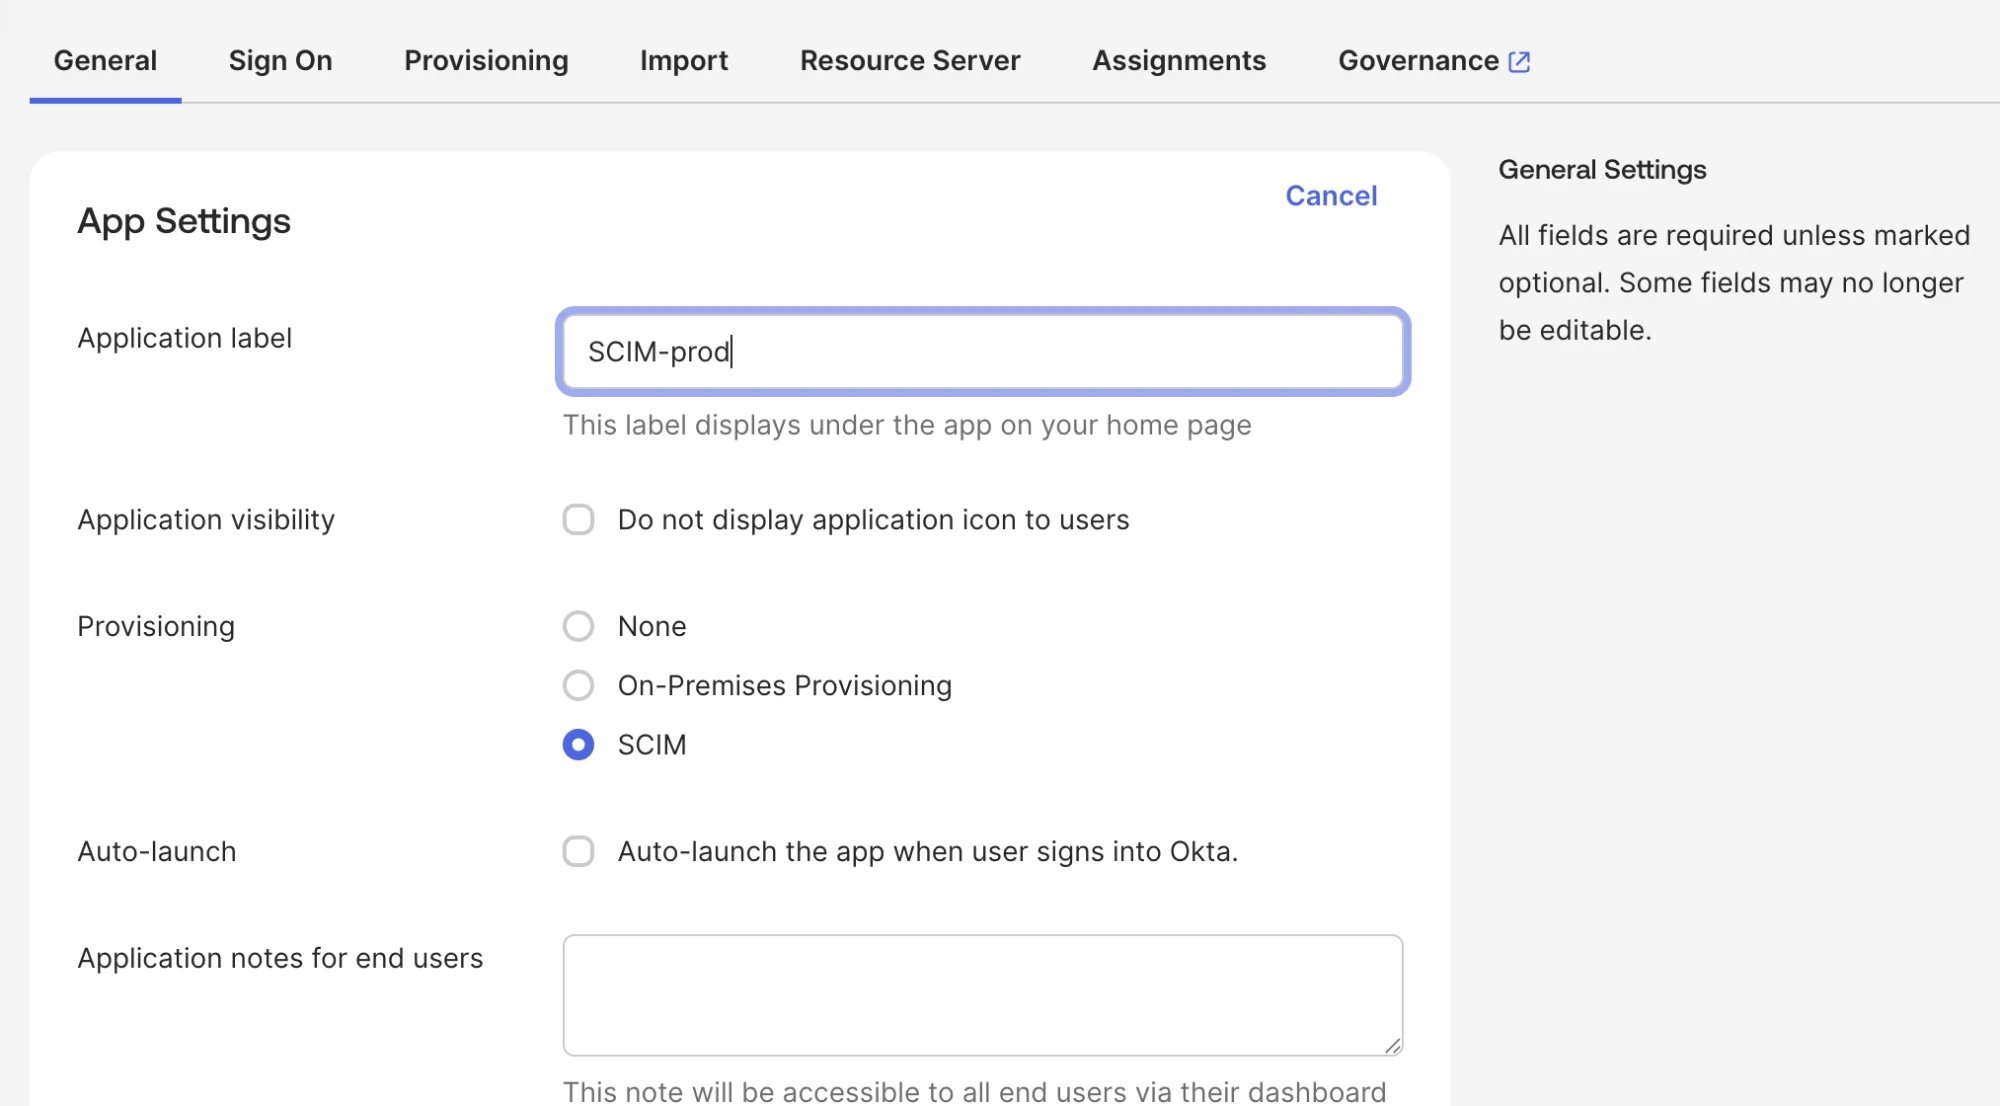
2
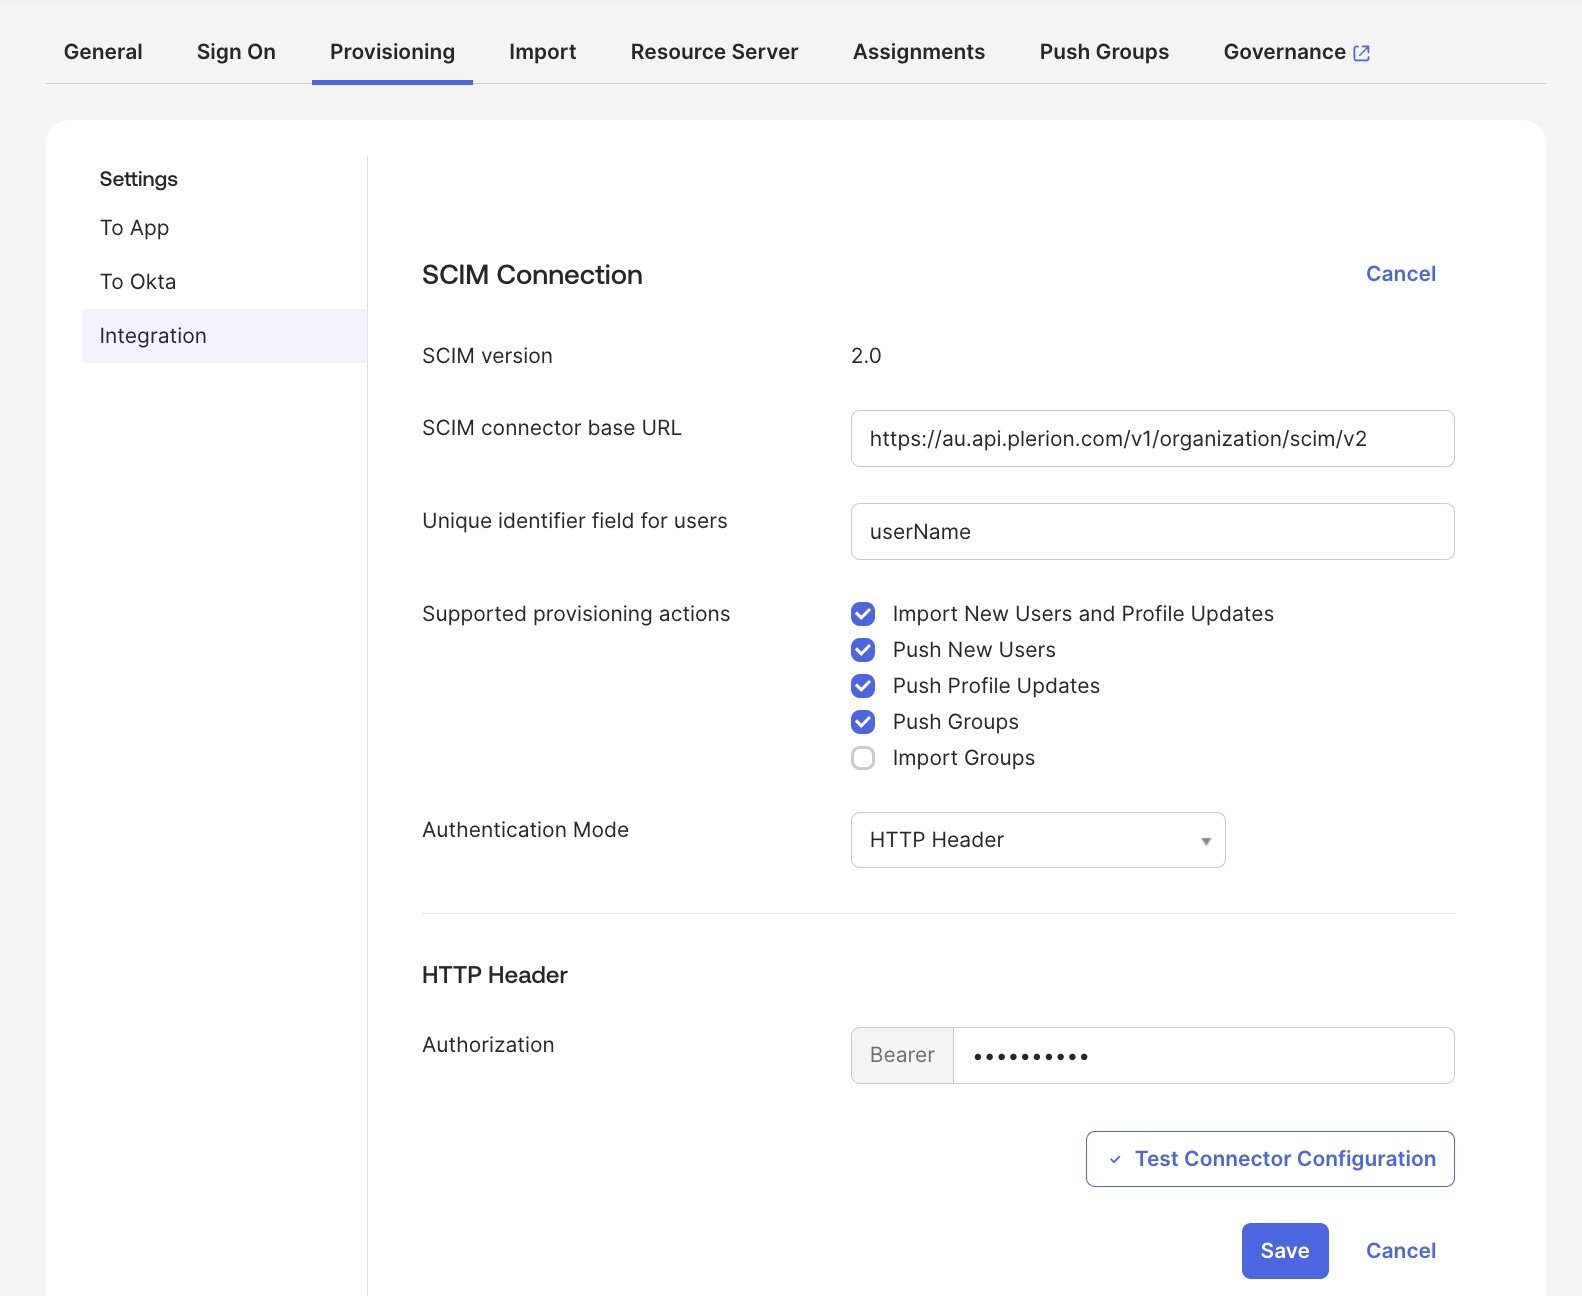
Configure the SCIM connection
- Open the
Provisioningtab, which shows theIntegrationsettings, and clickEdit. - Fill in the connection details:
- Click
Test Connector Configurationand confirm it passes, then clickSave.
3
Enable the provisioning actions
- Still on the
Provisioningtab, selectTo Appin the left sidebar and clickEdit. - Enable Create Users, Update User Attributes, and Deactivate Users.
- Click
Save.
These three are off by default, and nothing provisions until you enable them. A user you assigned before this shows
Matching user not found, or a provision user task, in Okta until provisioning is enabled and the task is retried.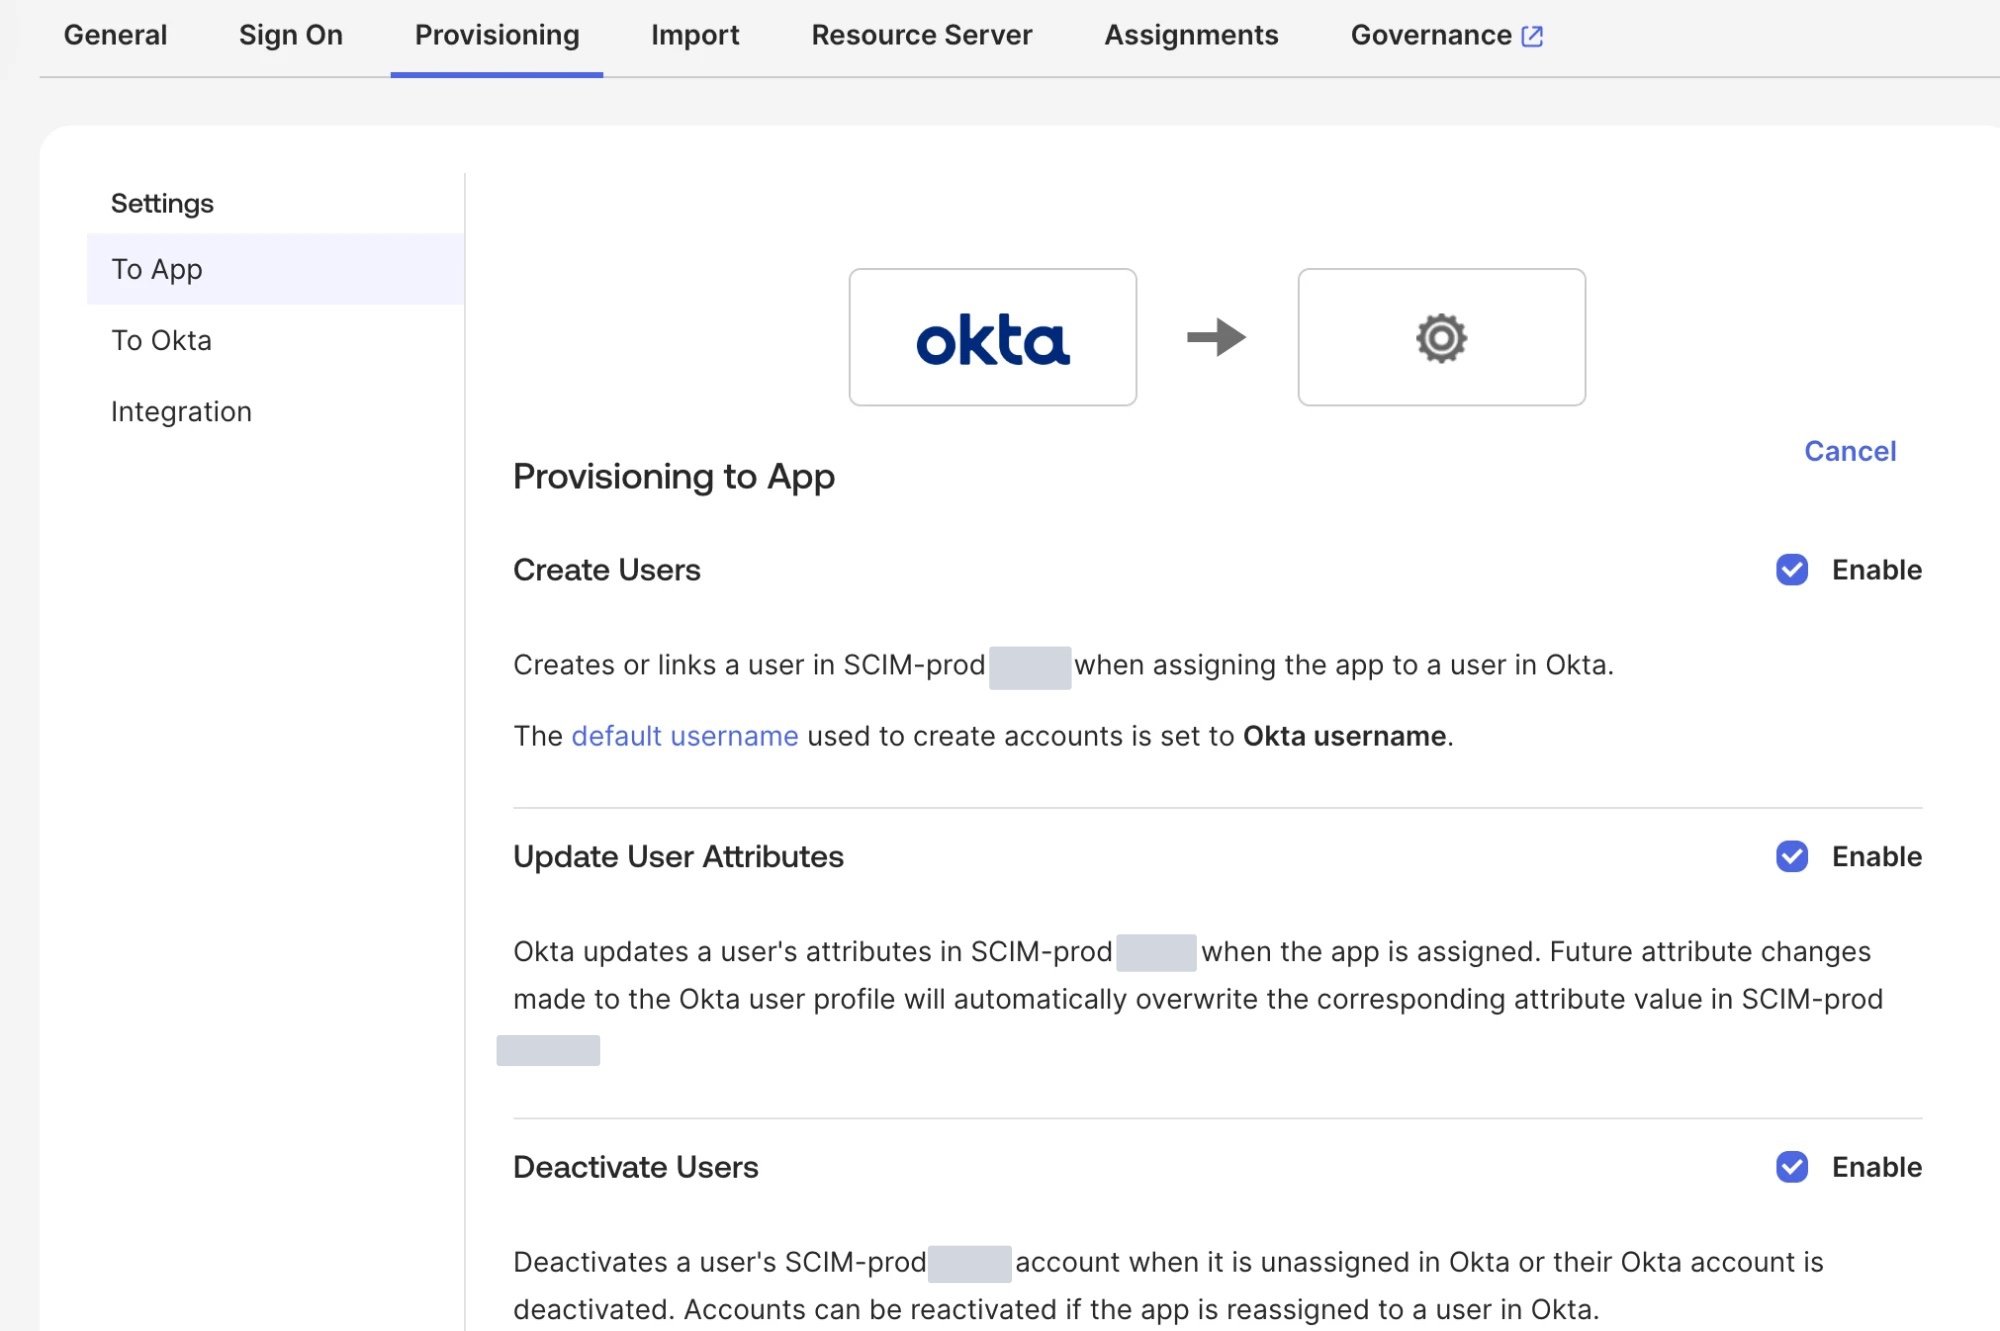
4
Push groups
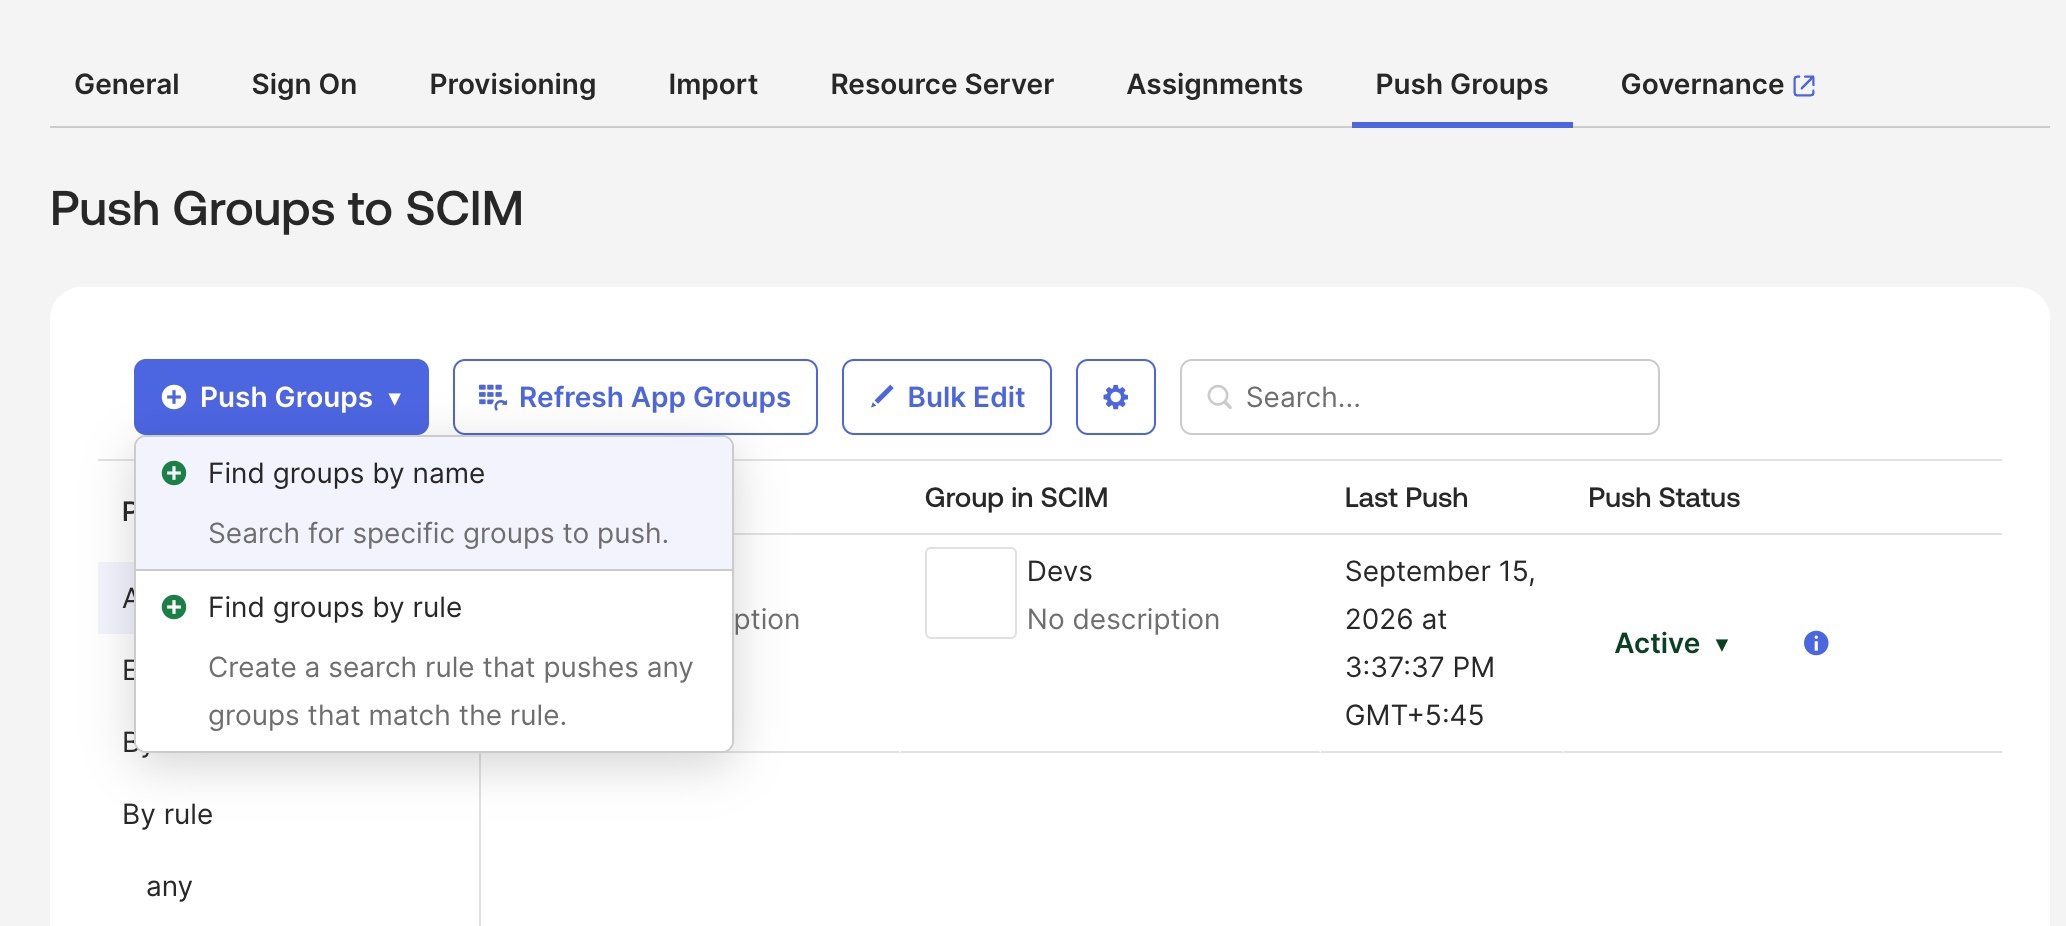
- Open the
Push Groupstab, clickPush Groups>Find groups by rule, and create a rule that matches the Okta groups whose members should have Plerion access. - Each matching group appears in Plerion under
Admin>Directory>User groups, where you grant it roles. See User groups.
5
Assign people and verify
- Go to the
Assignmentstab, clickAssign>Assign to Groups, and assign a pushed group, or assign a test user who belongs to one. - In Plerion, go to
Admin>Directory>Usersand confirm the user appears with the roles their group grants. - Sign in as that user through Okta to confirm the end-to-end flow.
Assigning a user, or pushing a profile update, is what provisions them to Plerion. A user who already existed in Plerion with the same email address is adopted rather than created again.
For the full user lifecycle and the break-glass rules that apply whatever your IdP, see SCIM provisioning.