How Plerion uses environment classifications
Environment classifications help you organize and filter data across Plerion. Cloud integrations such as AWS accounts, GCP projects, and Microsoft Entra tenants can be assigned to an environment. If no classification is set, the integration remains unclassified. You can use environments to:- Filter the homepage dashboard
- Filter assets, findings, and vulnerabilities
- Build workflows using the Environment filter
Setting the environment for your cloud integrations
You can assign environments to your cloud integrations from the dedicated Environments page. This page provides a centralized view of all connected cloud integrations and lets you to manage environment classifications in one place.1
Go to the Environments page
Open the Environments page in Plerion.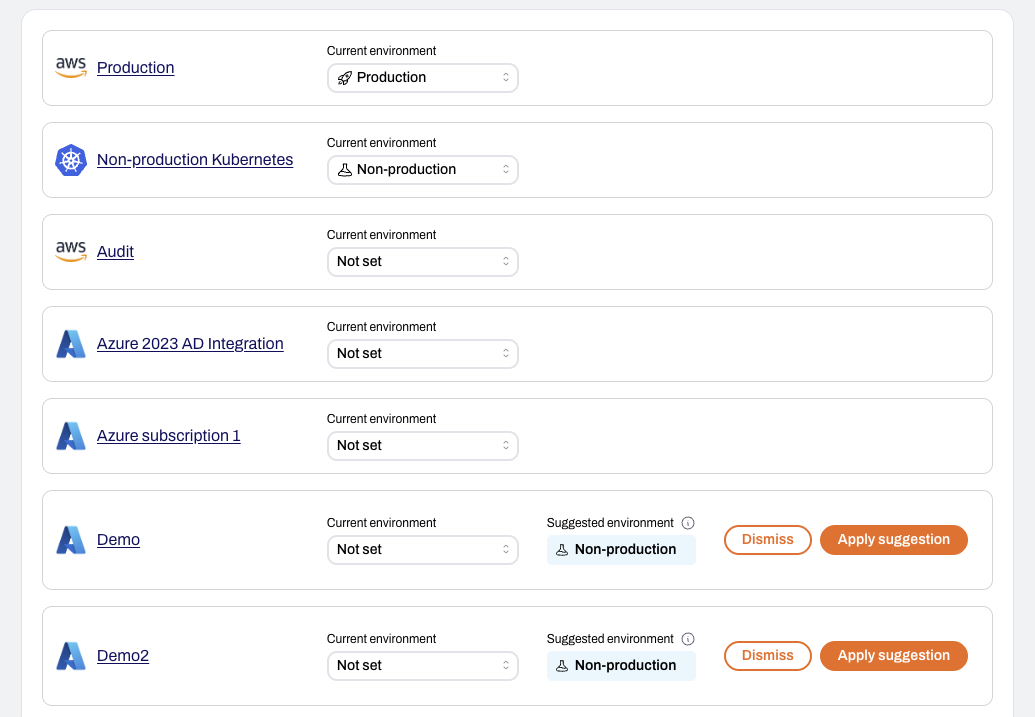
2
Review your connected cloud integrations
The page lists all connected cloud integrations (including AWS accounts, GCP projects, Microsoft Entra tenants, and Kubernetes clusters) along with their current environment status.
3
Assign an environment
Use the dropdown next to each integration to classify it as Production, Non-production, or Not set.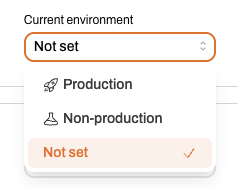
4
Review and apply environment suggestions (if available)
If Plerion has high confidence in an integration’s environment, it will suggest a classification.
- Click
Apply suggestionto accept the recommendation - Click
Dismissto ignore it
You can also assign an environment directly from an individual integration’s page.
1
On the Plerion dashboard, go to Settings > Integrations

2
Select the cloud integration you want to classify
3
Choose an environment classification
Set the integration to Production or Non-production.
You can also assign environments from the homepage dashboard when no integrations have been classified.
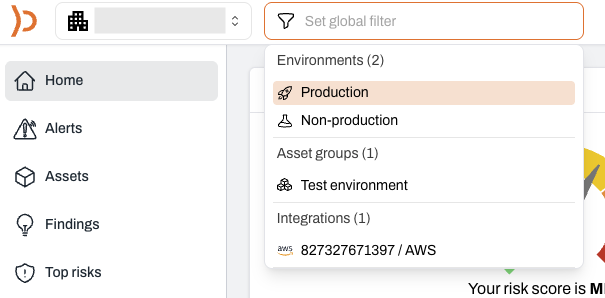
1
On the homepage dashboard, open the global filter and selects Environments
2
Assign your environments
Select the integrations you want to classify as Production or Non-production.
Plerion will take a moment to apply these classifications. Once complete, the homepage dashboard will refresh automatically and show the updated Environment filter.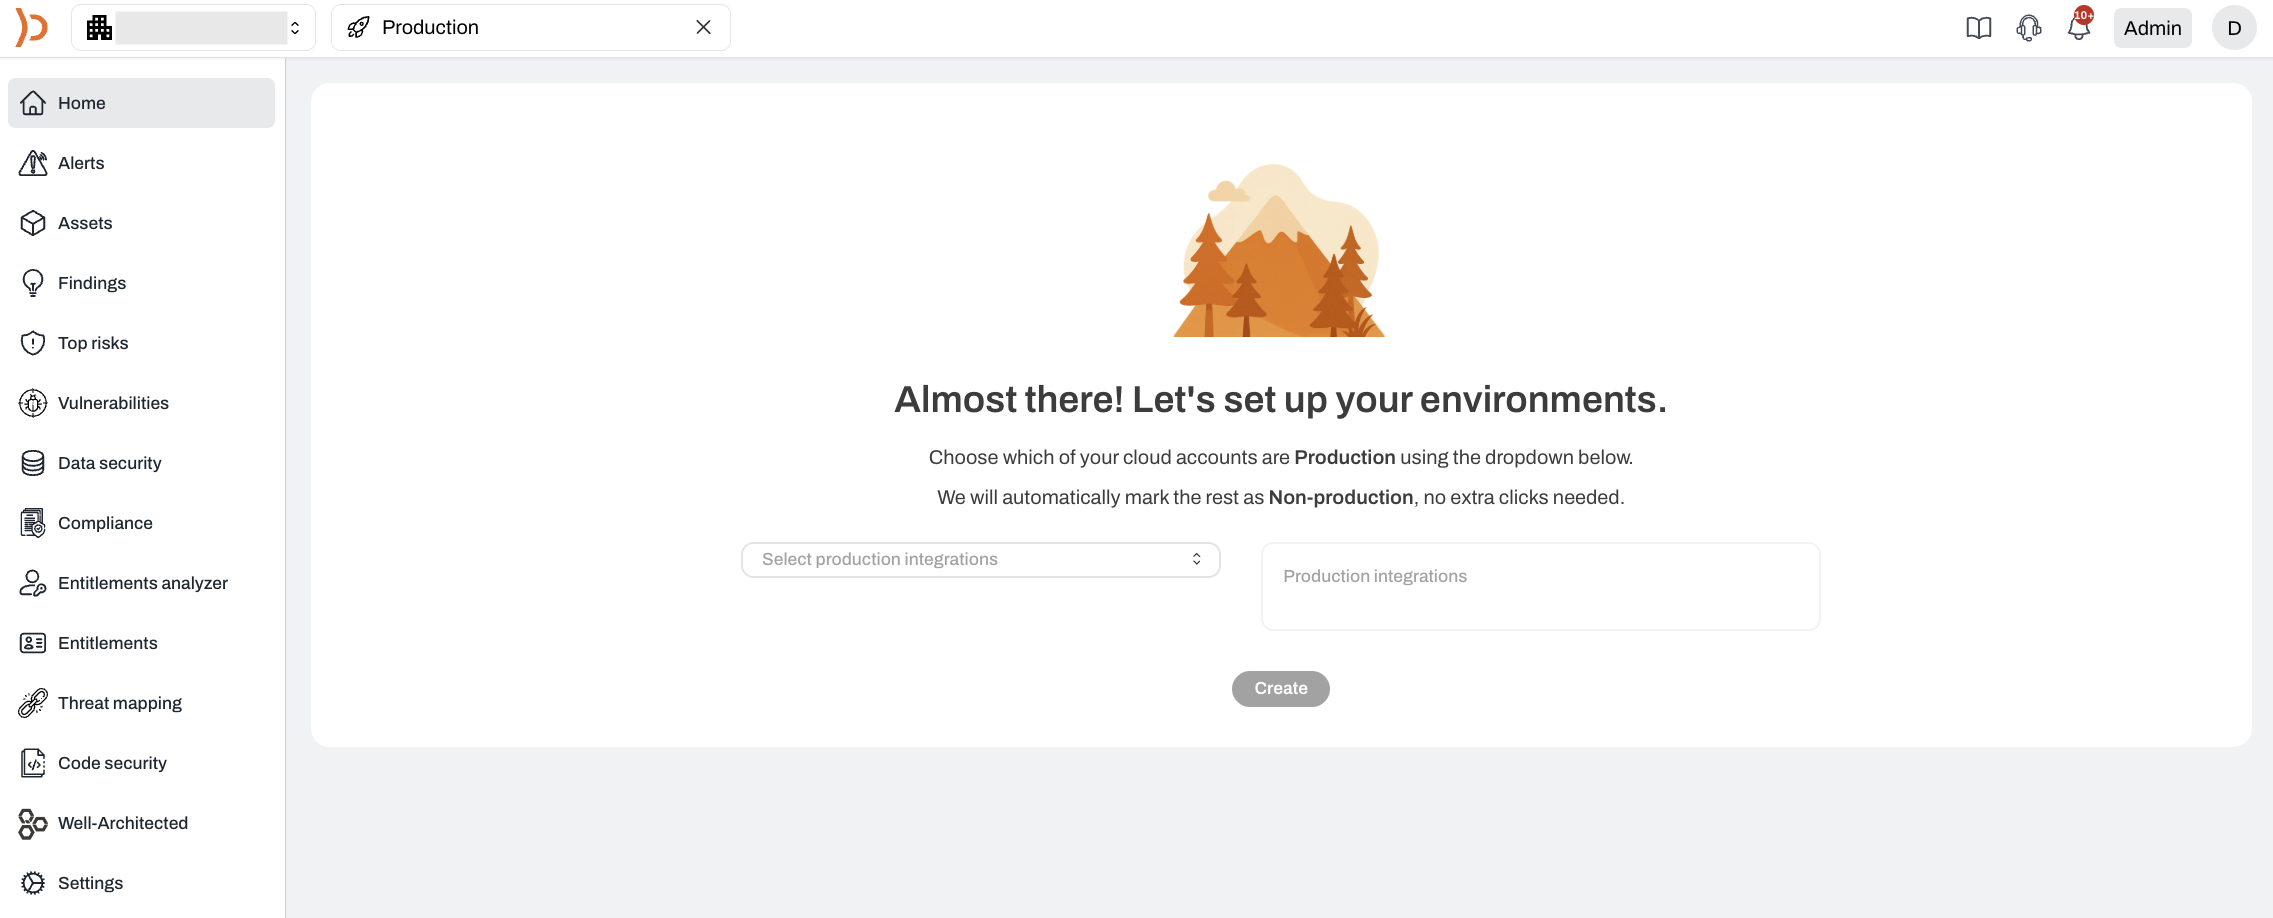
Plerion will take a moment to apply these classifications. Once complete, the homepage dashboard will refresh automatically and show the updated Environment filter.