Steps to configure Okta SSO
1
Log in to Okta
Sign in to your Okta account with the required roles and permissions.
2
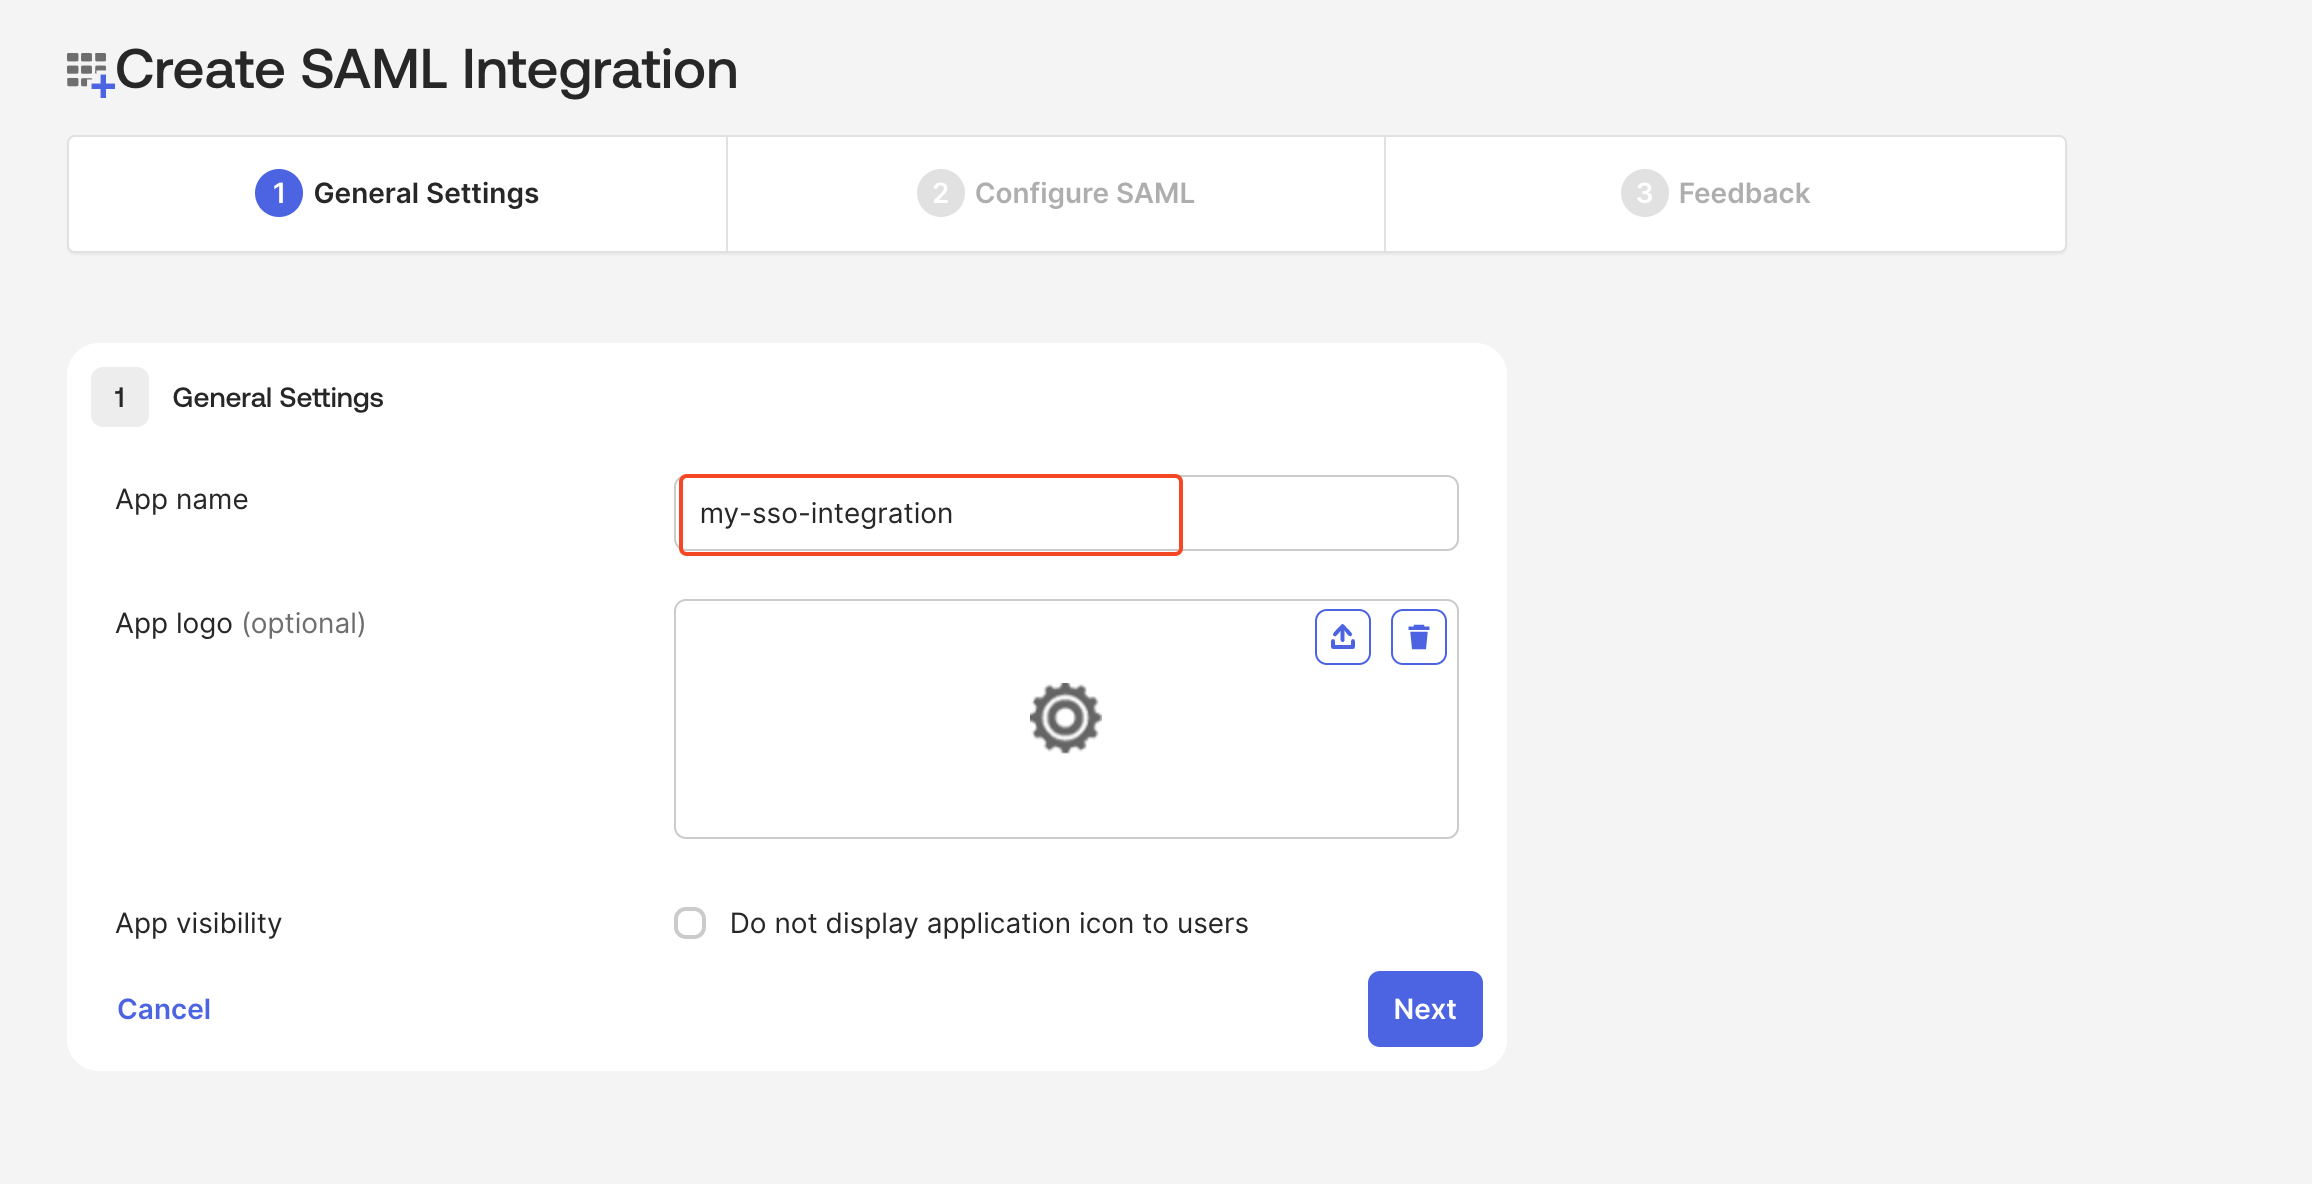
Create a new Okta application
- Go to
Applicationsand clickCreate App Integration. - Select
SAML 2.0and clickNext. - Enter an app name and click
Next.
3
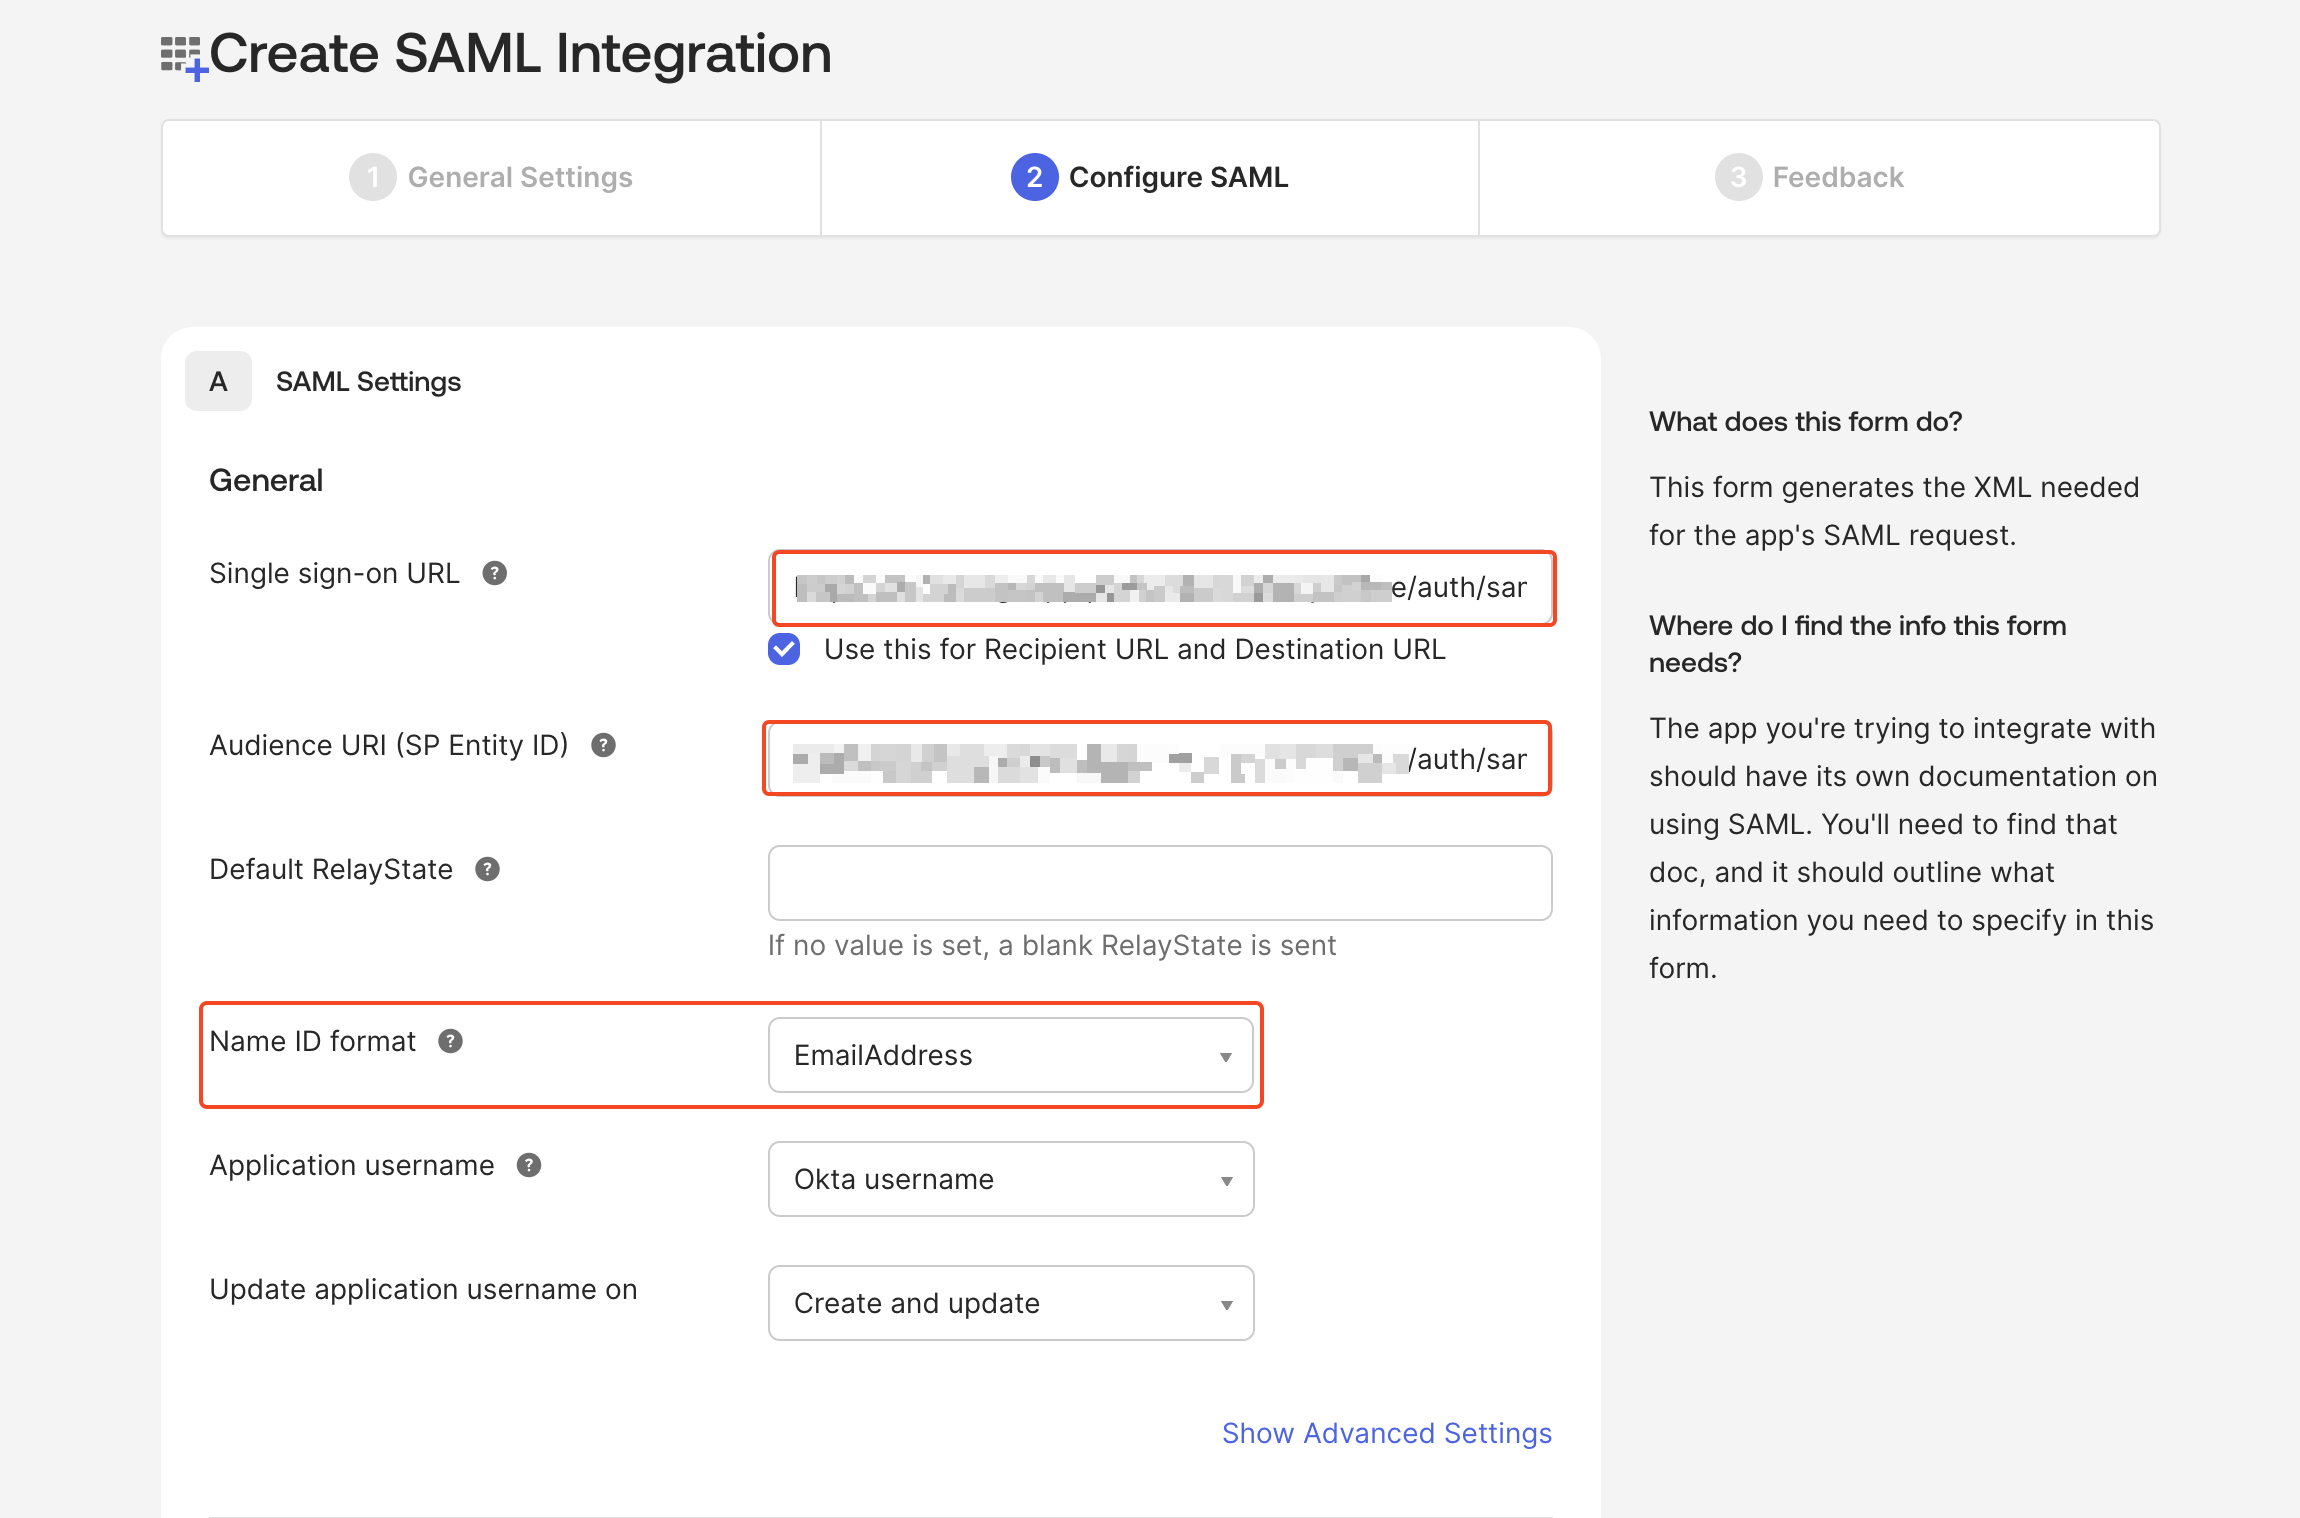
Configure SAML settings
- In Plerion, go to
Admin>Security>Single sign-onand copy the SSO URL. - In Okta, paste this URL into the Single sign-on URL and Audience URI (SP Entity ID) fields.
- Set
Name ID formattoEmailAddress. - For
Attribute statements, provide the required values and continue.
4
Finish Okta application setup
Review your settings, select your preferences, and click
Finish.5
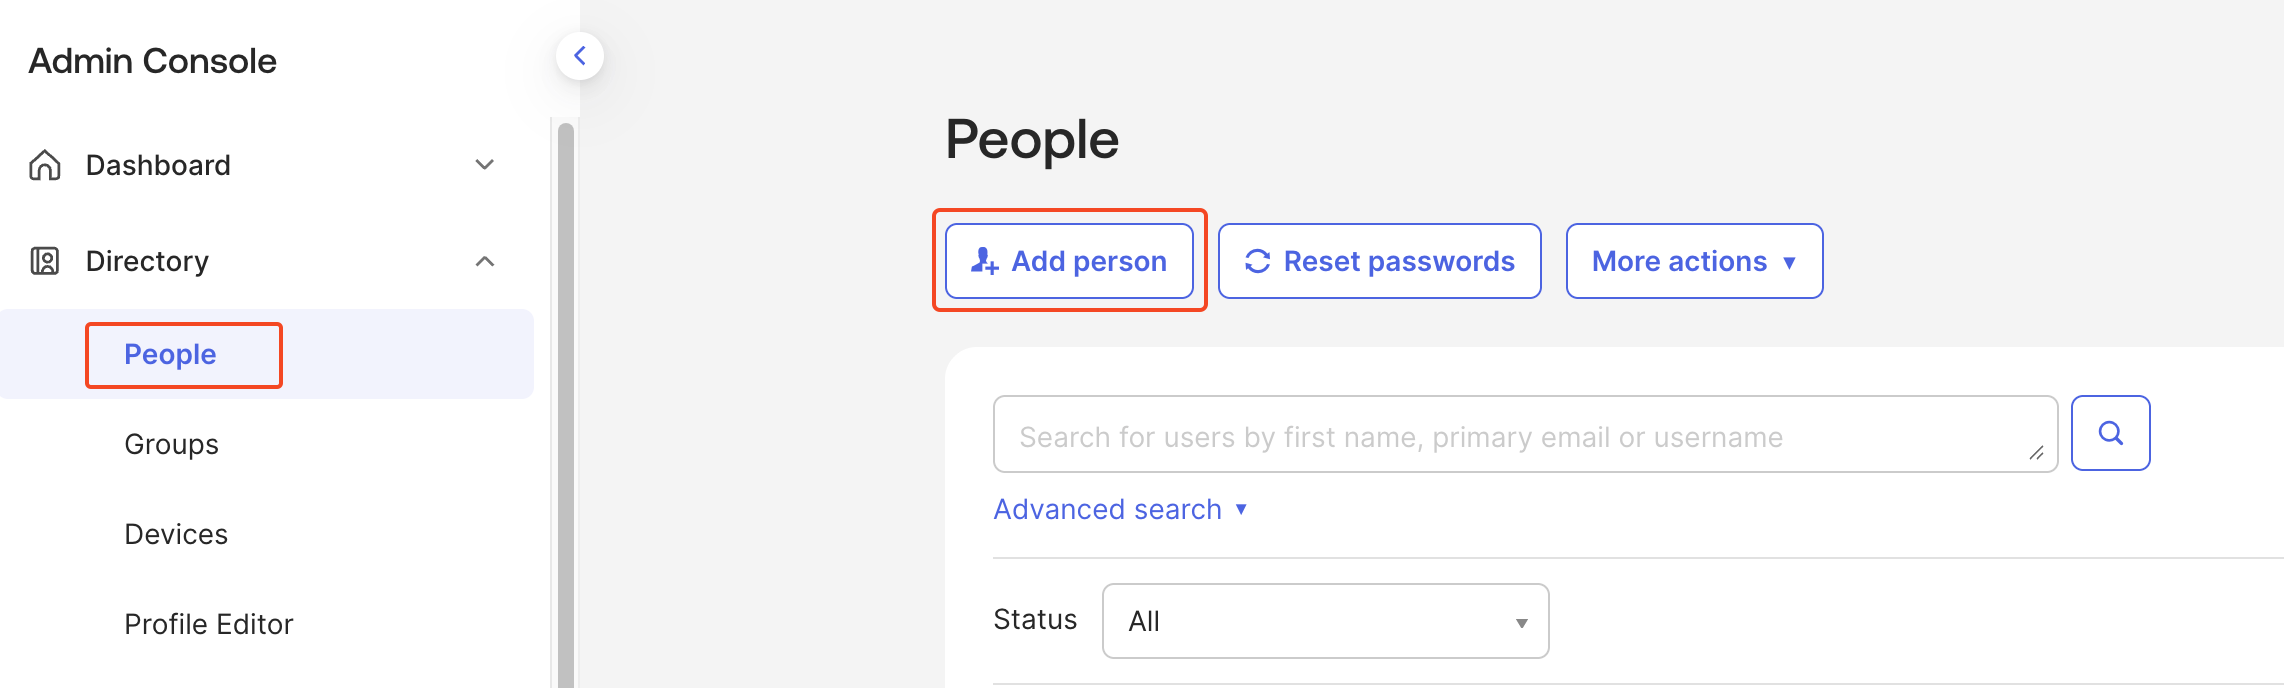
Add users to the Okta application
- In Okta, go to
Directory>Peopleand clickAdd person. - Enter the user details and click
Save. - Open your application, go to the
Assignmentstab, clickAssign>Assign to people, and assign the new user. - Click
Doneto confirm.
6
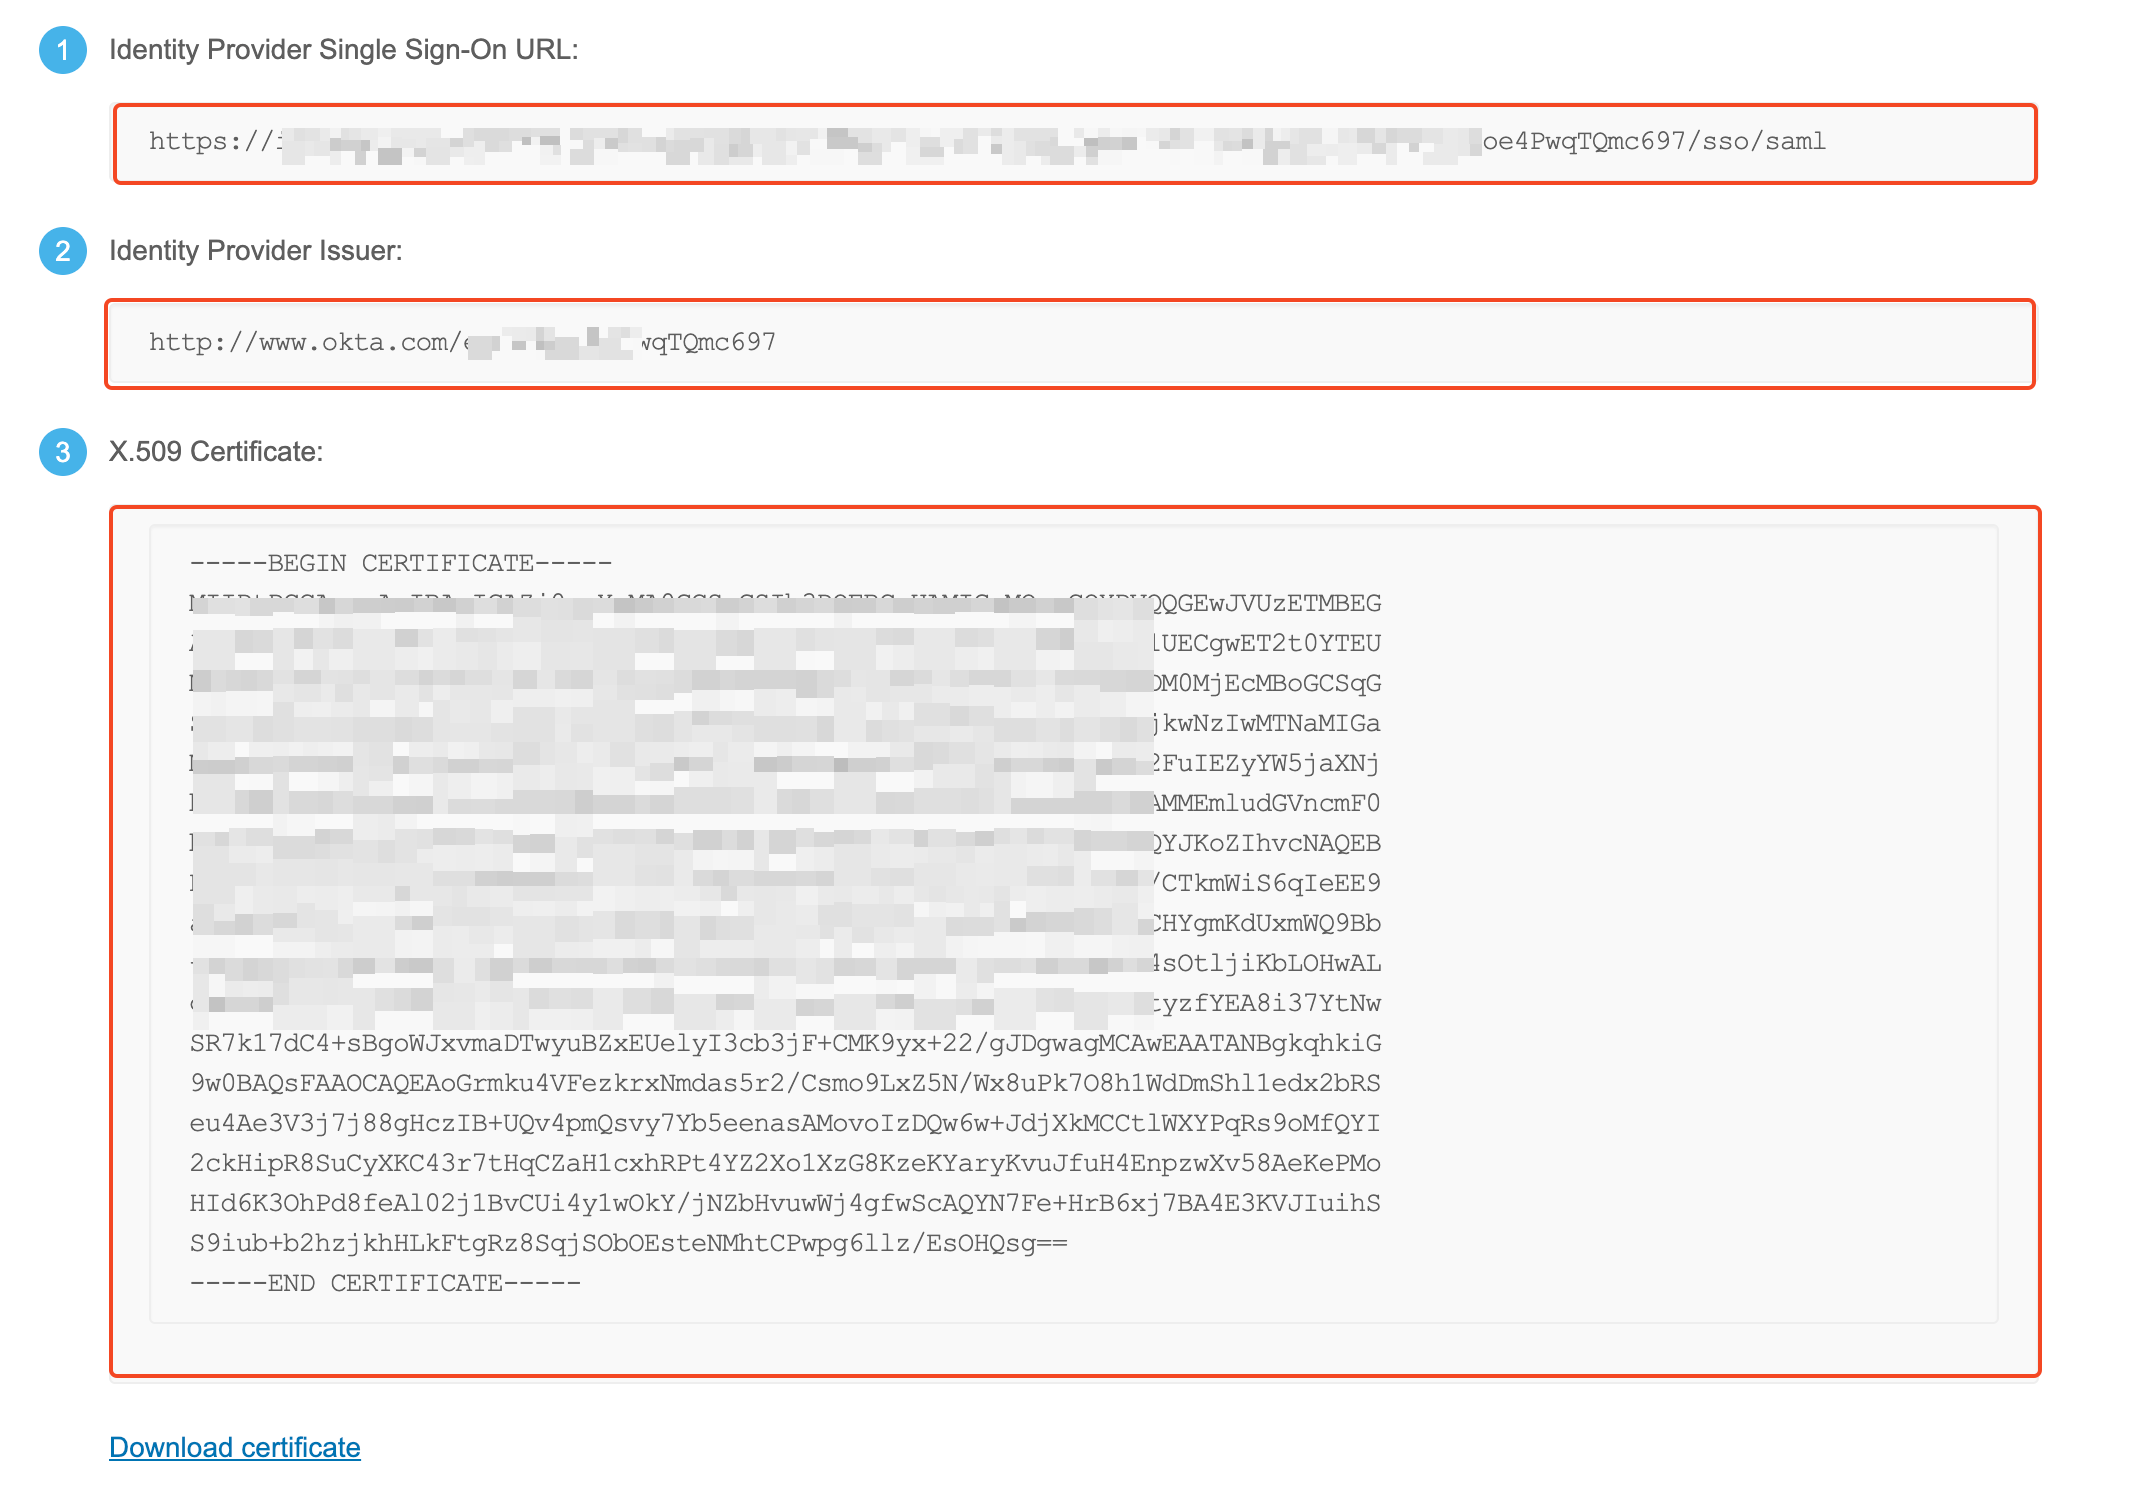
Copy identity provider details
- In your application, go to the
Sign-ontab and clickView SAML setup instructions. - Copy the Single sign-on URL, Identity provider issuer, and X.509 certificate.
7
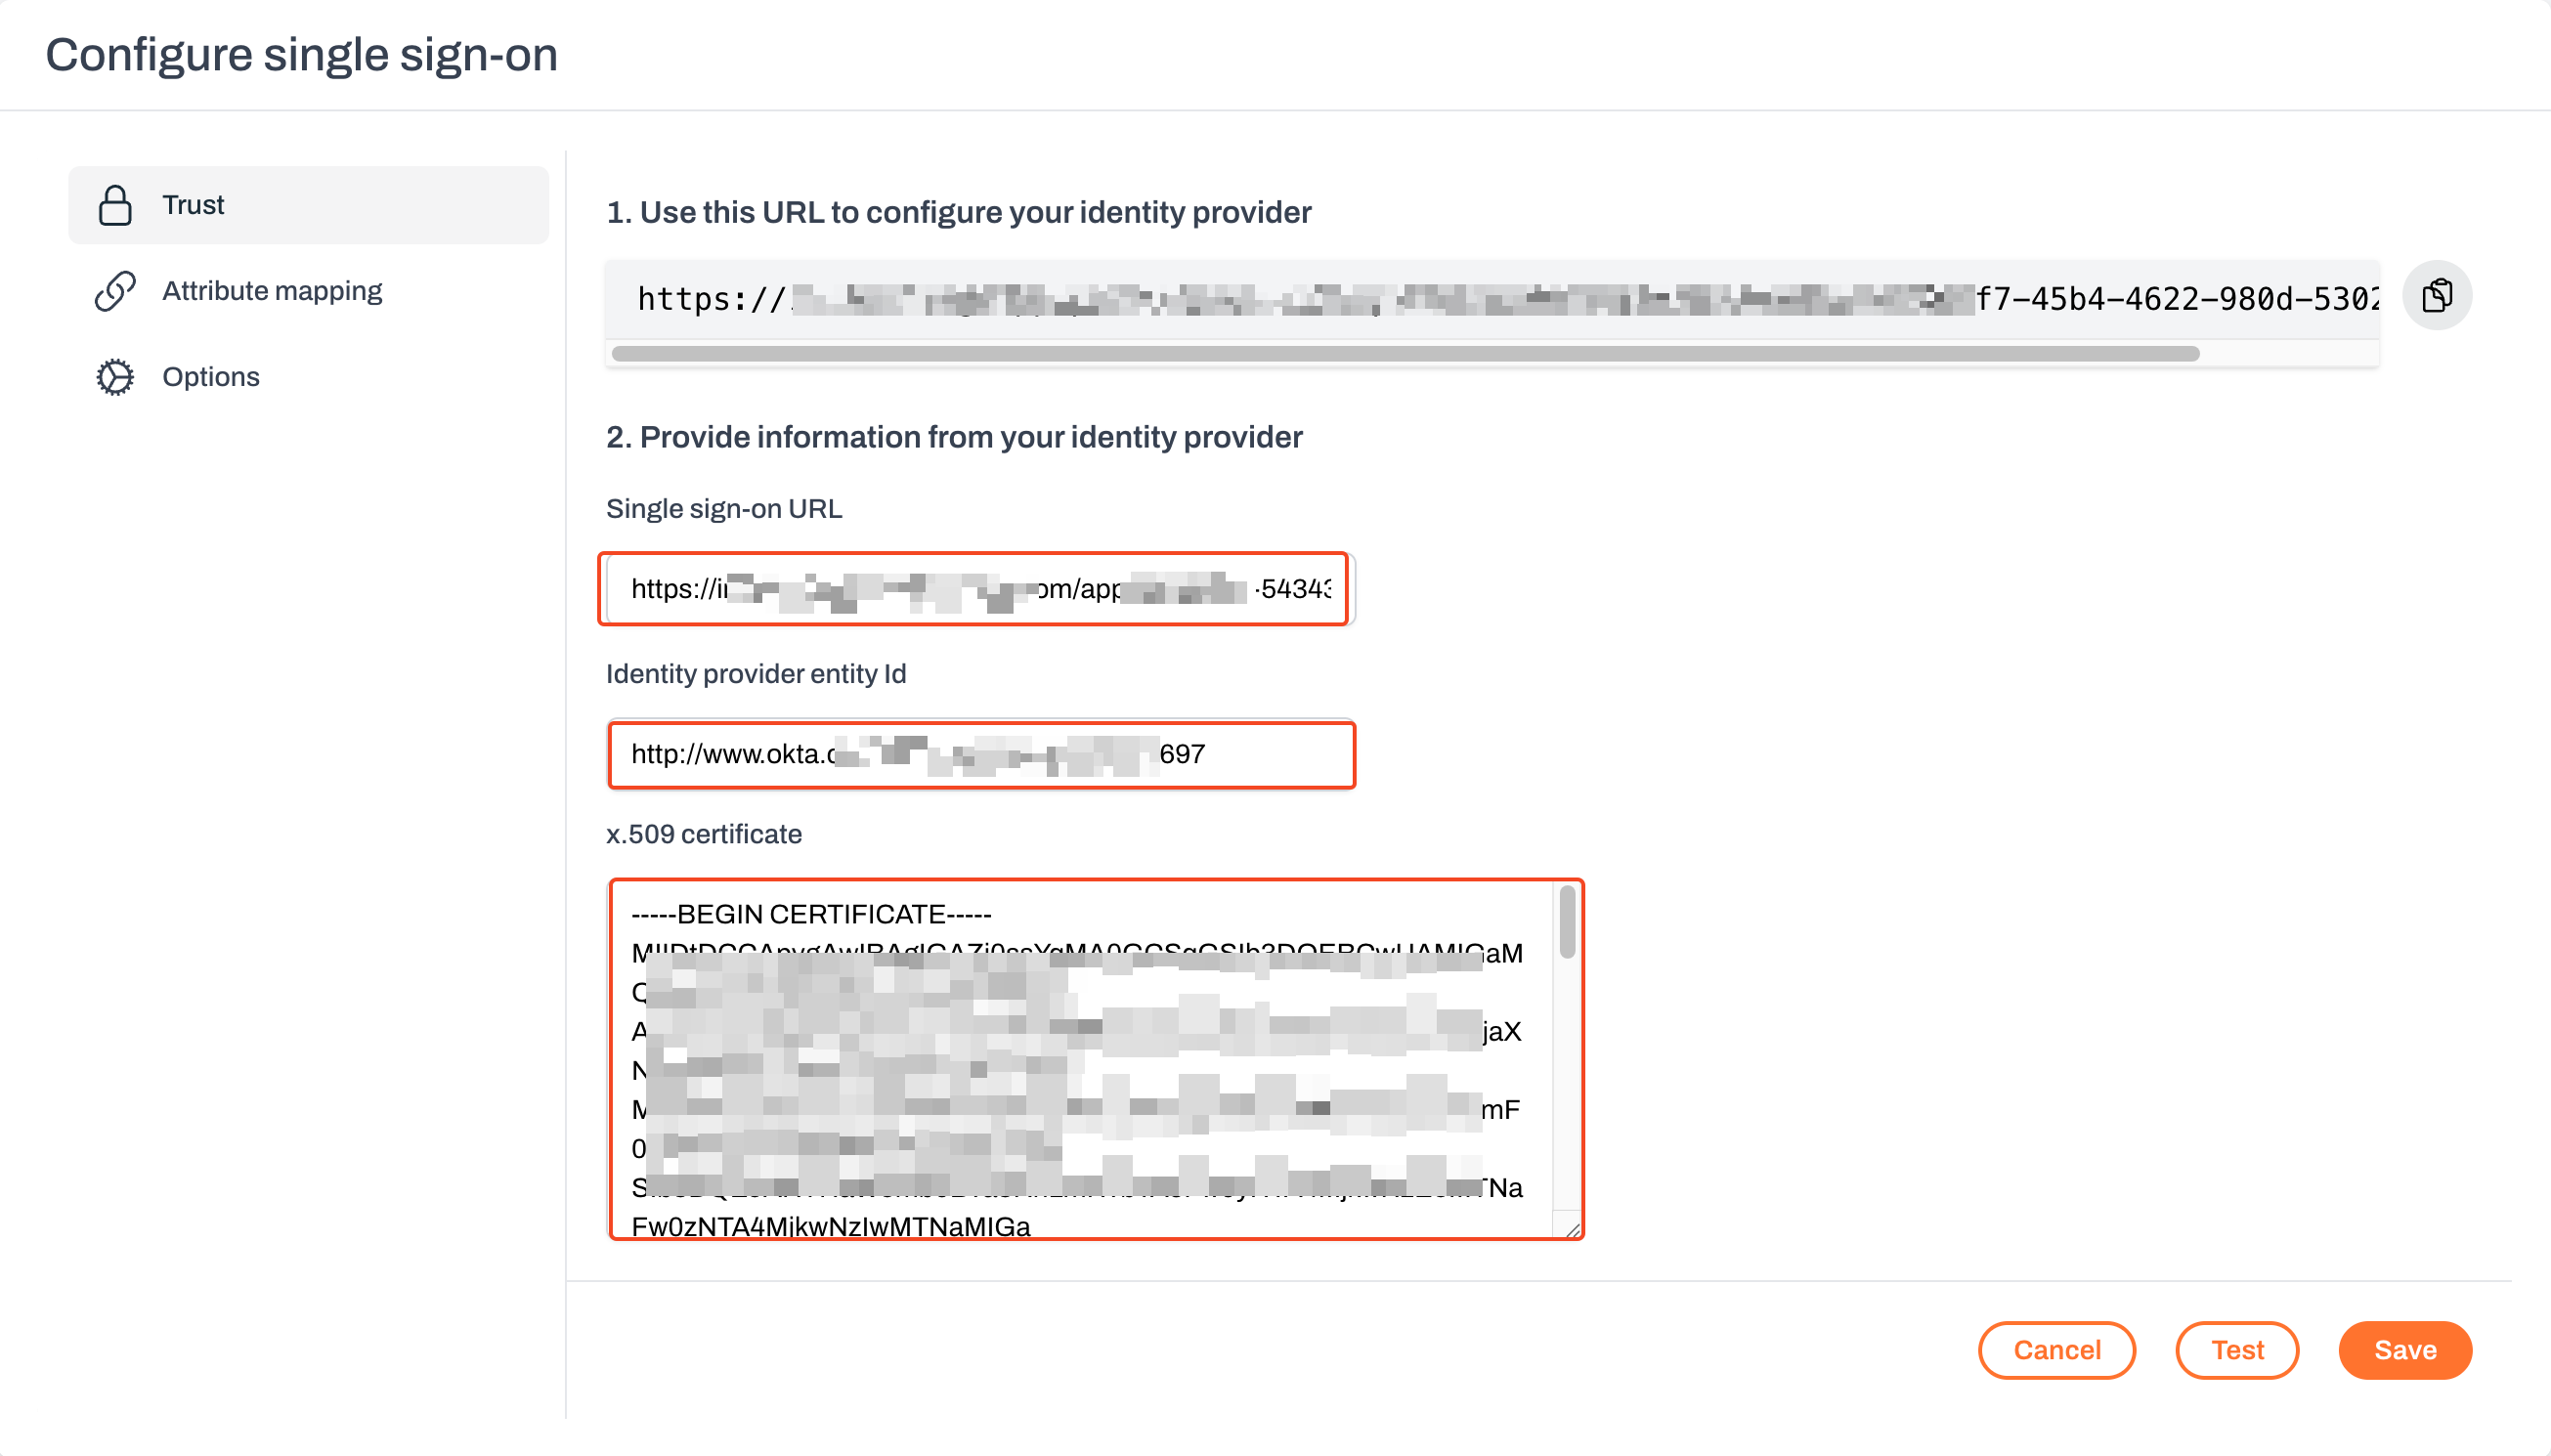
Configure trust in Plerion
- In Plerion, go to
Admin>Security>Single sign-on. - Paste the following values into the matching fields:
- Single sign-on URL
- Identity provider issuer
- X.509 certificate
- Save the configuration.
8
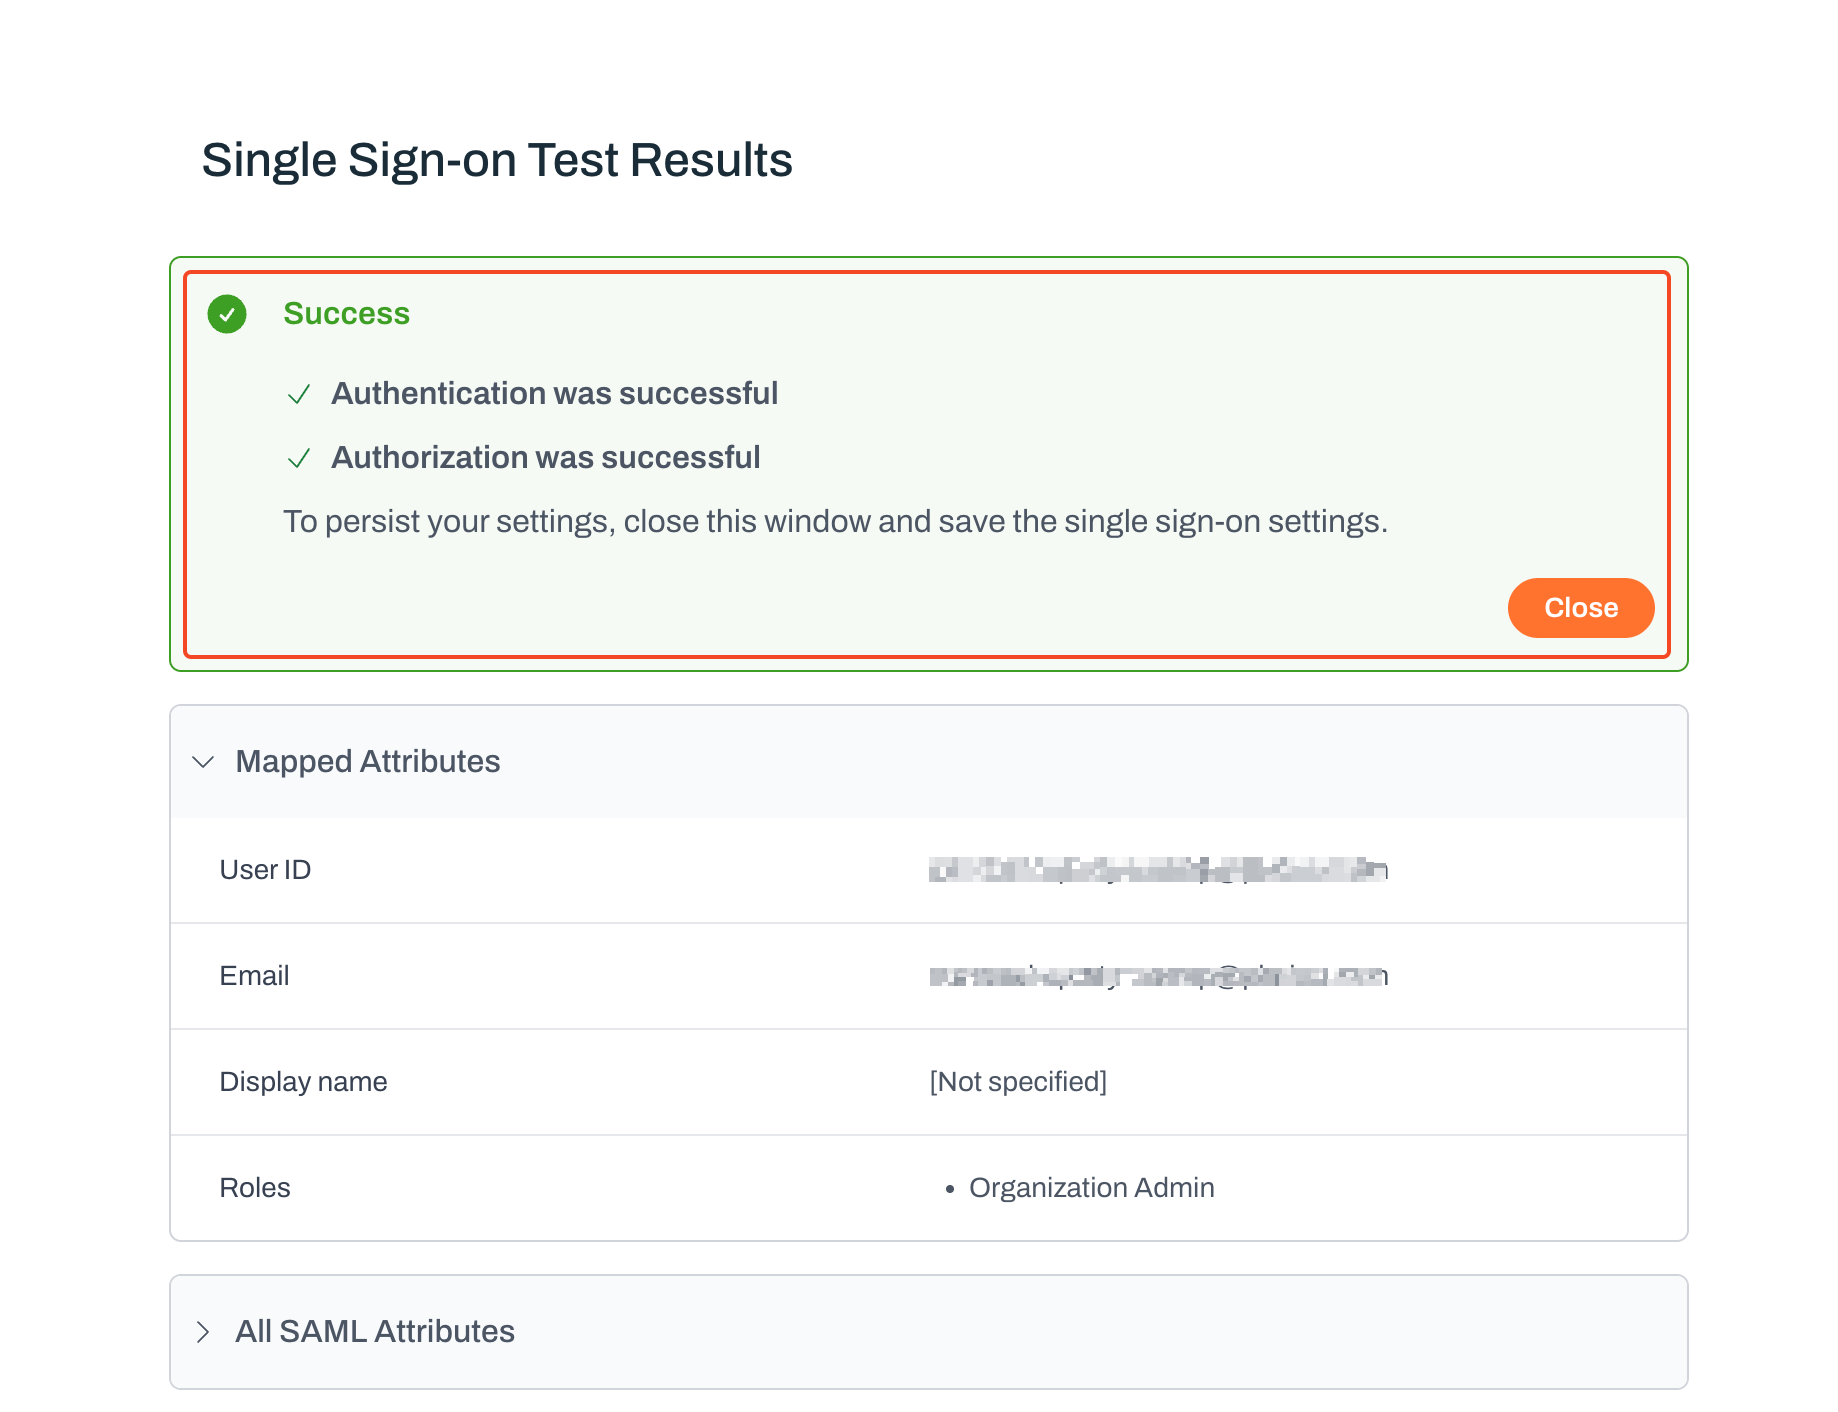
Test your Okta SSO connection
- Click
Testin Plerion. A new window will open where you can sign in with the user you added in Okta. - Verify that you can log in to Plerion using Okta SSO.
Attribute mapping and roles
1
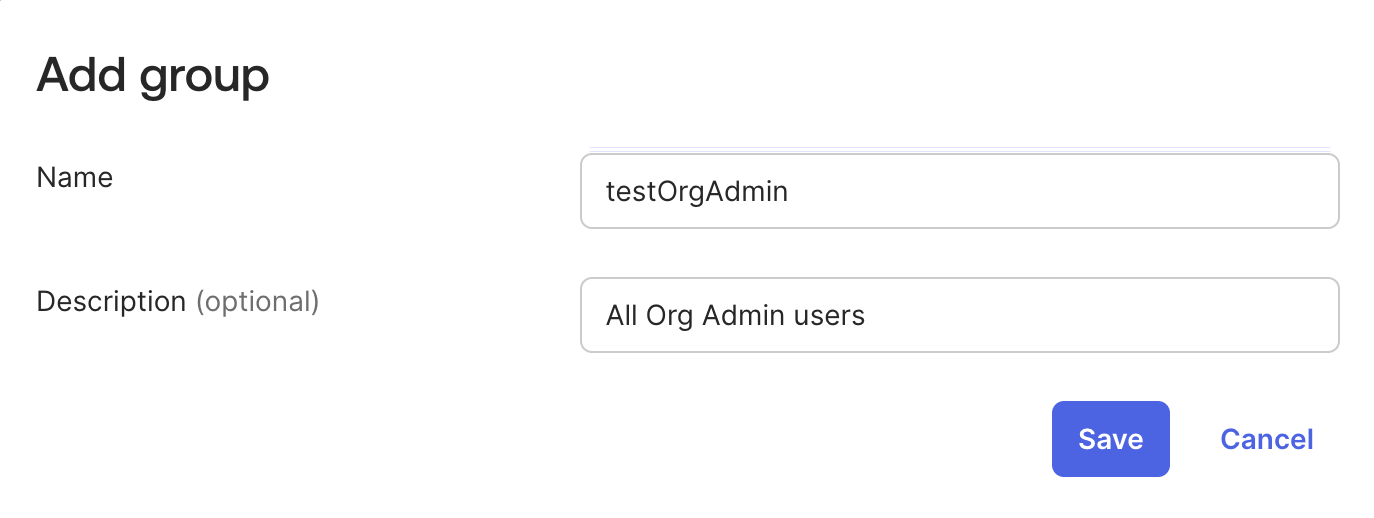
Create and assign Okta groups
- In Okta, go to
Directory>Groupsand clickAdd group. - Enter a name (for example, testOrgAdmin) and click
Save. - Open your application, go to the
Assignmentstab, clickAssign>Assign to groups, and assign your new group. - Add the previously created user to this group.
2
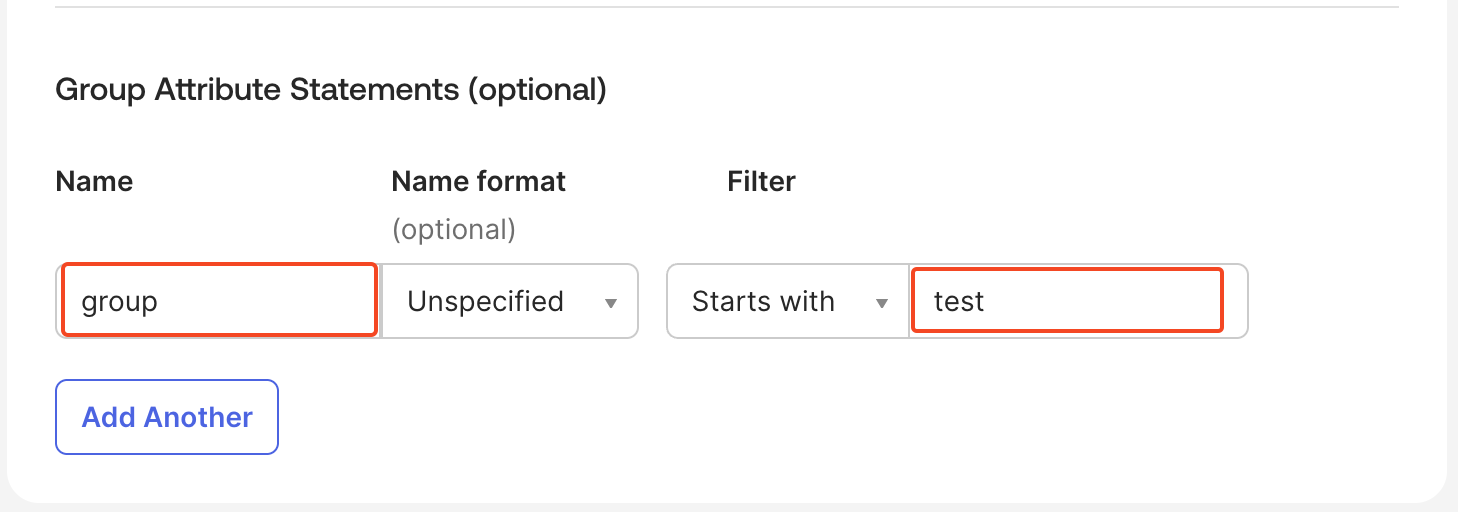
Configure group attribute statements in Okta
- In your application, go to the
Generaltab. - Under
SAML settings, clickEditand go toConfigure SAML. - Add a Group attribute statement.
Example: Set the attribute name to group and use your group name (testOrgAdmin) as the filter.
3
Map attributes in Plerion
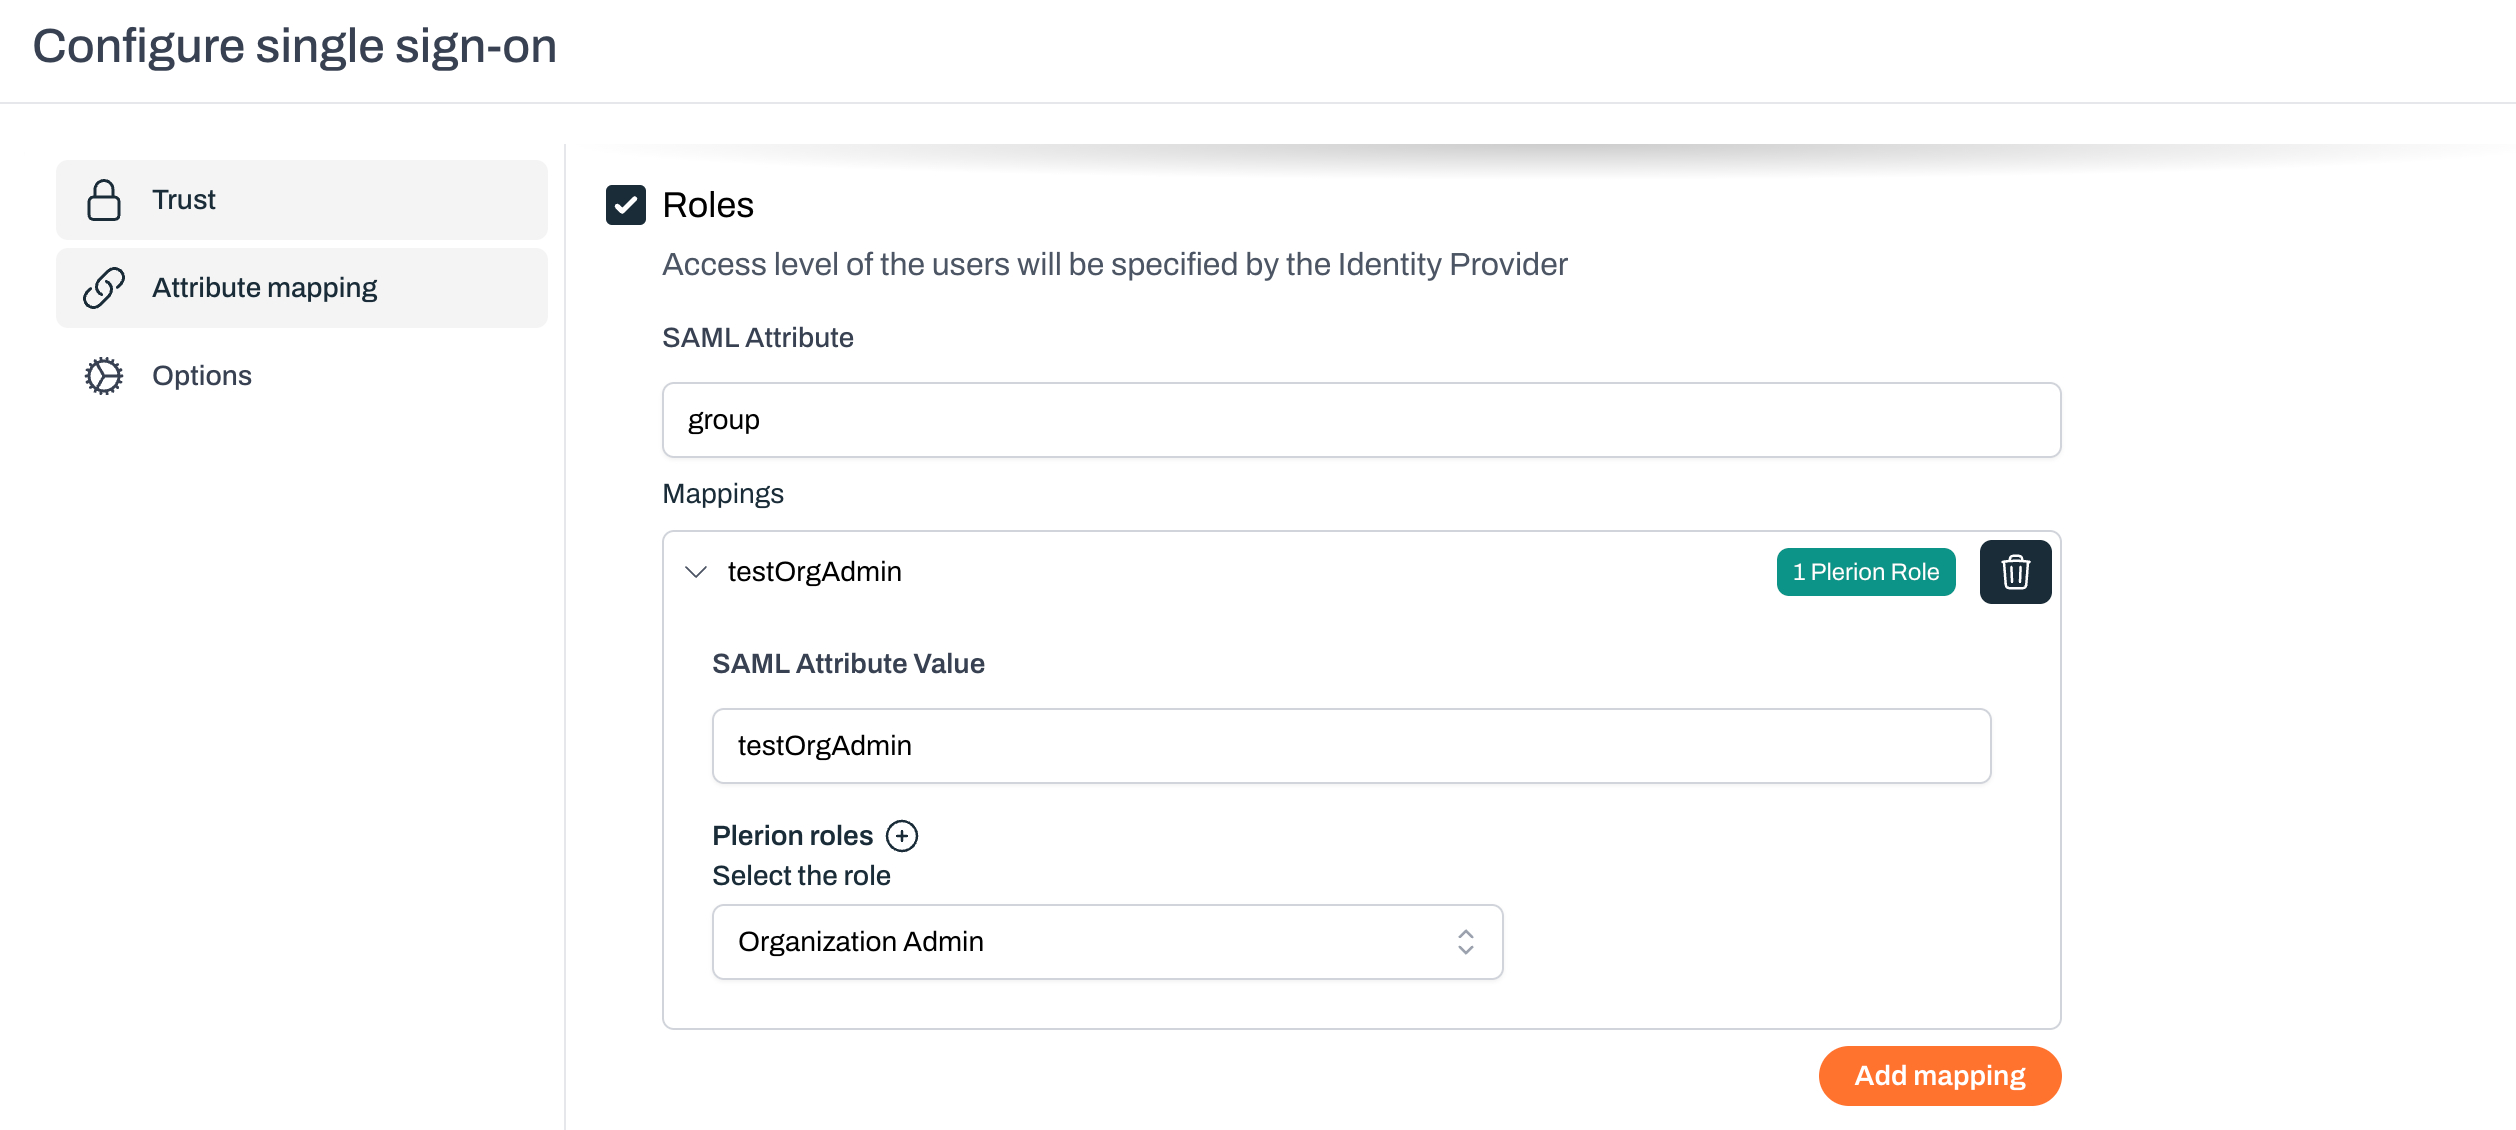
- In Plerion, go to
Admin>Security>Single sign-on>Attribute mapping.- For Email, select Use SAML Name ID.
- For Display name, leave unchecked to let users choose their own, or map the Okta user’s first and last name.
- For Roles, add a mapping with the SAML attribute name group.
- Map testOrgAdmin to the Organization Admin role.
- Save the configuration.
4
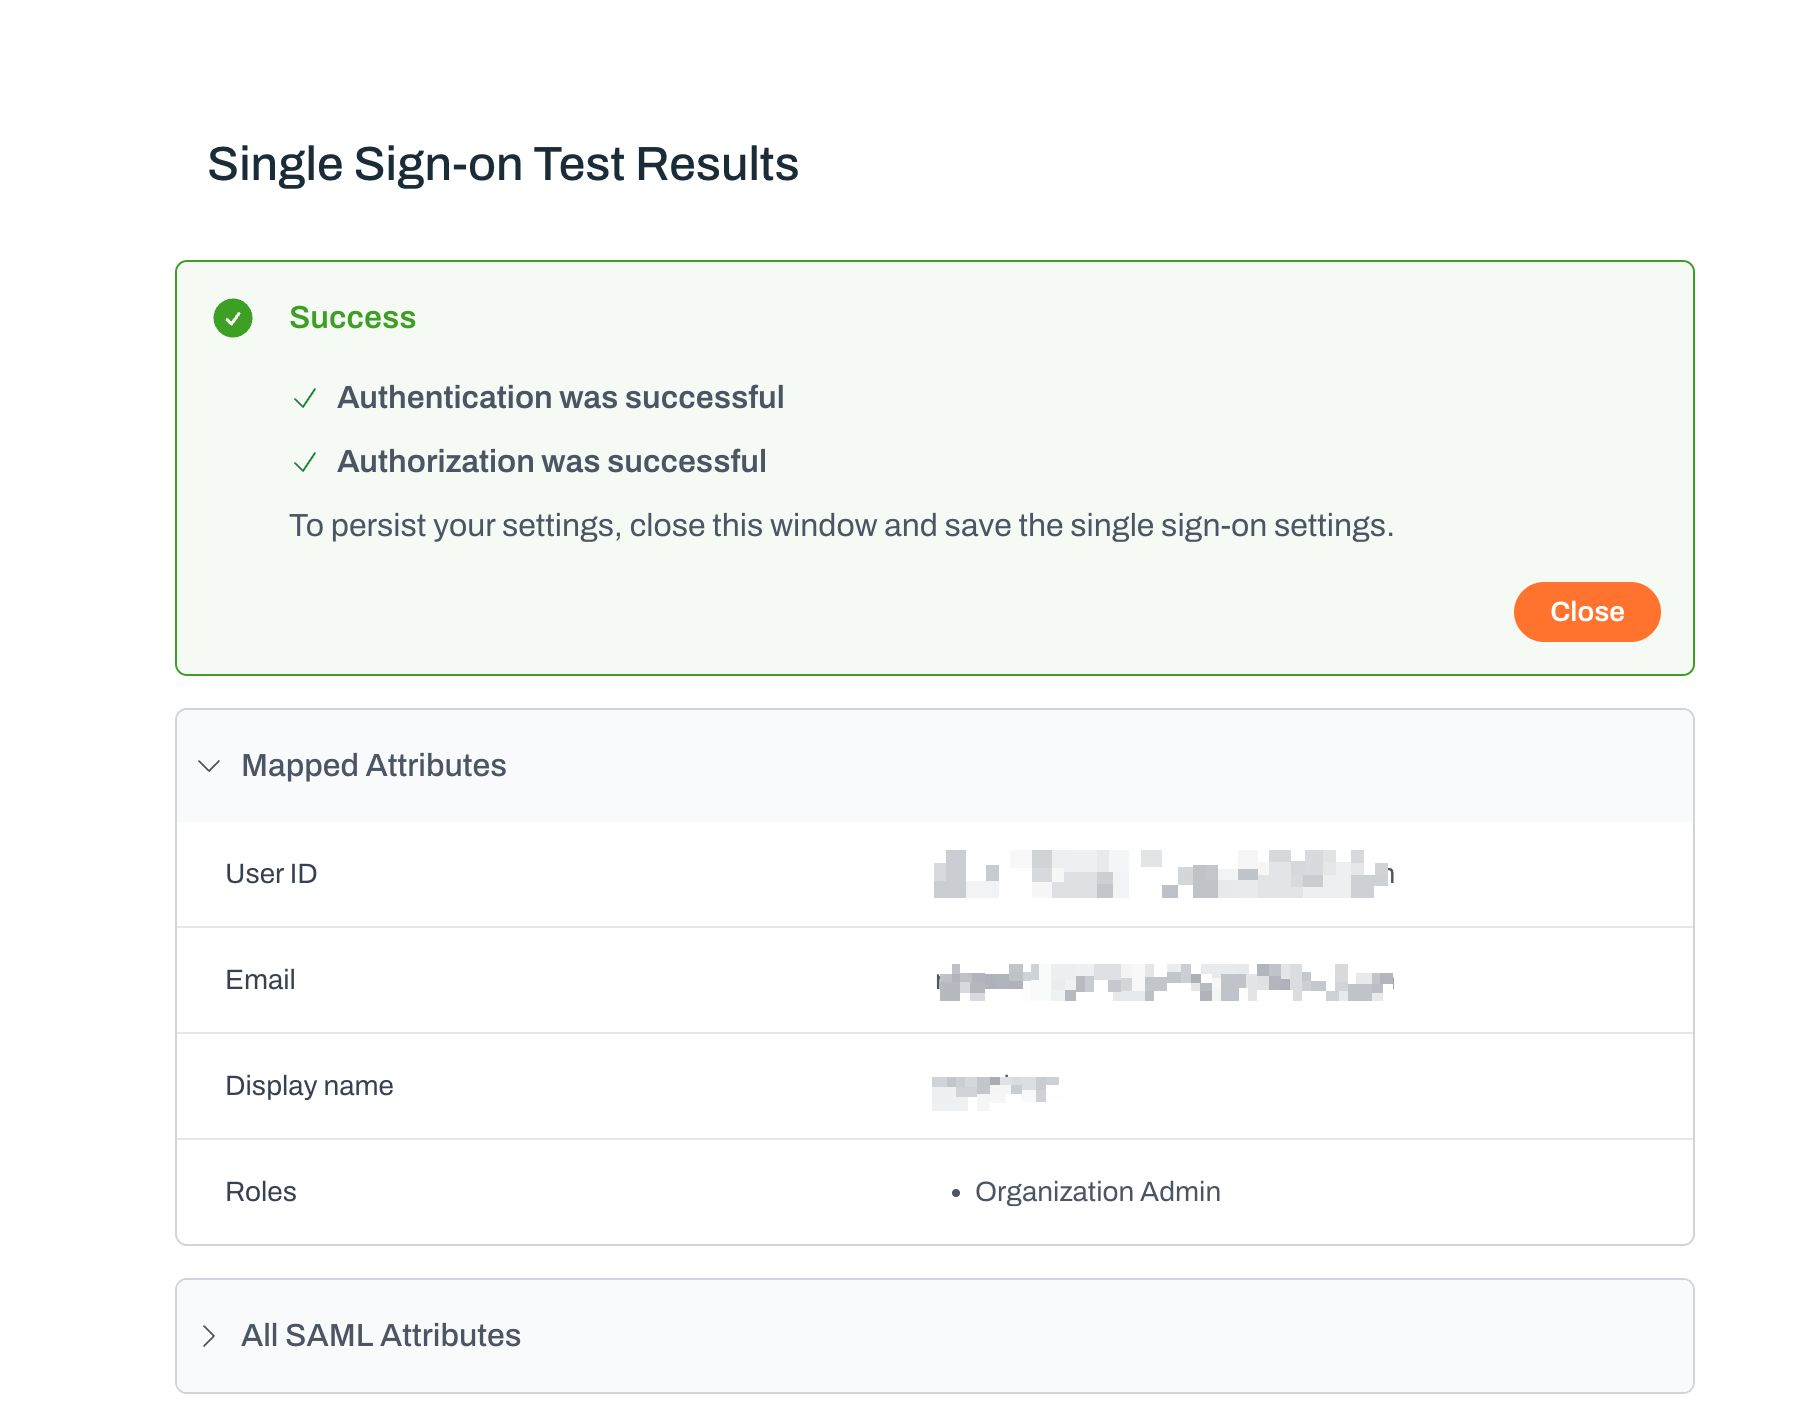
Test the attribute mapping
- Click
Testin Plerion. - Verify that the attribute mapping works as expected.
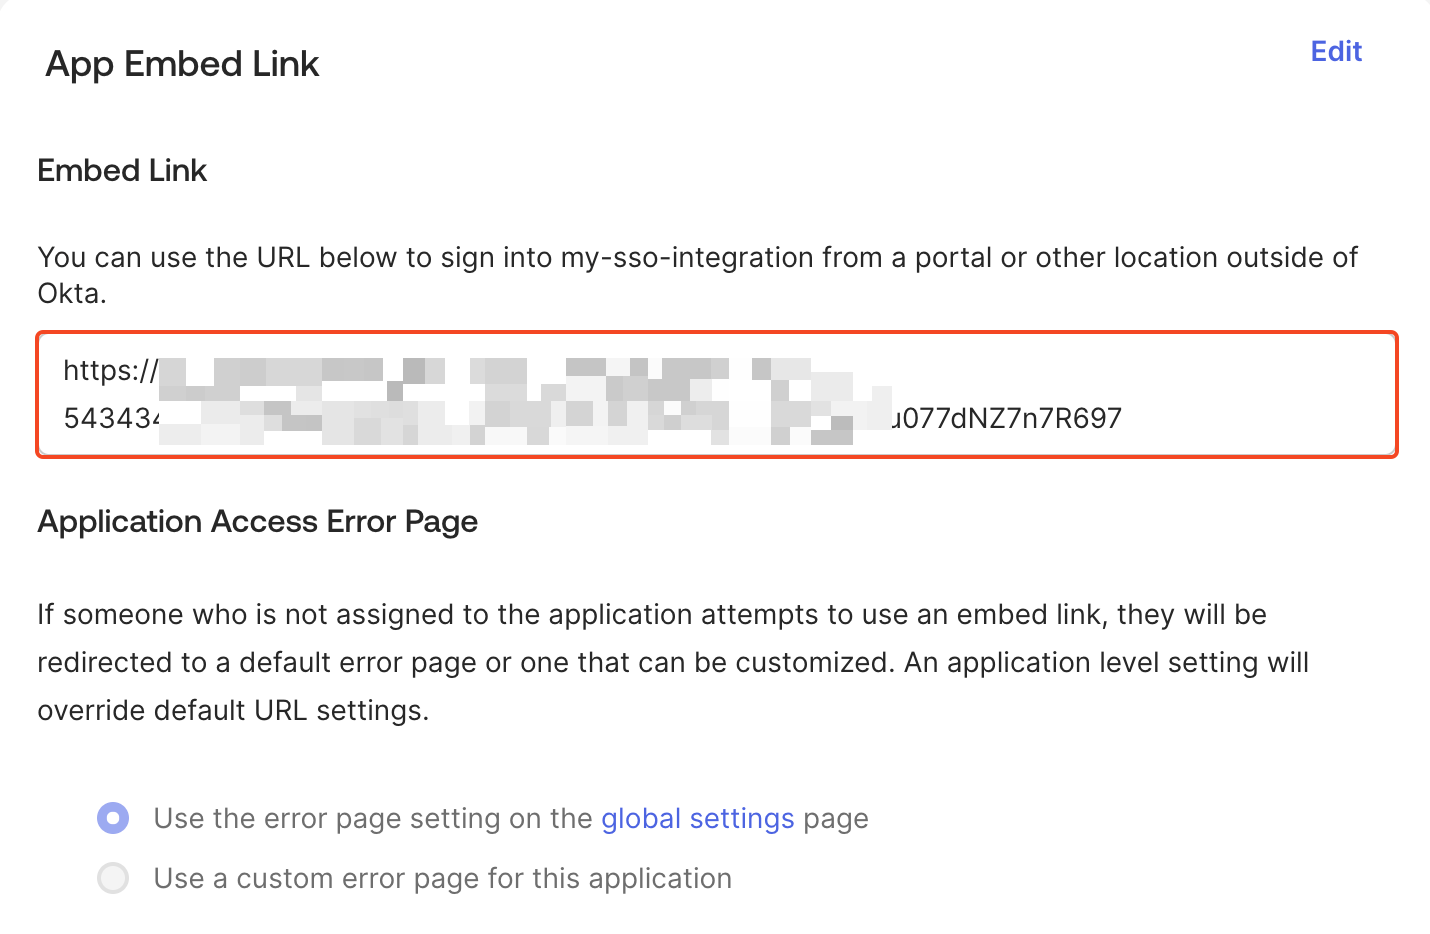
Accessing Plerion through Okta
You can access Plerion using the App Embed link from your Okta application (General tab > App embed link).Log in with your Okta user credentials, and you will be signed in with the mapped Plerion role.