Steps to configure Azure SSO
1
Log in to Microsoft Entra ID
Sign in to your Azure account with the required roles and permissions.
2
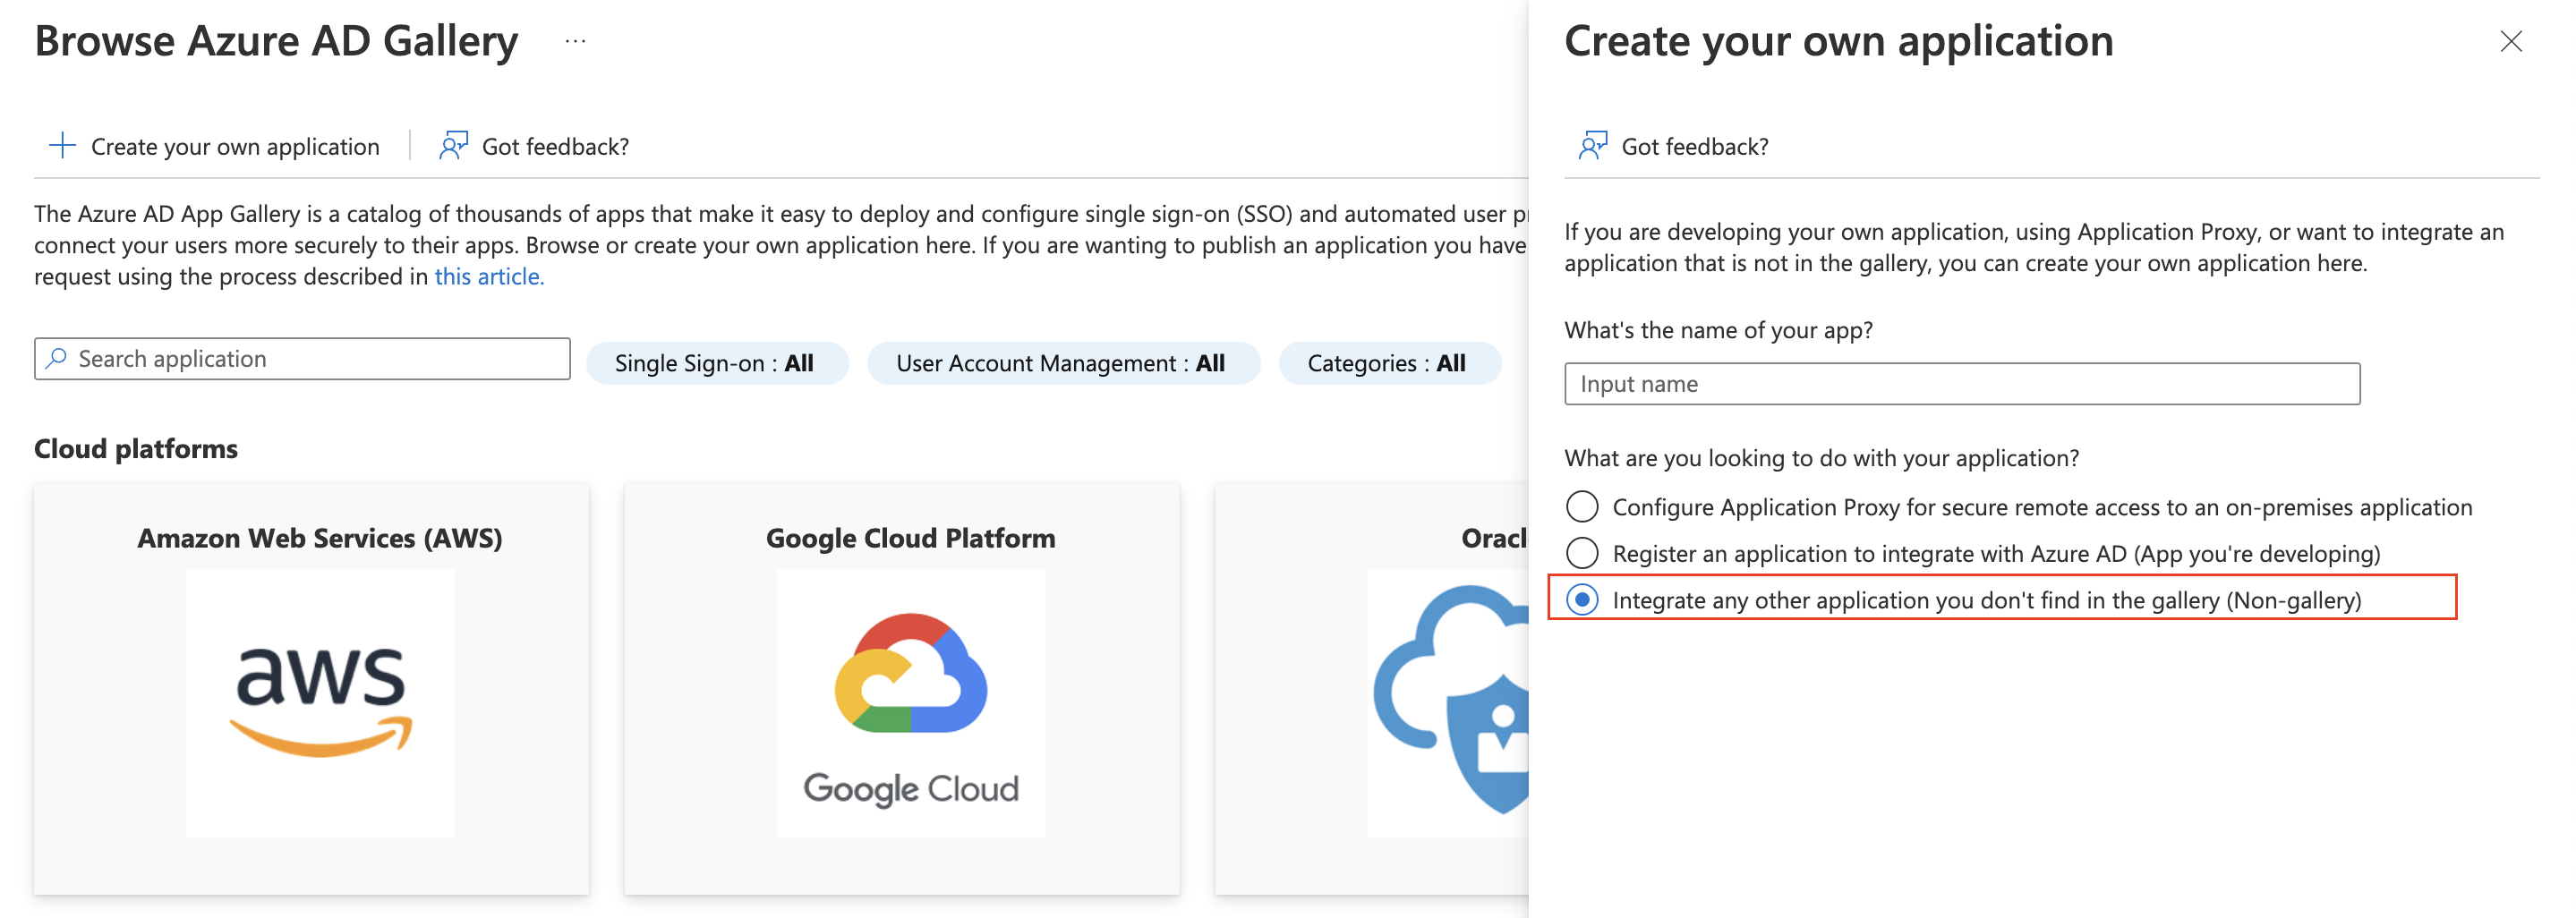
Create a new enterprise application
- Go to
Enterprise applicationsand clickNew application. - Select
Create your own application, enter a name, and chooseNon-gallery.
3
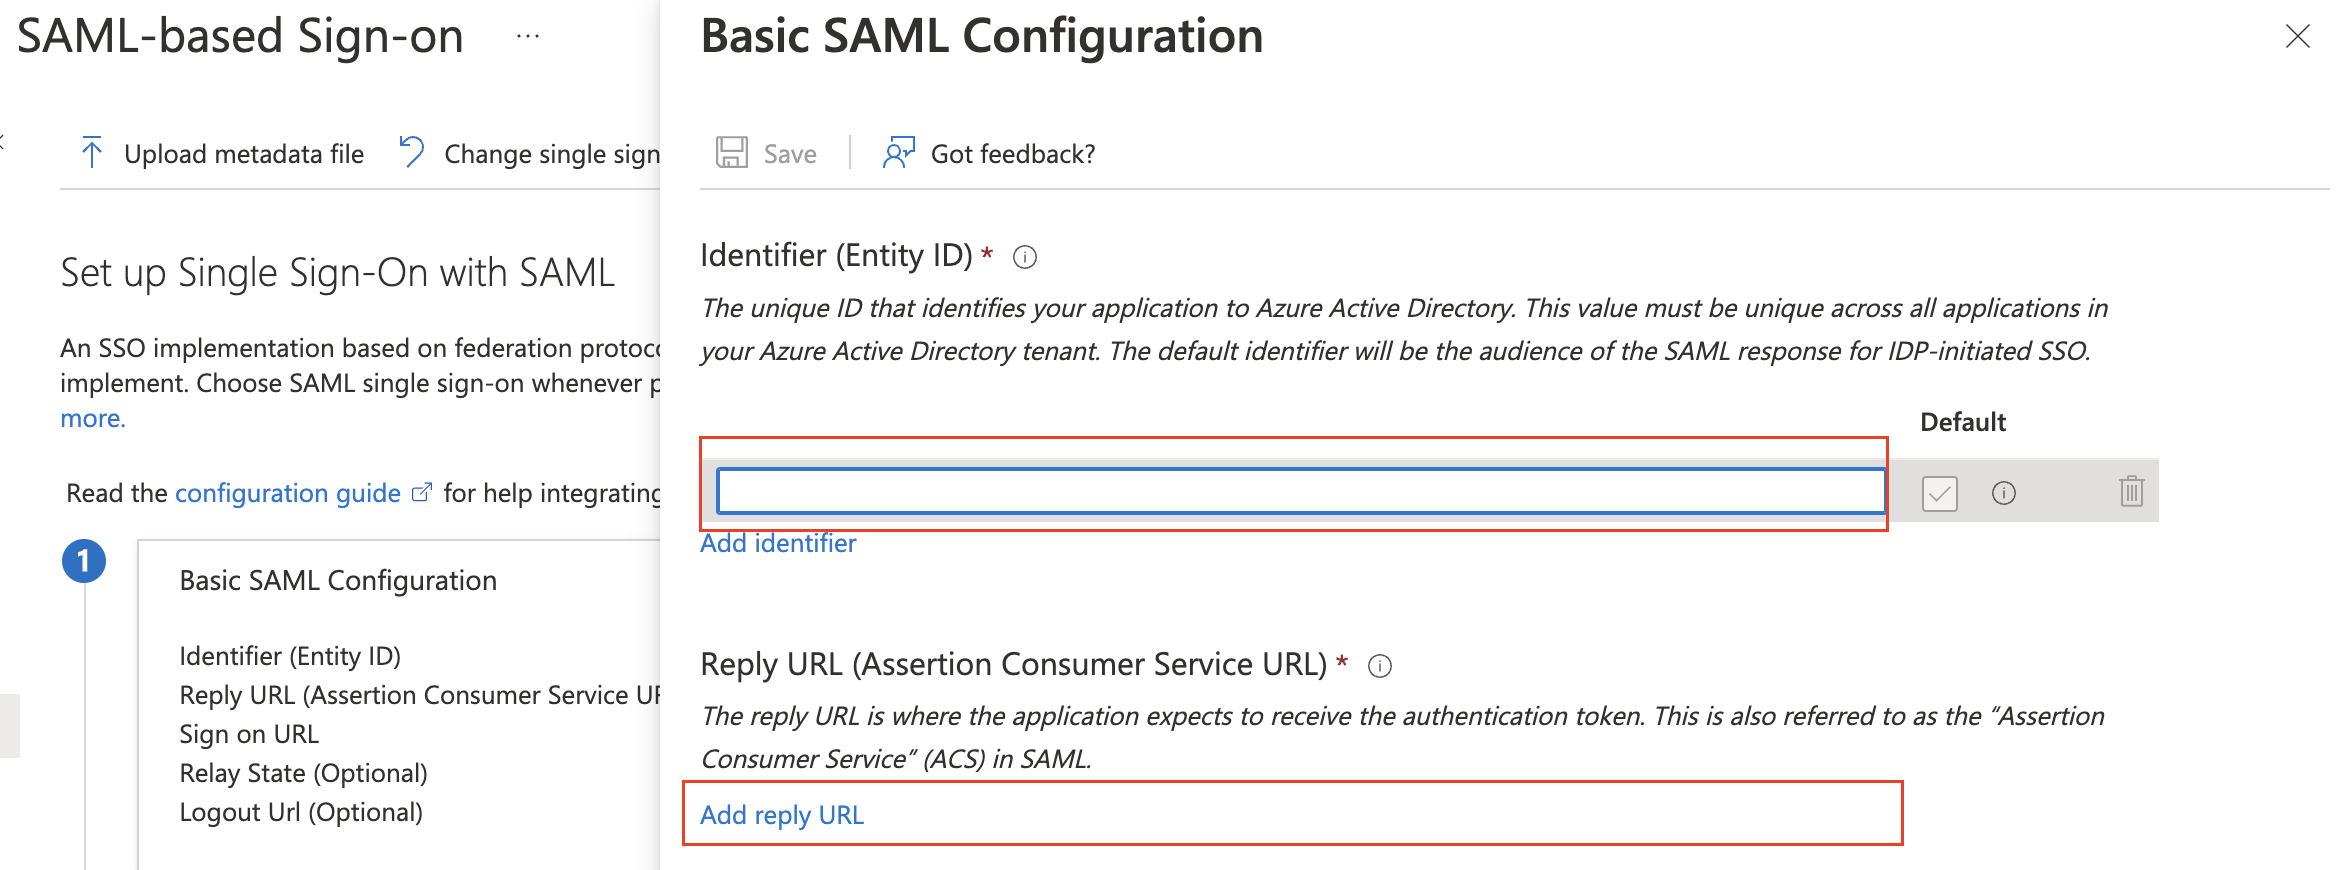
Set up single sign-on
- In the application, go to
Single sign-onand selectSAML. - In Plerion, go to
Admin>Single sign-onand copy the SSO URL. - In Azure, under
Basic SAML Configuration, paste the URL as both Entity ID and Reply URL (Assertion Consumer Service URL). - Save the configuration.
4
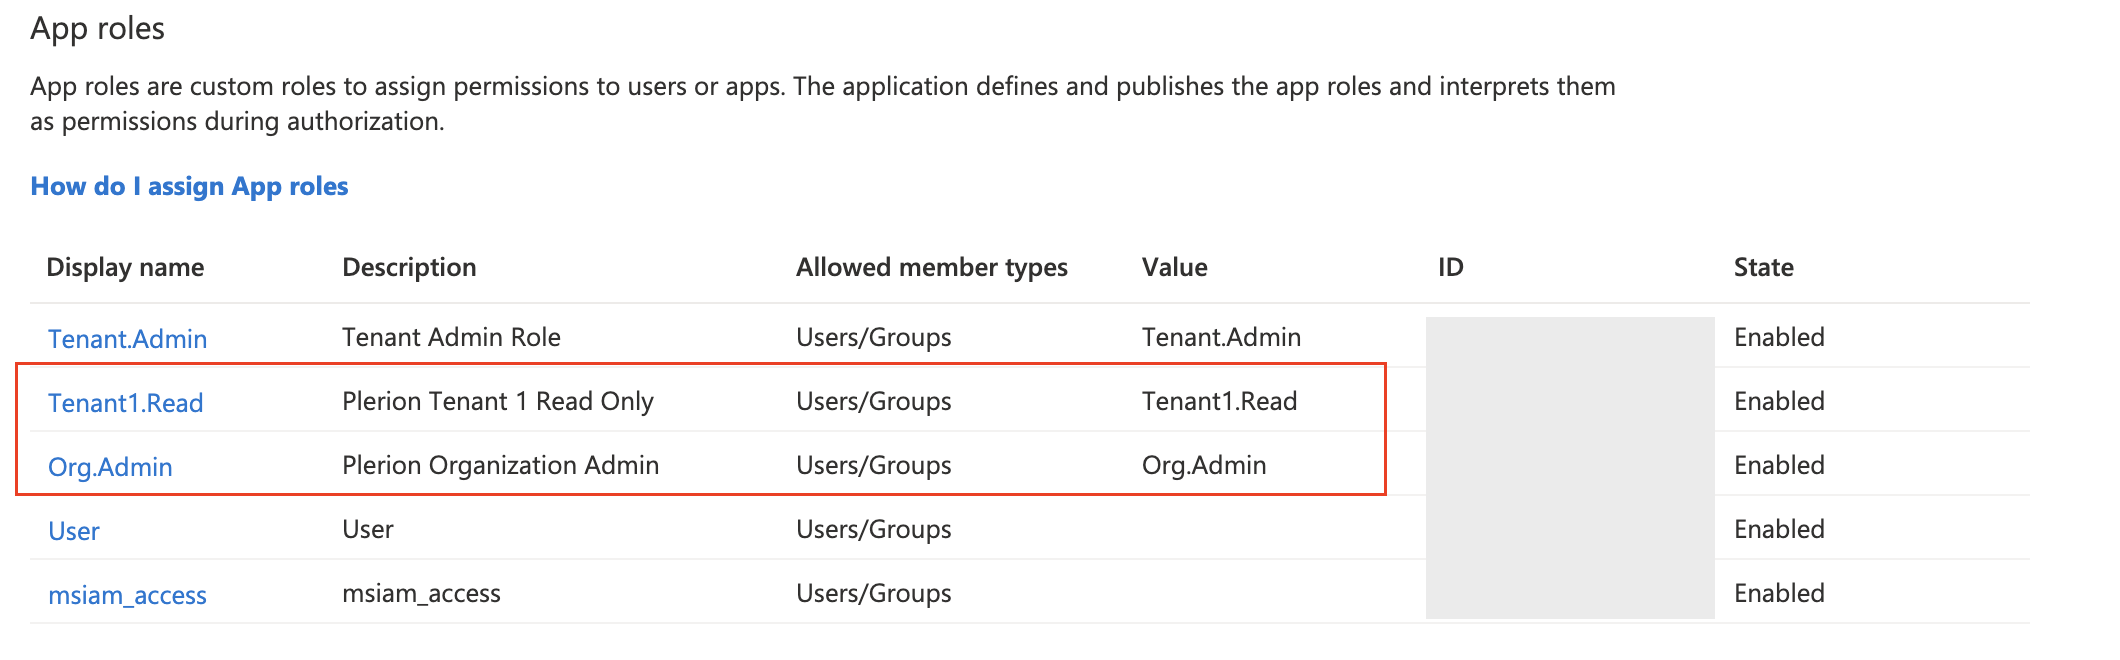
Register app roles
- Go to
App registrations, find the application, and open it. - Under
App roles, create two new roles:- Org.Admin
- Tenant1.Read
5
Assign users and groups
- Go back to
Enterprise applications, open the application, and go toUsers and groups. - Click
+ Add user/groupand add two test users. Assign Tenant1.Read to one and Org.Admin to the other.

6
Download SAML certificate and identifiers
In the application’s 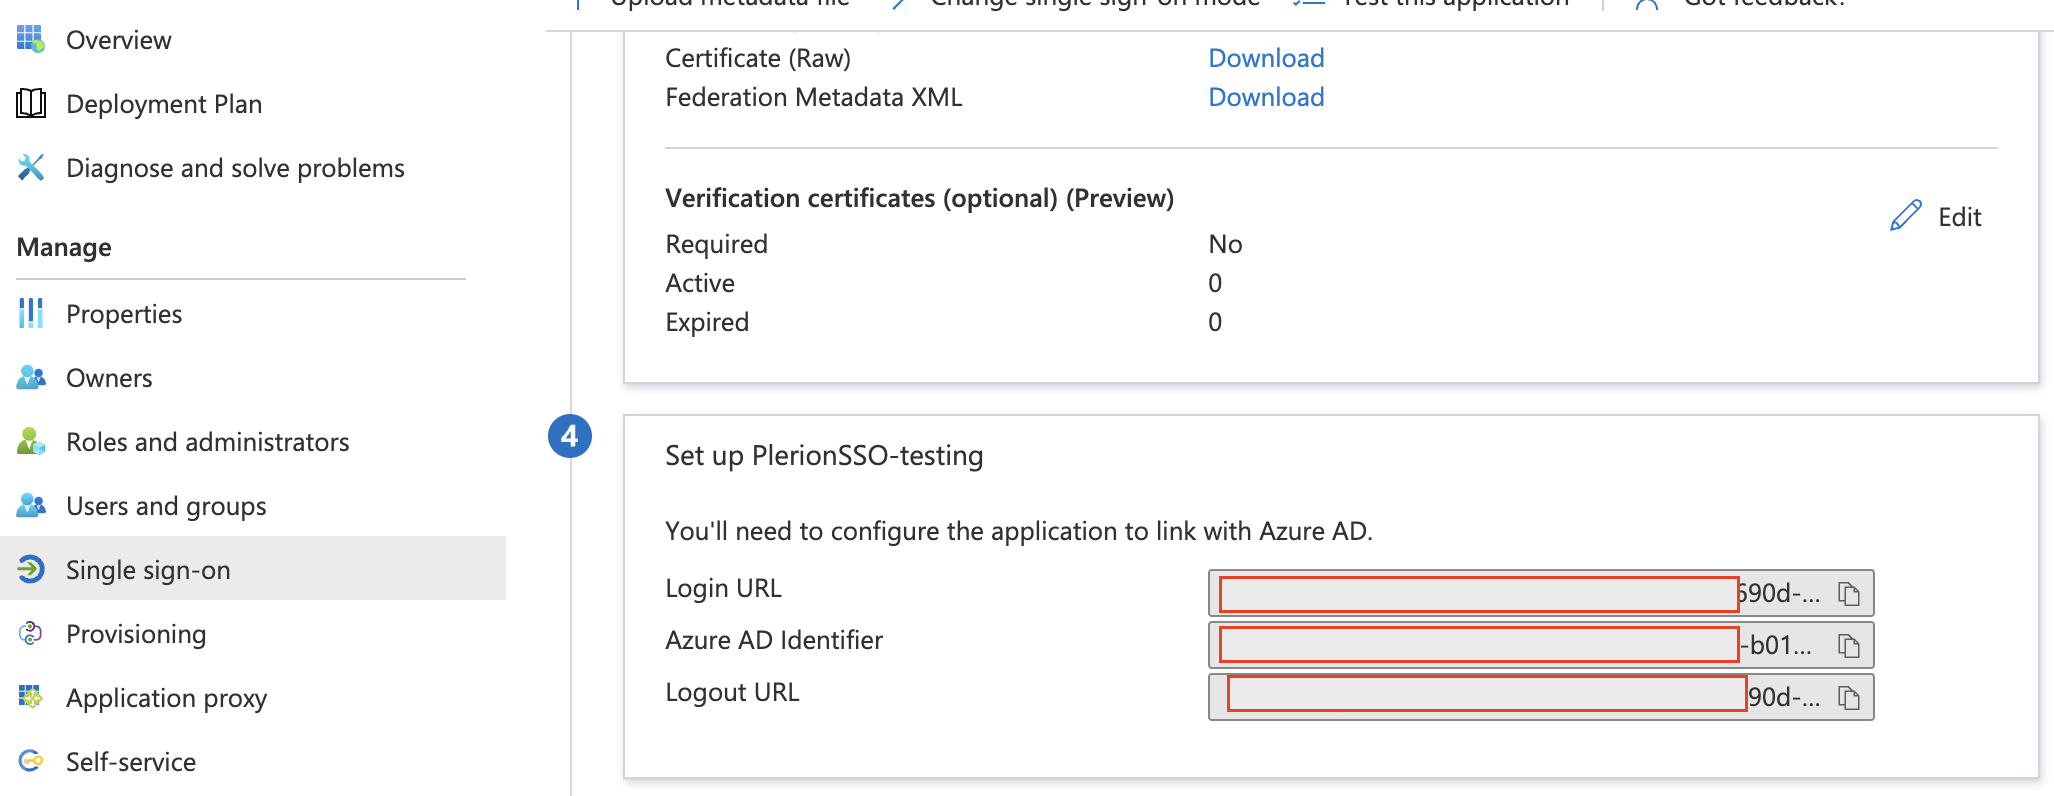
Single sign-on page, download the Certificate (Base64) and copy the values for Login URL and Microsoft Entra Identifier.7
Configure trust in Plerion
In Plerion, go to 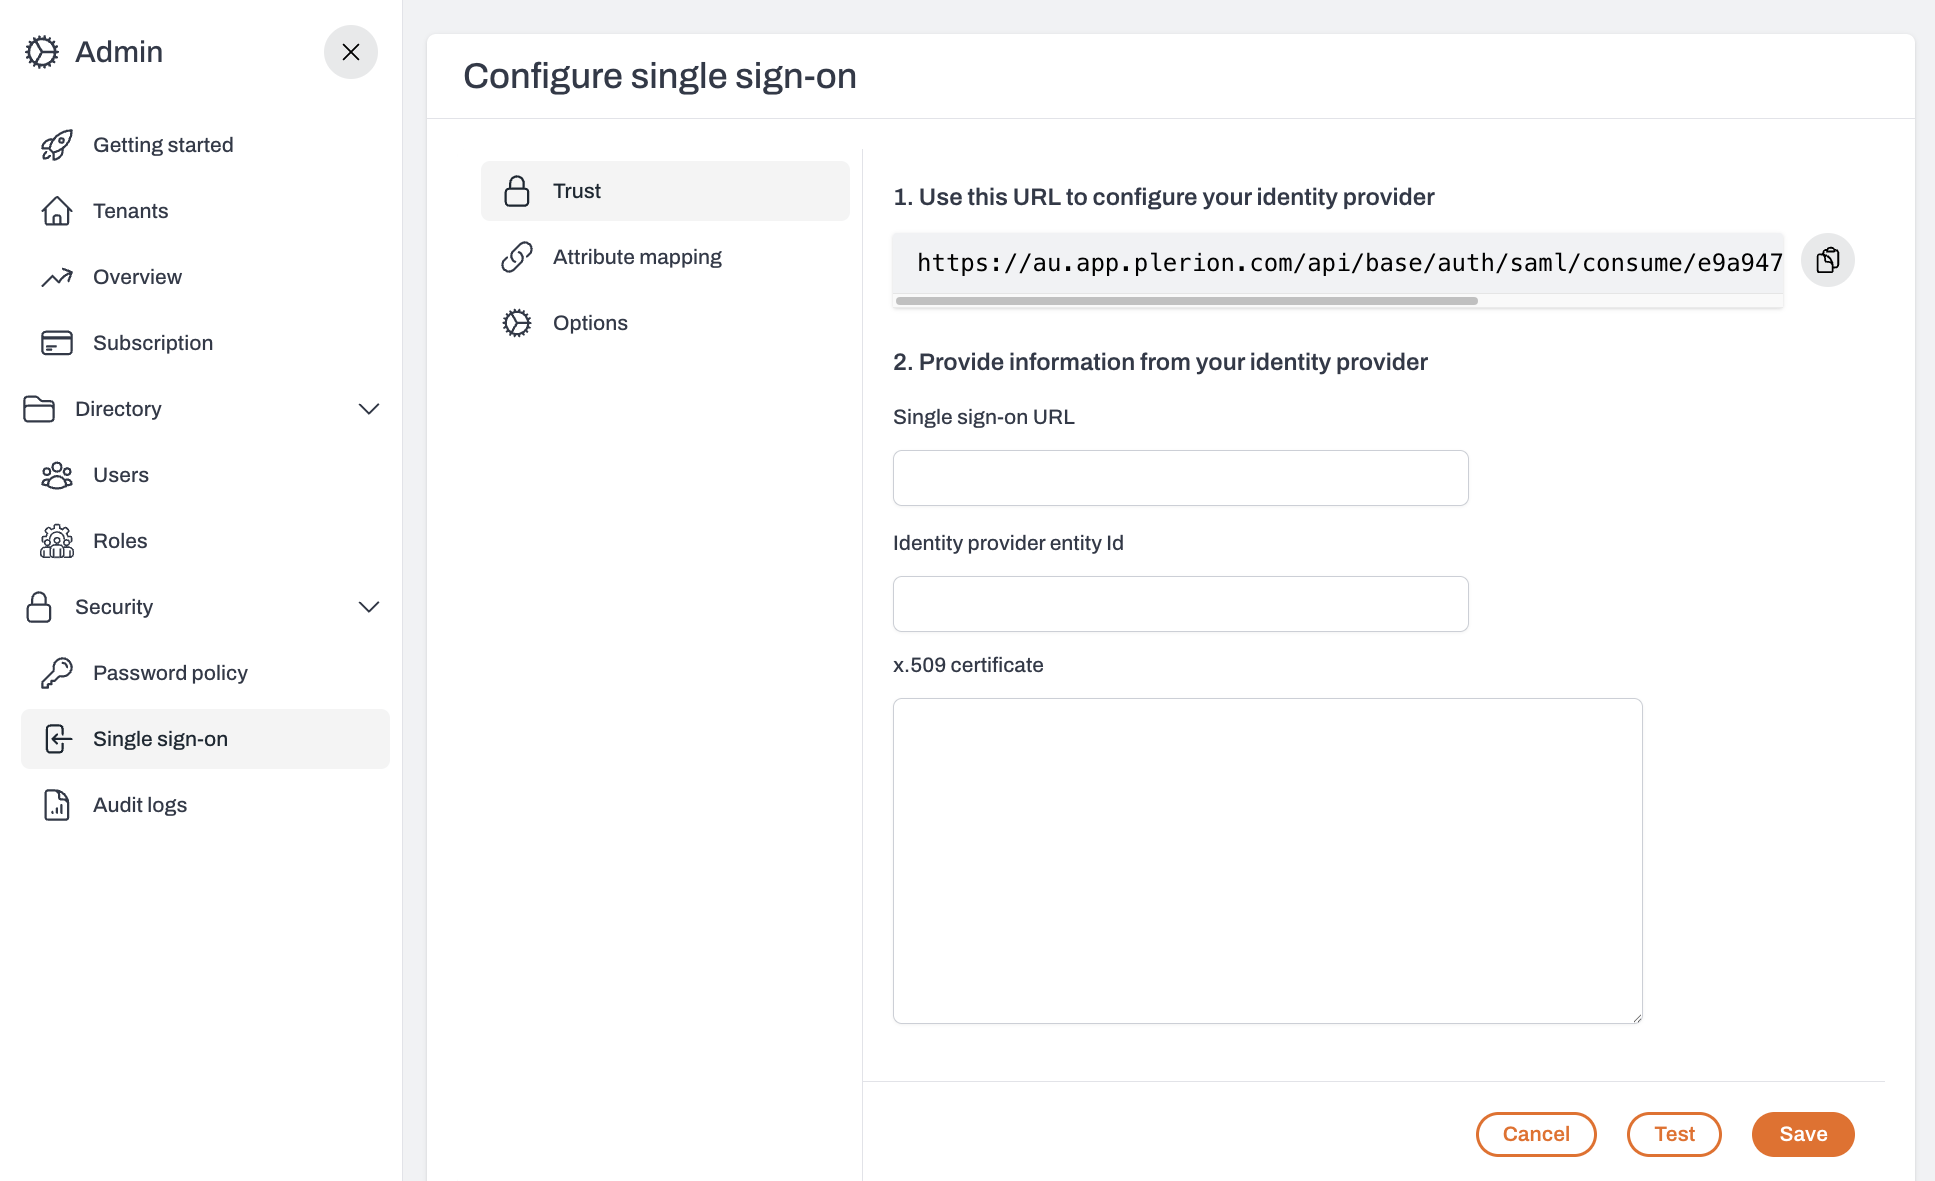
Admin > Single sign-on > Edit > Trust.- Paste Login URL into Single Sign-On URL
- Paste Microsoft Entra Identifier into Identity Provider Entity ID
- Paste the contents of the Certificate (Base64) file into x.509 Certificate
ClickConfigureto save.
8
Map attributes and roles
In 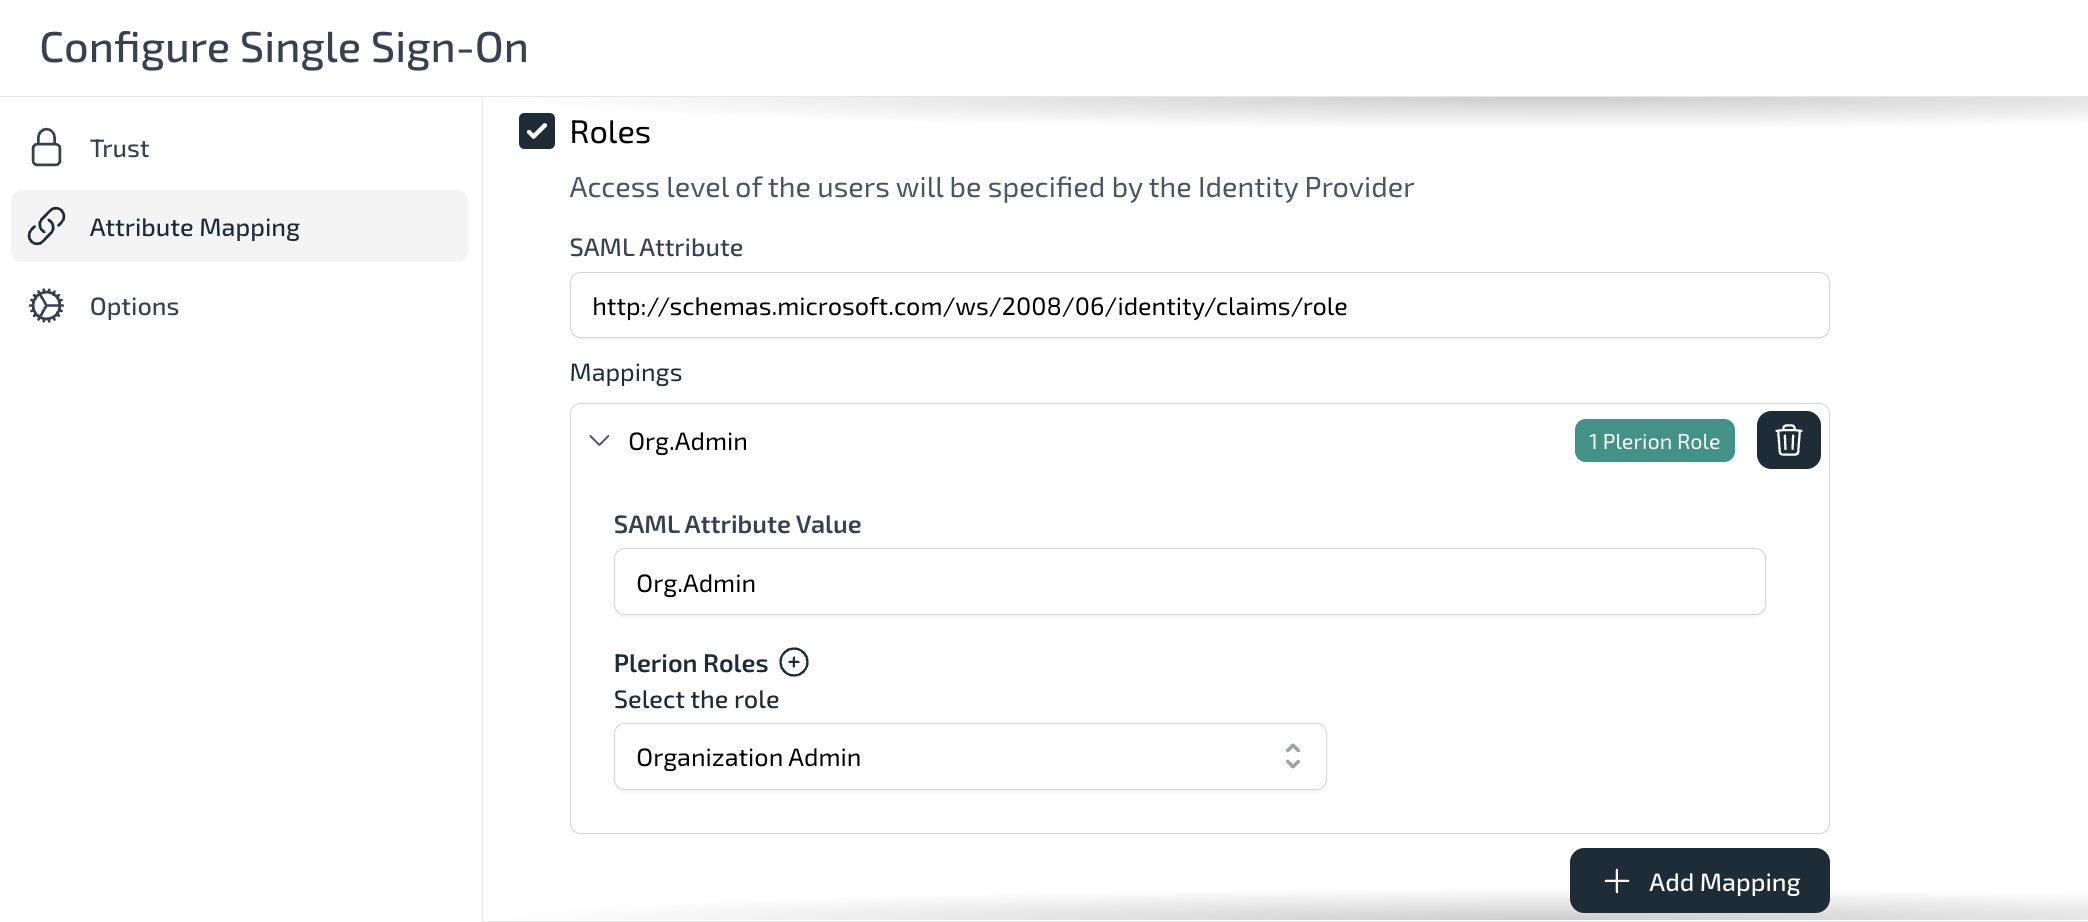
Attribute mapping:- For Email, select Use SAML Name ID.
- For Display name, leave unchecked to let users choose their own, or map the Azure display name if required.
- For Roles, set the SAML attribute to
http://schemas.microsoft.com/ws/2008/06/identity/claims/role
Map Org.Admin and Tenant1.Read to the corresponding Plerion roles.
9
Test your Azure SSO connection
- Open a new browser session and go to My Apps.
- Sign in as one of the users you added and verify that you can log in to Plerion using Azure SSO.