
Before you start, enable SCIM in Plerion and copy the SCIM base URL and a readWrite organization API key. See SCIM provisioning. You also need the enterprise application you created in the Azure single sign-on guide, because SCIM provisions users while SAML is used for authentication only.
Steps to configure Entra ID provisioning
1
Open your Plerion enterprise application
- Sign in to the Microsoft Entra admin center.
- Go to
Enterprise applicationsand open the application you created for Plerion single sign-on.
2
Create a provisioning configuration
- Go to
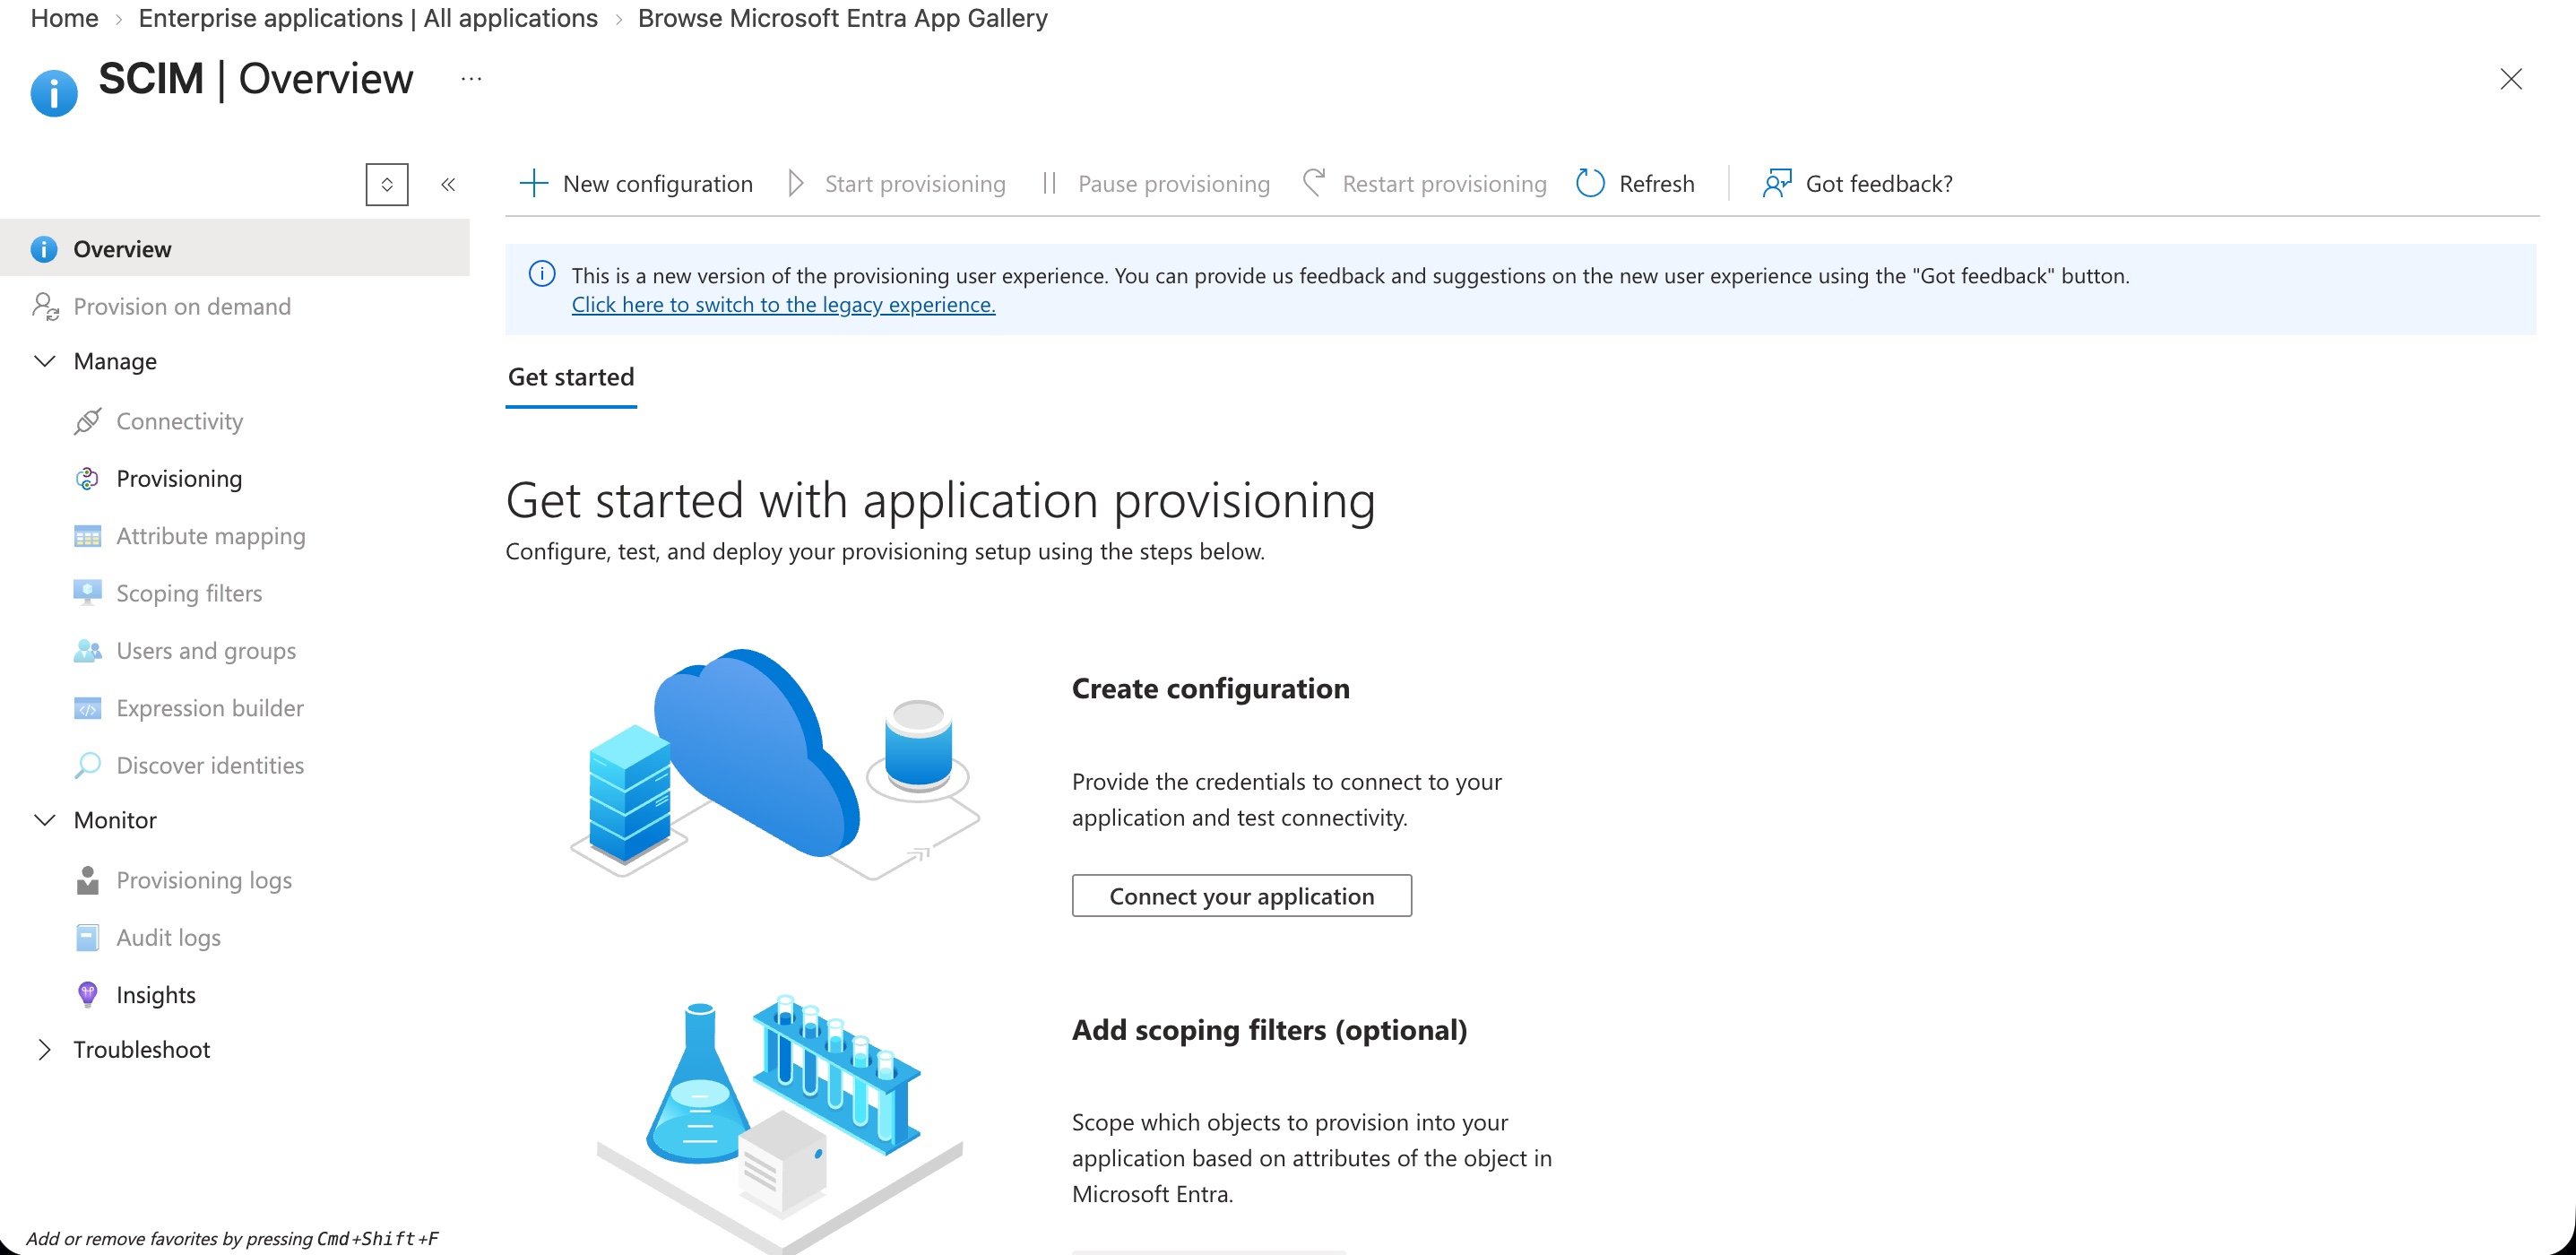
Provisioningand clickNew configuration.
3
Enter the Plerion credentials
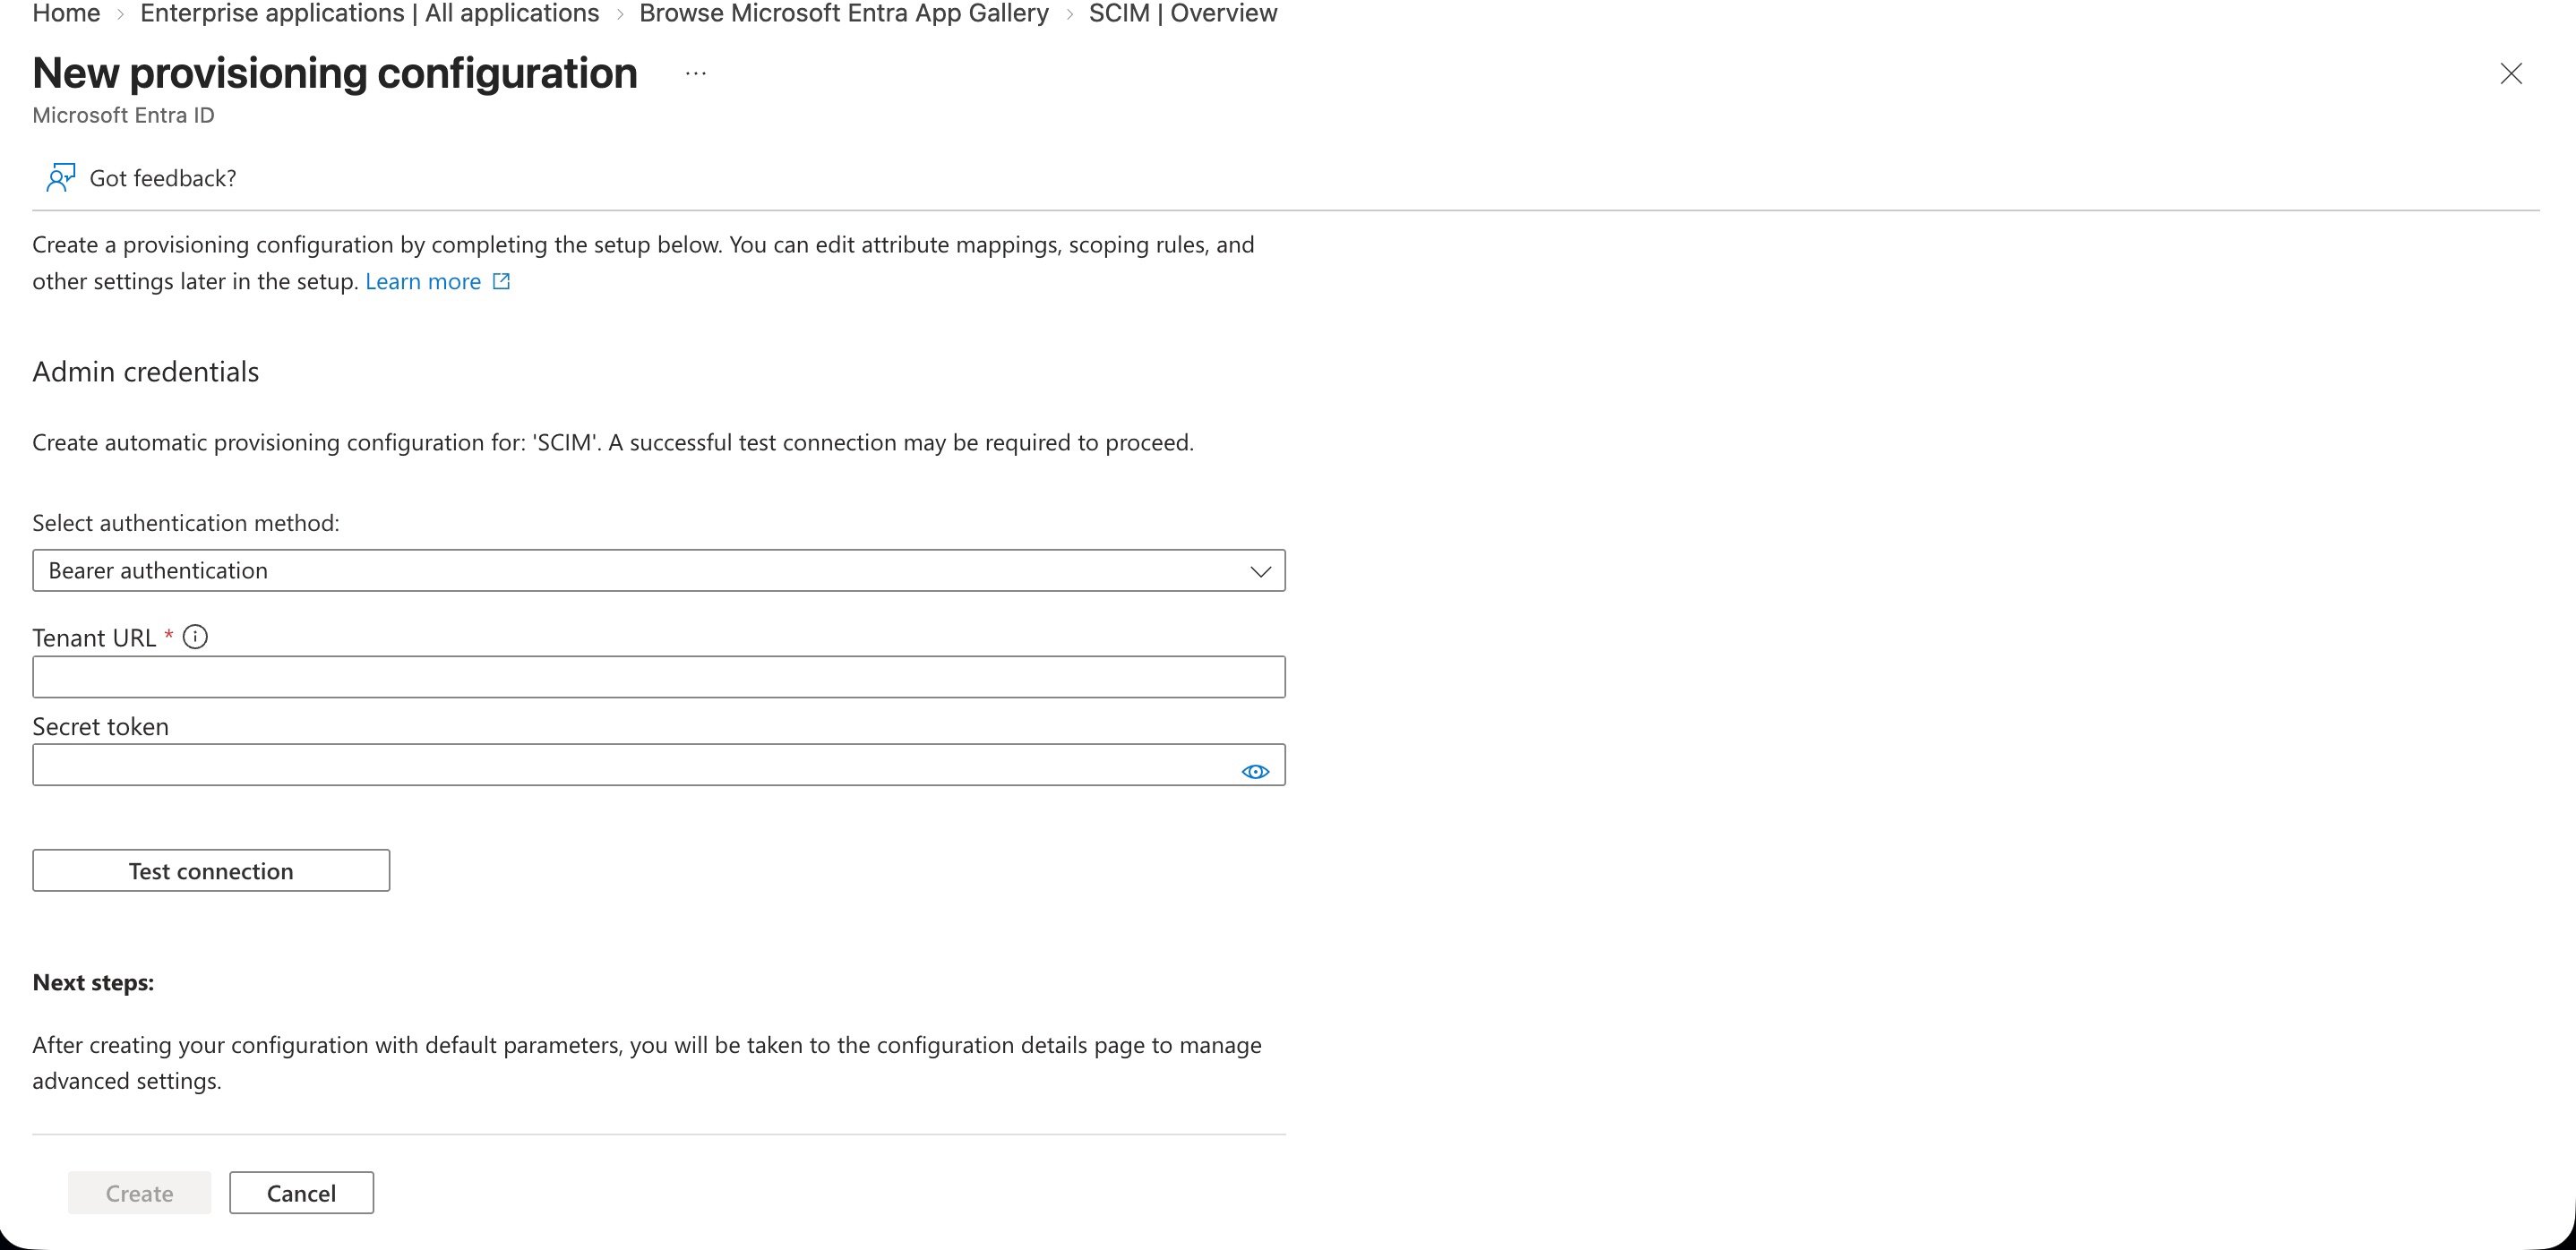
- Leave the authentication method as
Bearer authentication. - In
Tenant URL, paste the SCIM base URL you copied from Plerion. - In
Secret token, paste your readWrite organization API key. - Click
Test connectionand confirm it succeeds, then clickCreate.
4
Review the mappings
- Under
Mappings, openProvision Microsoft Entra ID Usersand confirm thatuserPrincipalNamemaps touserNameand that the mail attribute maps to the primary email, because Plerion derives the Plerion email address from those fields. - Open
Provision Microsoft Entra ID Groupsand confirm it is enabled, withdisplayNamemapped todisplayNameandmembersmapped tomembers. Each synced group appears in Plerion underAdmin>Directory>User groups, marked as managed by your identity provider.
5
Choose the scope and start provisioning
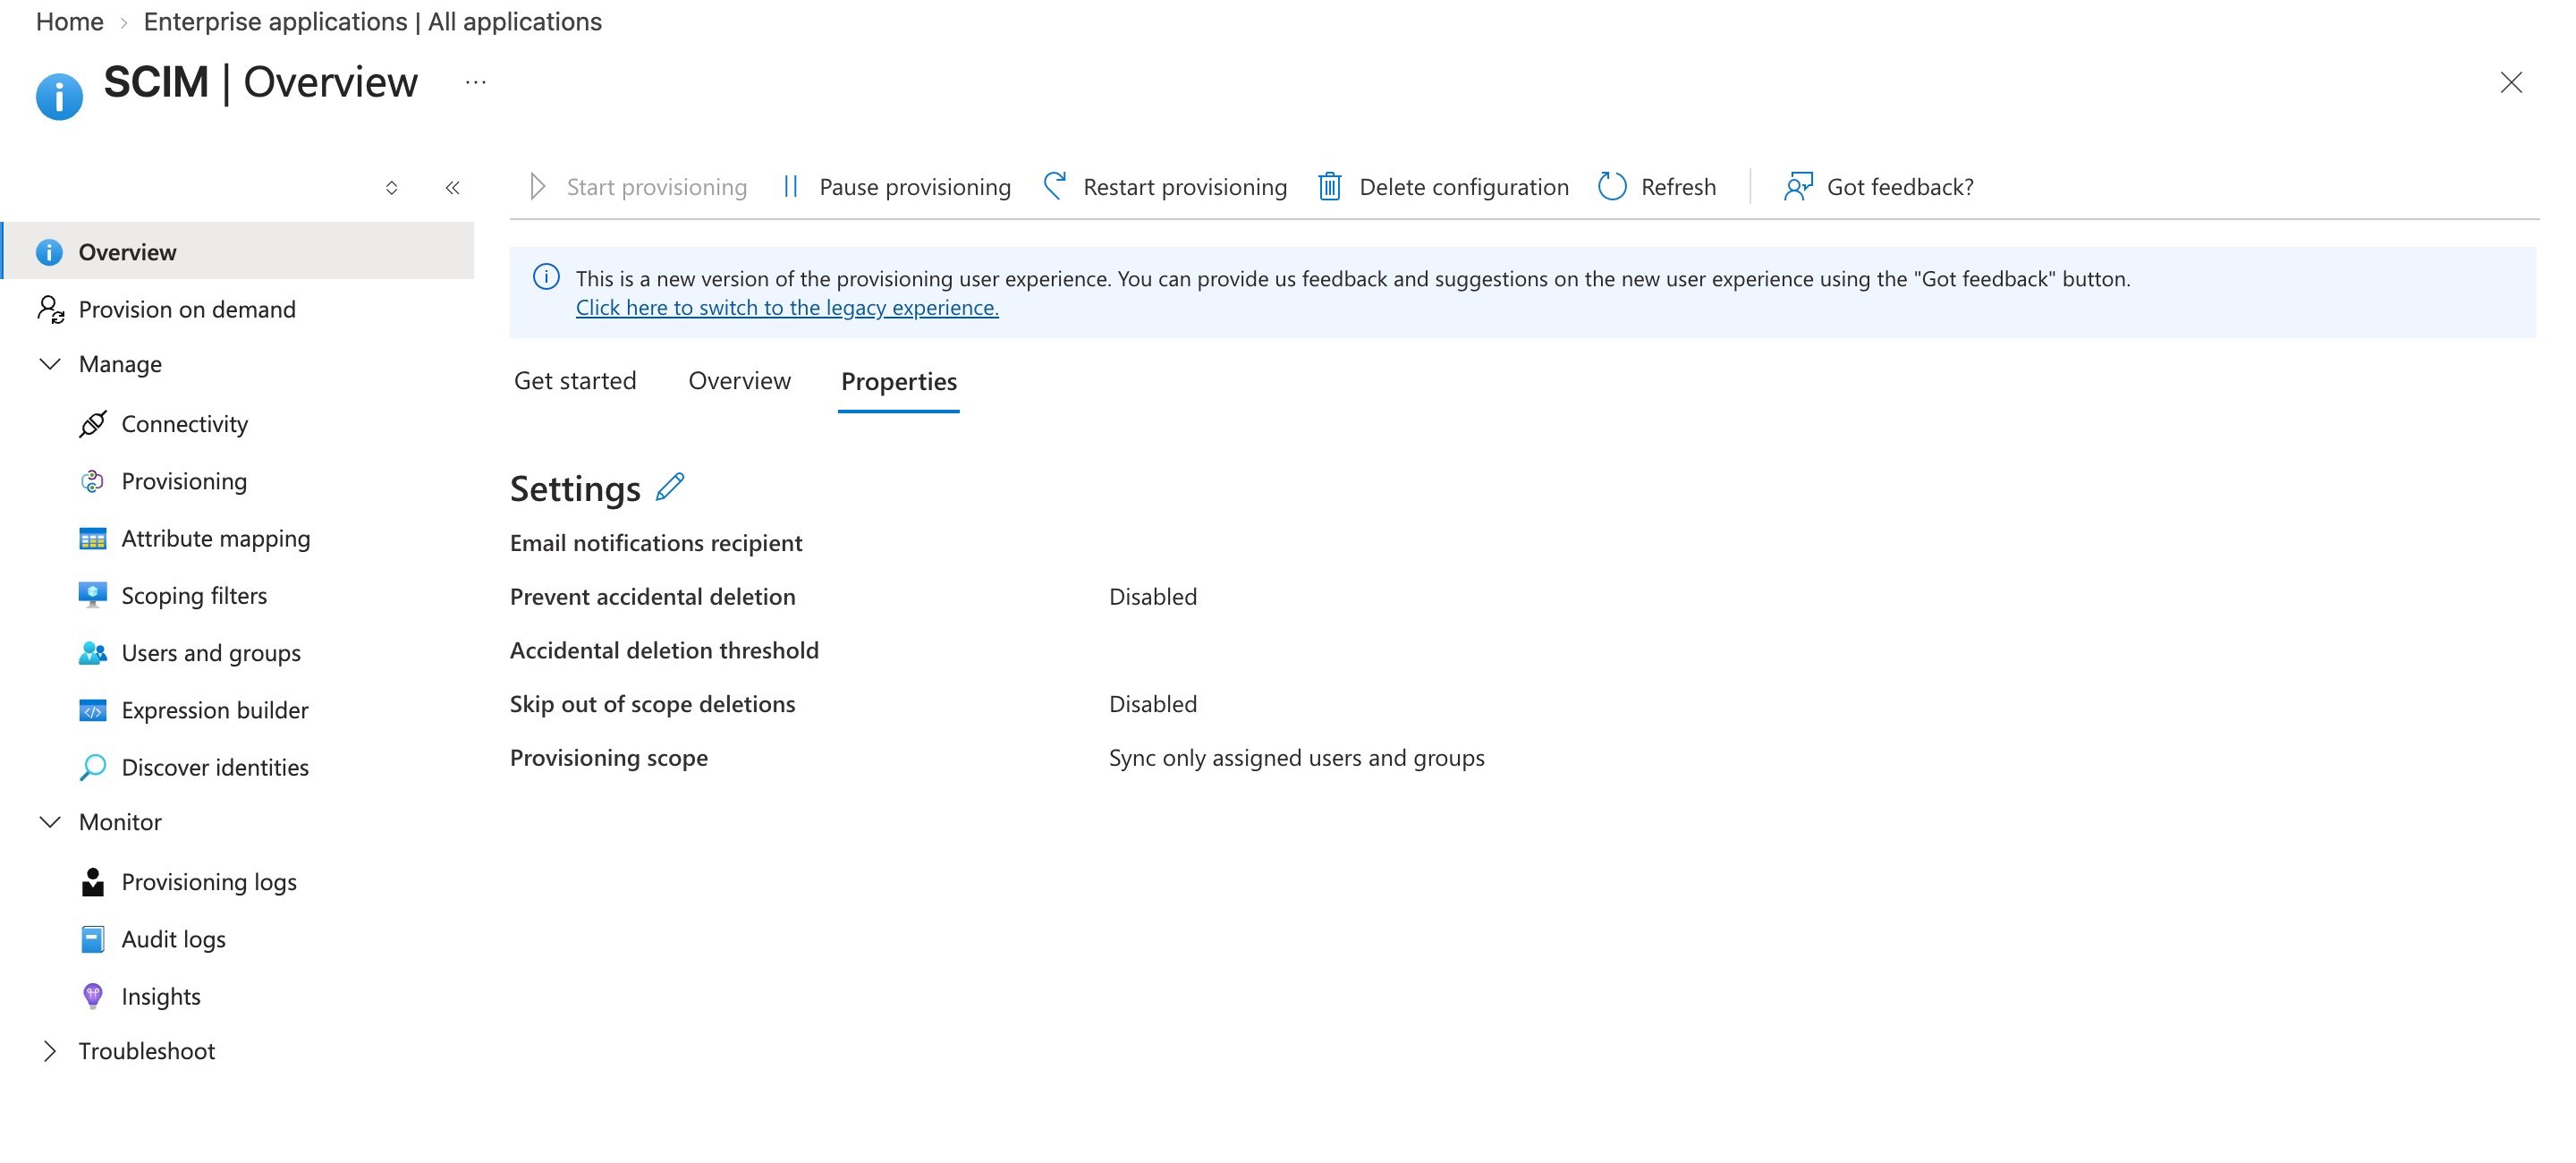
- On the
Propertiestab, confirmProvisioning scopeisSync only assigned users and groups. - Assign groups under
Users and groups. Their members are provisioned as users and the groups themselves as user groups. - Click
Start provisioning. The first cycle starts within a few minutes.
6
Grant roles to the synced groups
- In Plerion, go to
Admin>Directory>User groups, open each synced group, and grant it the roles its members should hold. See User groups. - Until one of their groups grants a role, its members are refused at sign-in. A SCIM-managed user cannot be granted a role directly.
7
Verify the first cycle
- Open
Provisioning logsto confirm the users and groups were created. - In Plerion, go to
Admin>Directory>Usersand confirm they appear with the roles their groups grant.
Entra ID-specific behavior
- Changes arrive in cycles, not instantly. Entra ID runs an incremental cycle roughly every 40 minutes. A change you make in Entra ID can take that long to reach Plerion, including a deactivation. Use
Provision on demandto push a single user immediately while you are testing. - Errors land in the provisioning logs. Open
Provisioning logson the application, then match the message against the troubleshooting table.