Before you begin
Choose which AWS account to use as your service account:- Recommended: Create a new AWS account specifically for the service account to isolate costs and avoid impacting existing workloads.
- Alternative: You can use an existing AWS account.
Prerequisites
Verify AWS region availability
1
Sign in to the AWS Management Console
2
Check region settings
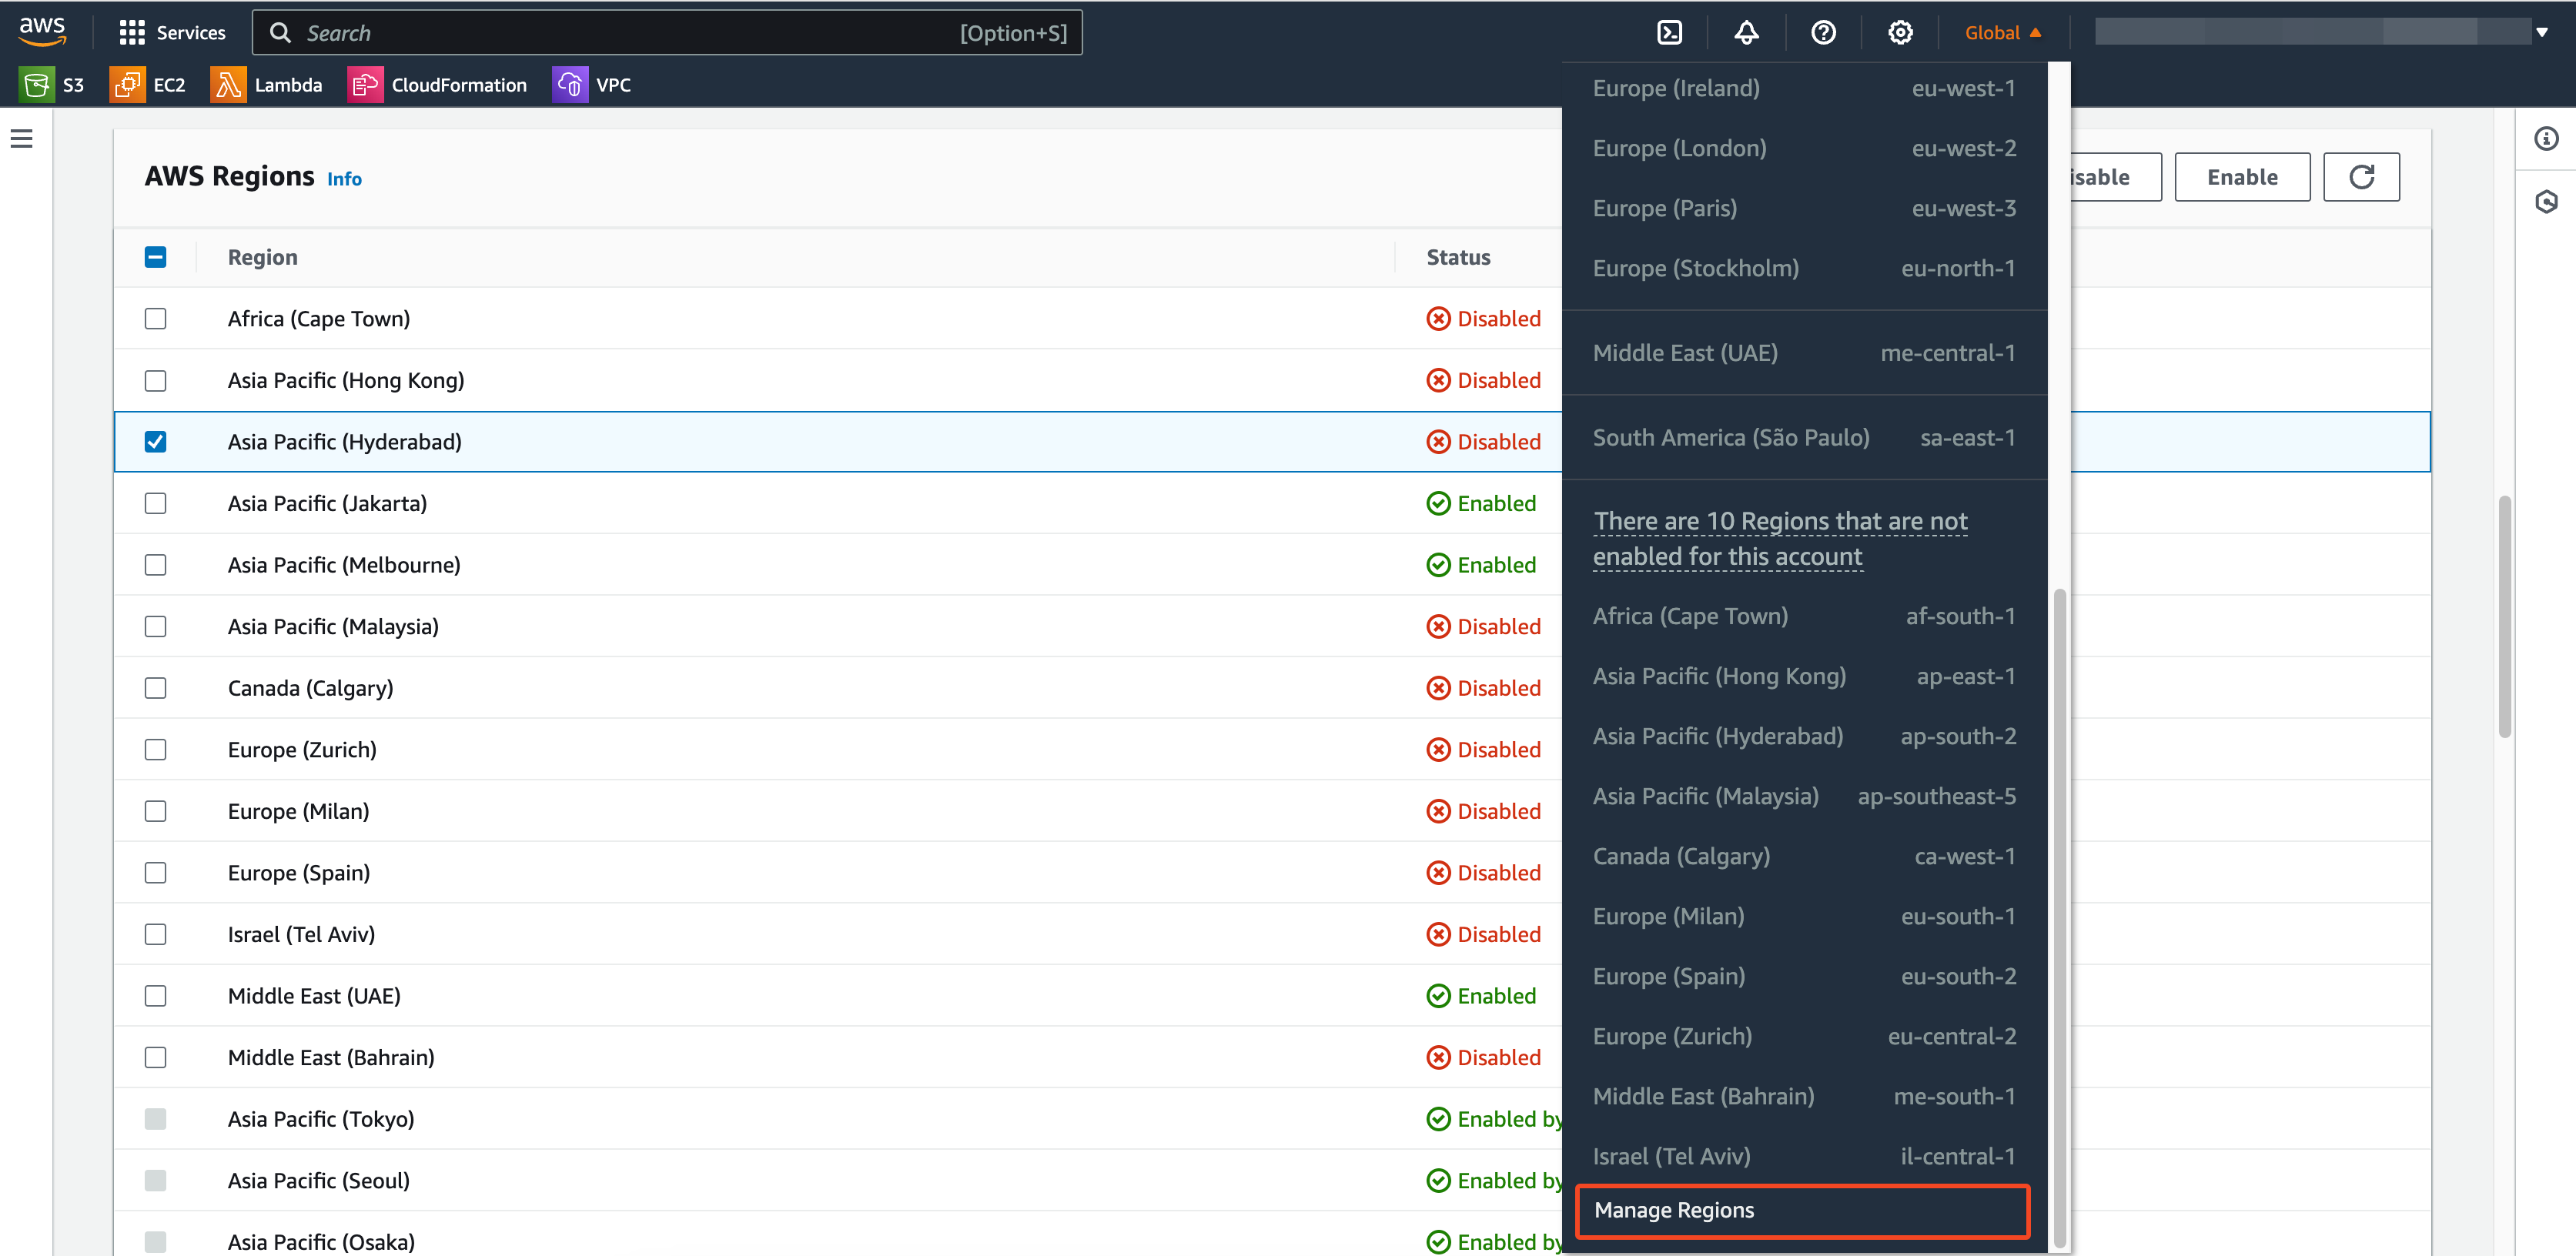
- Open the region selector in the top-right corner and choose
Manage regions. - Enable the regions you plan to use.
3
Test if the region is active
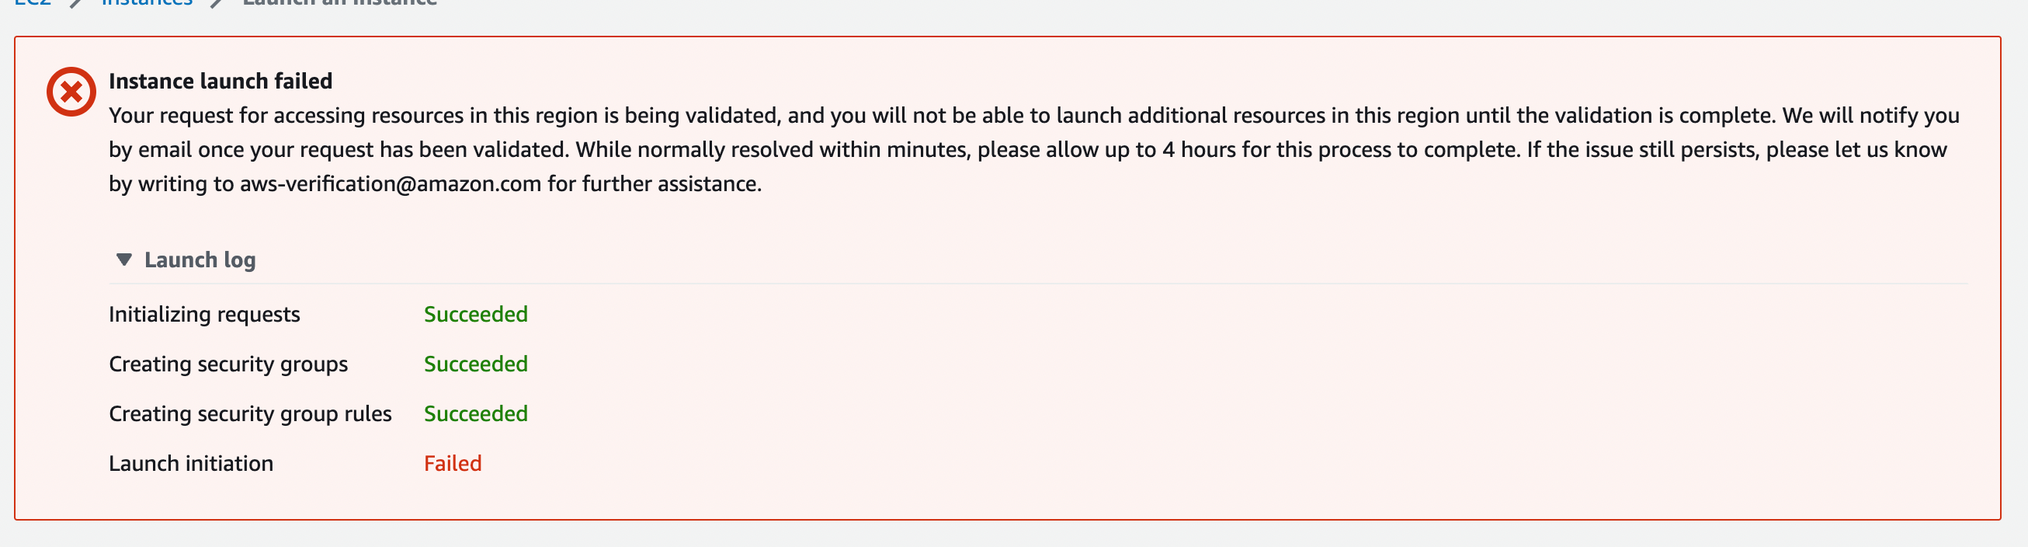
- Open the EC2 service in your target region.
- Try to launch 10 t3.micro instances or 1 large instance.
- If the region is inactive, you’ll see an error message:
4
Wait for activation or contact AWS support
- AWS typically activates a region within 10–15 minutes and sends a confirmation email.
- If no email arrives, raise a support ticket in the AWS Support Center.
Verify AWS service quotas
The AWS service account deploys appliances as EC2 instances to perform CWPP scans. By default, these appliances use thec7i.xlarge instance type in supported regions. If c7i.xlarge is not available in a region, the service account will fall back to using t3.large.
- c7i.xlarge: 4 vCPUs, 8 GiB memory
- t3.large: 2 vCPUs, 8 GiB memory
1
Sign in to the AWS Management Console
2
Select the target region
Use the region selector in the top-right corner to confirm you’re in the correct region.
3
Open the Service Quotas service
4
Search for EC2 quotas
In the navigation pane, choose
AWS services, then search for EC2 and select Amazon Elastic Compute Cloud (Amazon EC2).5
Find the On-Demand Standard instances quota
Enter
Running On-Demand Standard (A, C, D, H, I, M, R, T, Z) instances in the search field and select the matching quota.6
Review the applied quota value
- The minimum required for a service account is 40.
- If your applied value is lower, continue with a quota increase request.
7
Request a quota increase
- On the quota details page, click
Request quota increase. - Confirm the quota name is Running On-Demand Standard (A, C, D, H, I, M, R, T, Z) instances and the region is correct.
- Enter a new value of
40 or higherand submit the request. - A confirmation message should appear at the top of the screen.