
Create new target accounts
Onboard a single AWS account
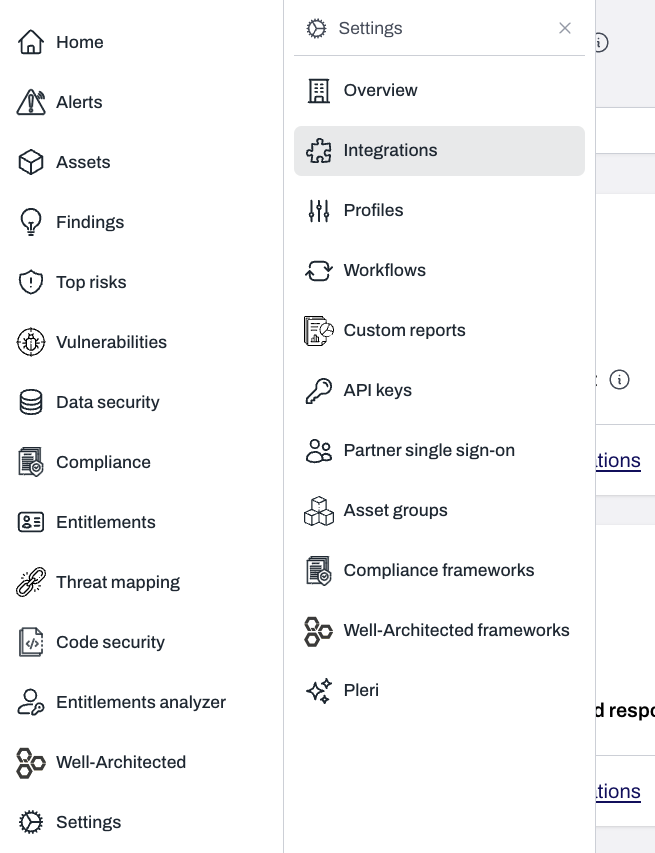
On the Plerion dashboard, go to Settings > Integrations
Find AWS account and click the + button
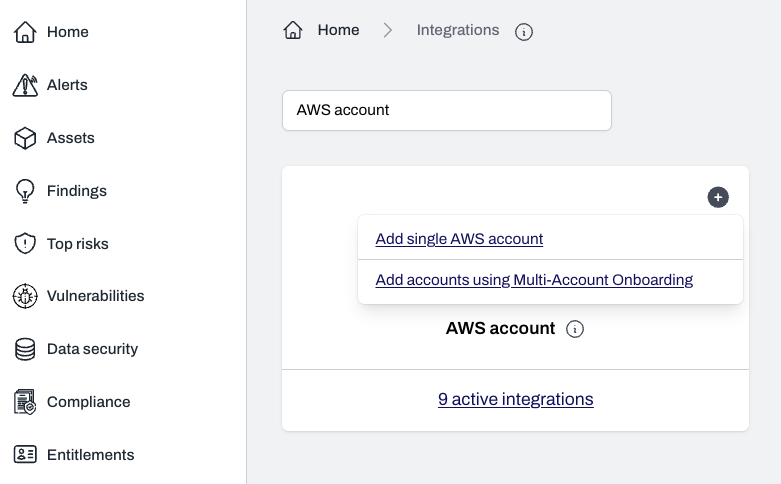
Add single AWS account to continue with onboarding a single AWS account.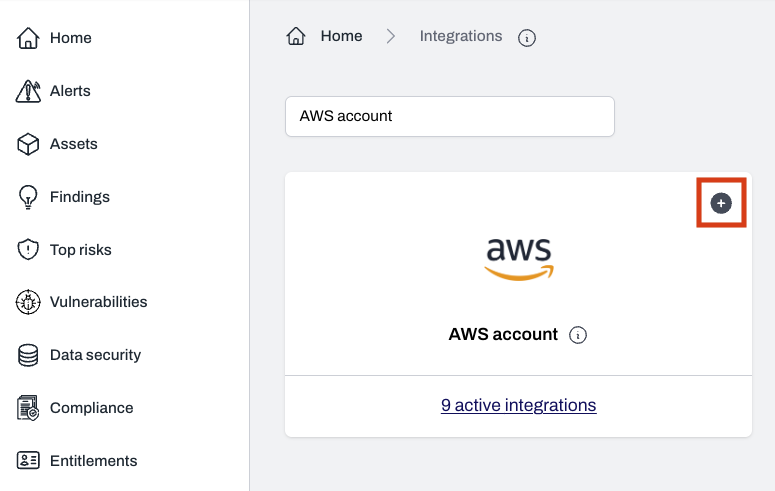
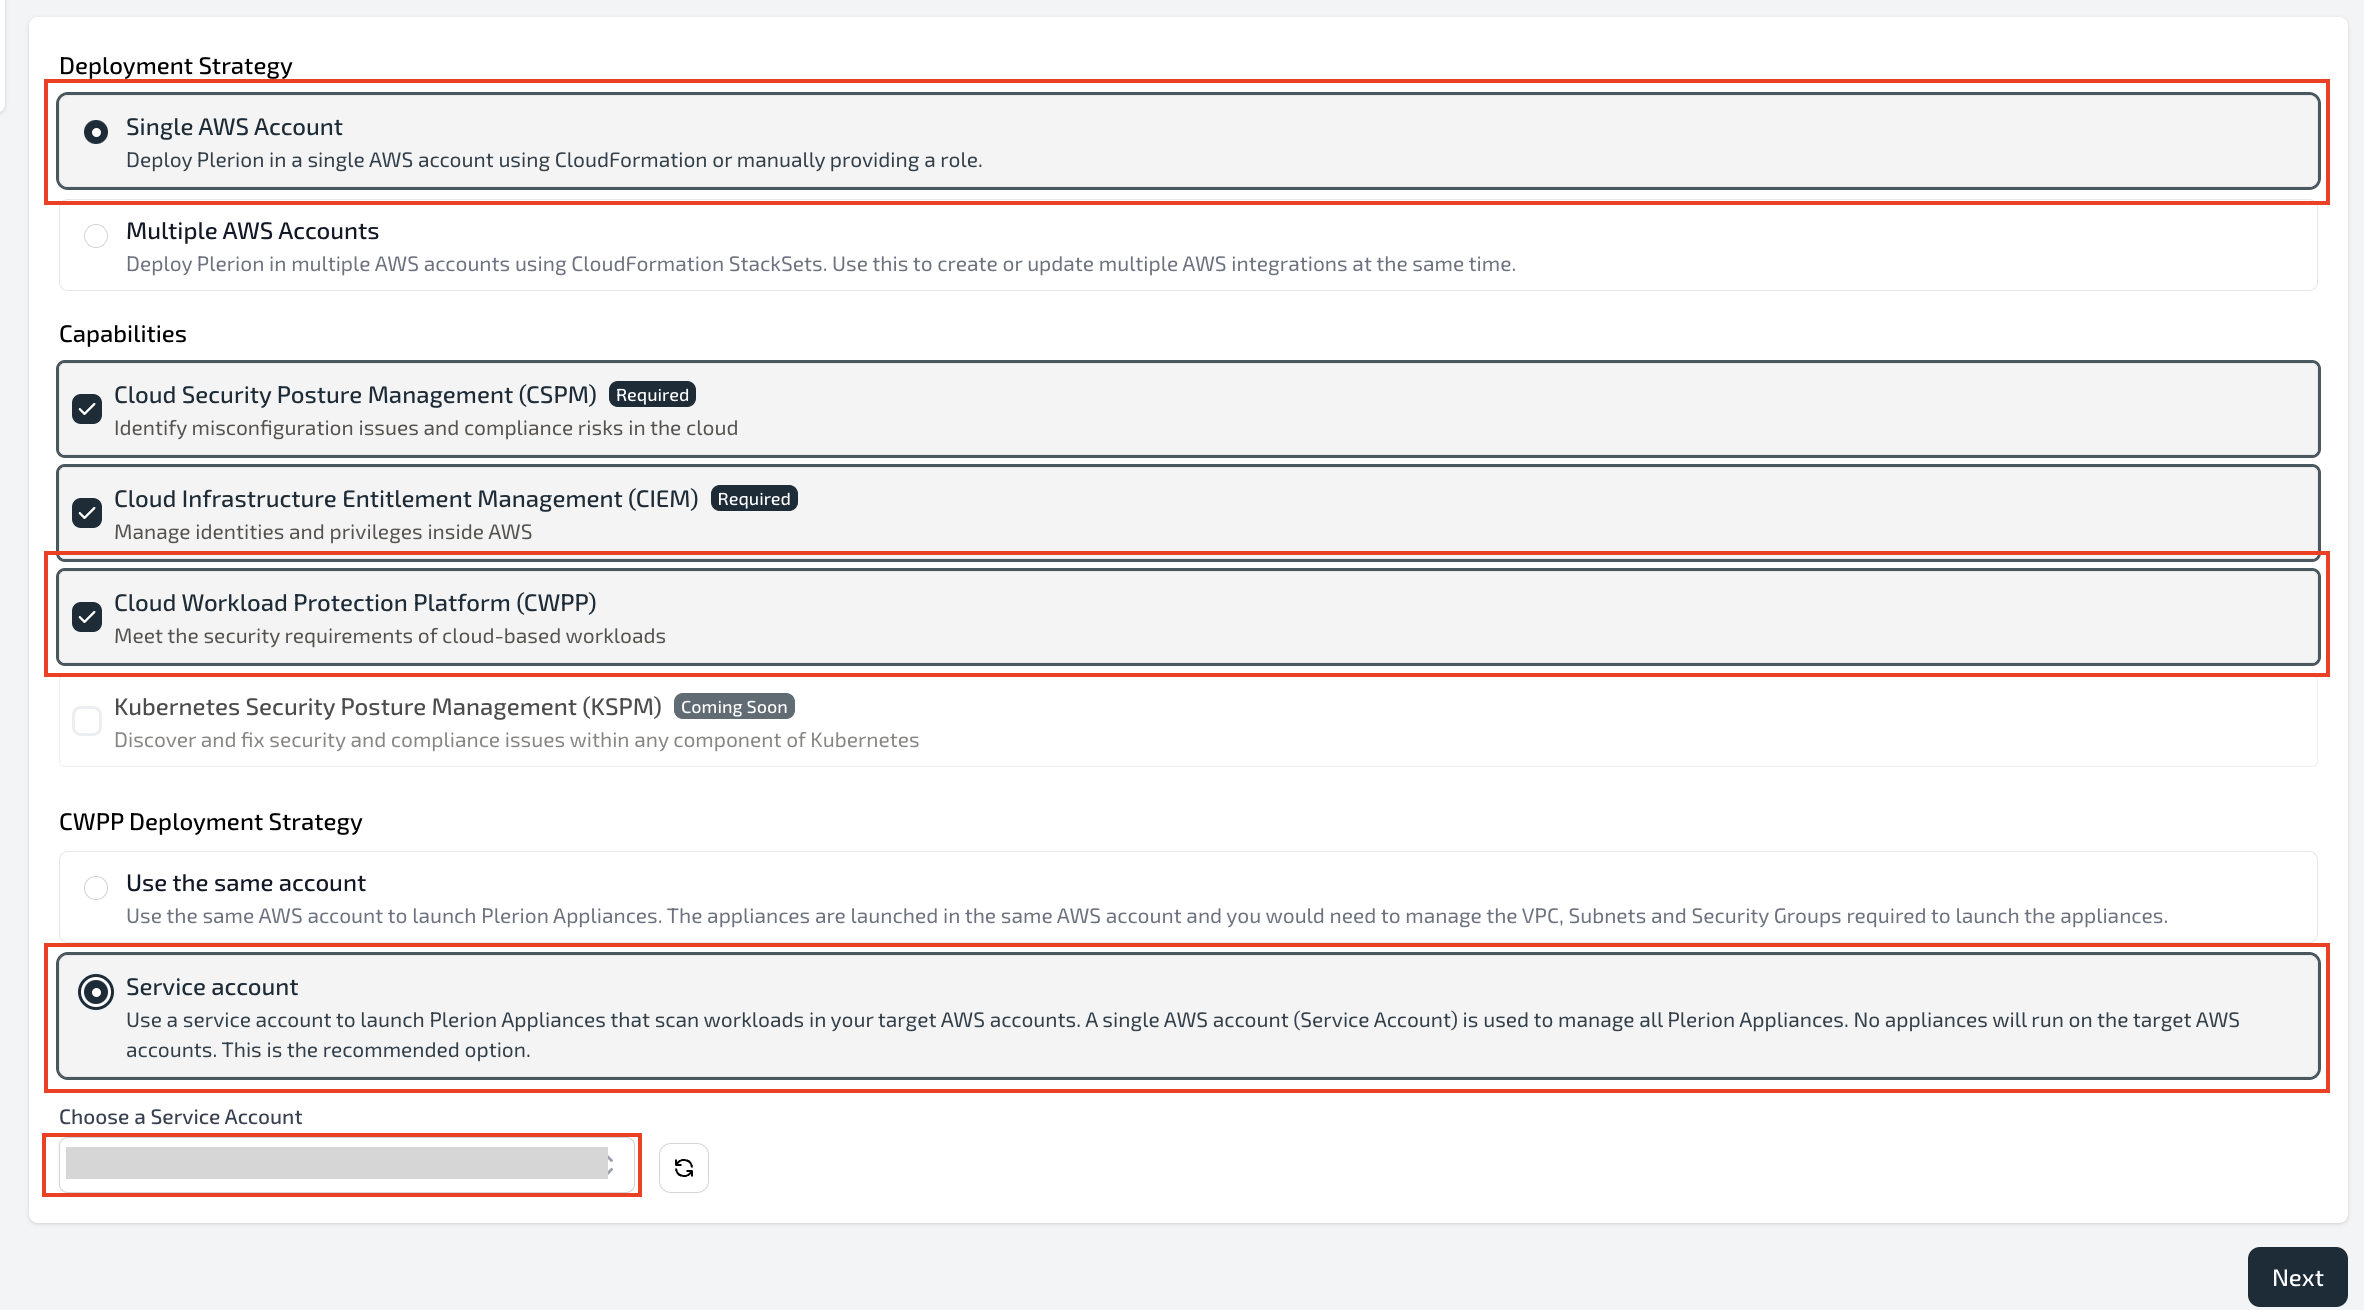
Select your desired capabilities
- Select
CSPM,CIEMandCWPP - For the CWPP deployment, choose
Service accountand select your service account. - Click
Nextto continue.
Launch the CloudFormation stack
Launch stack to open the Quick create stack page in AWS CloudFormation.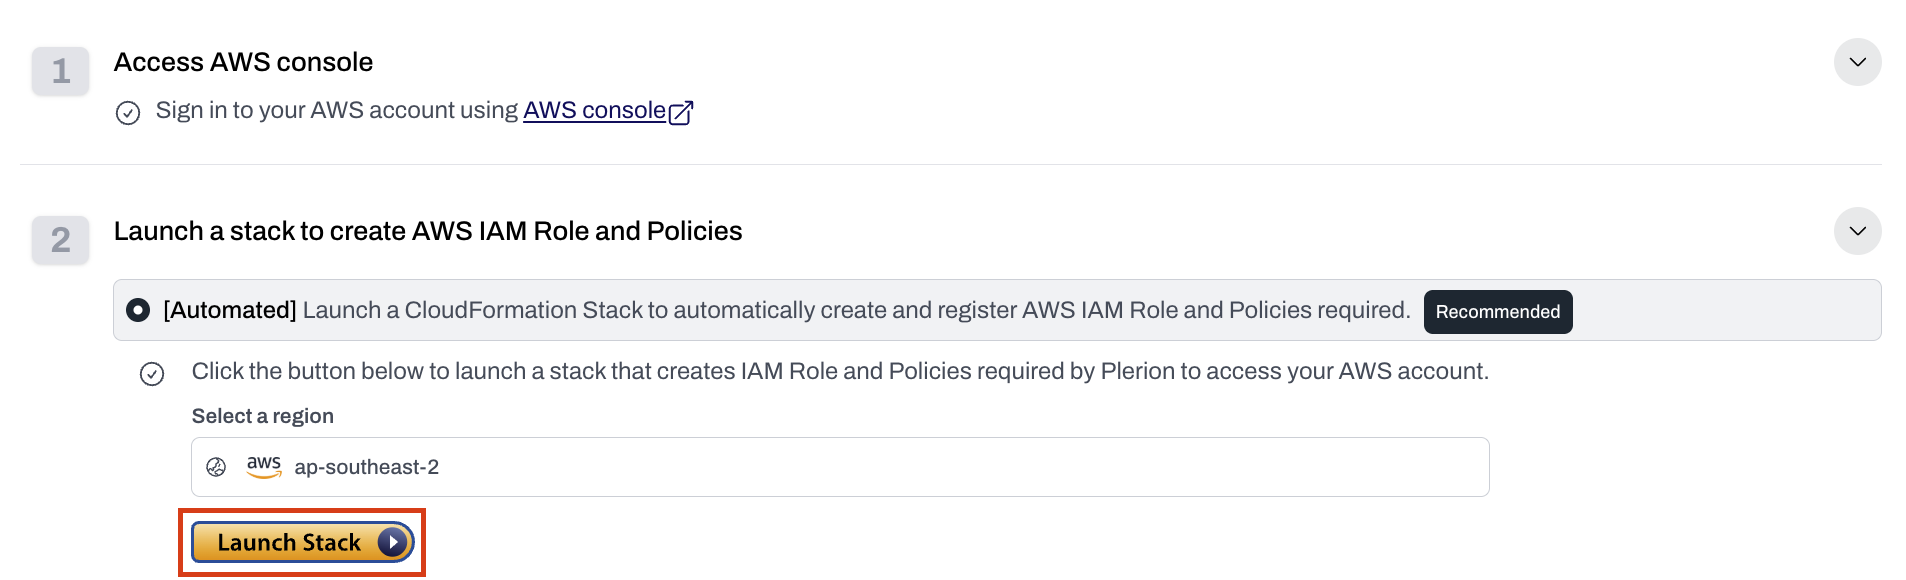
Verify the Service account parameter and create the stack
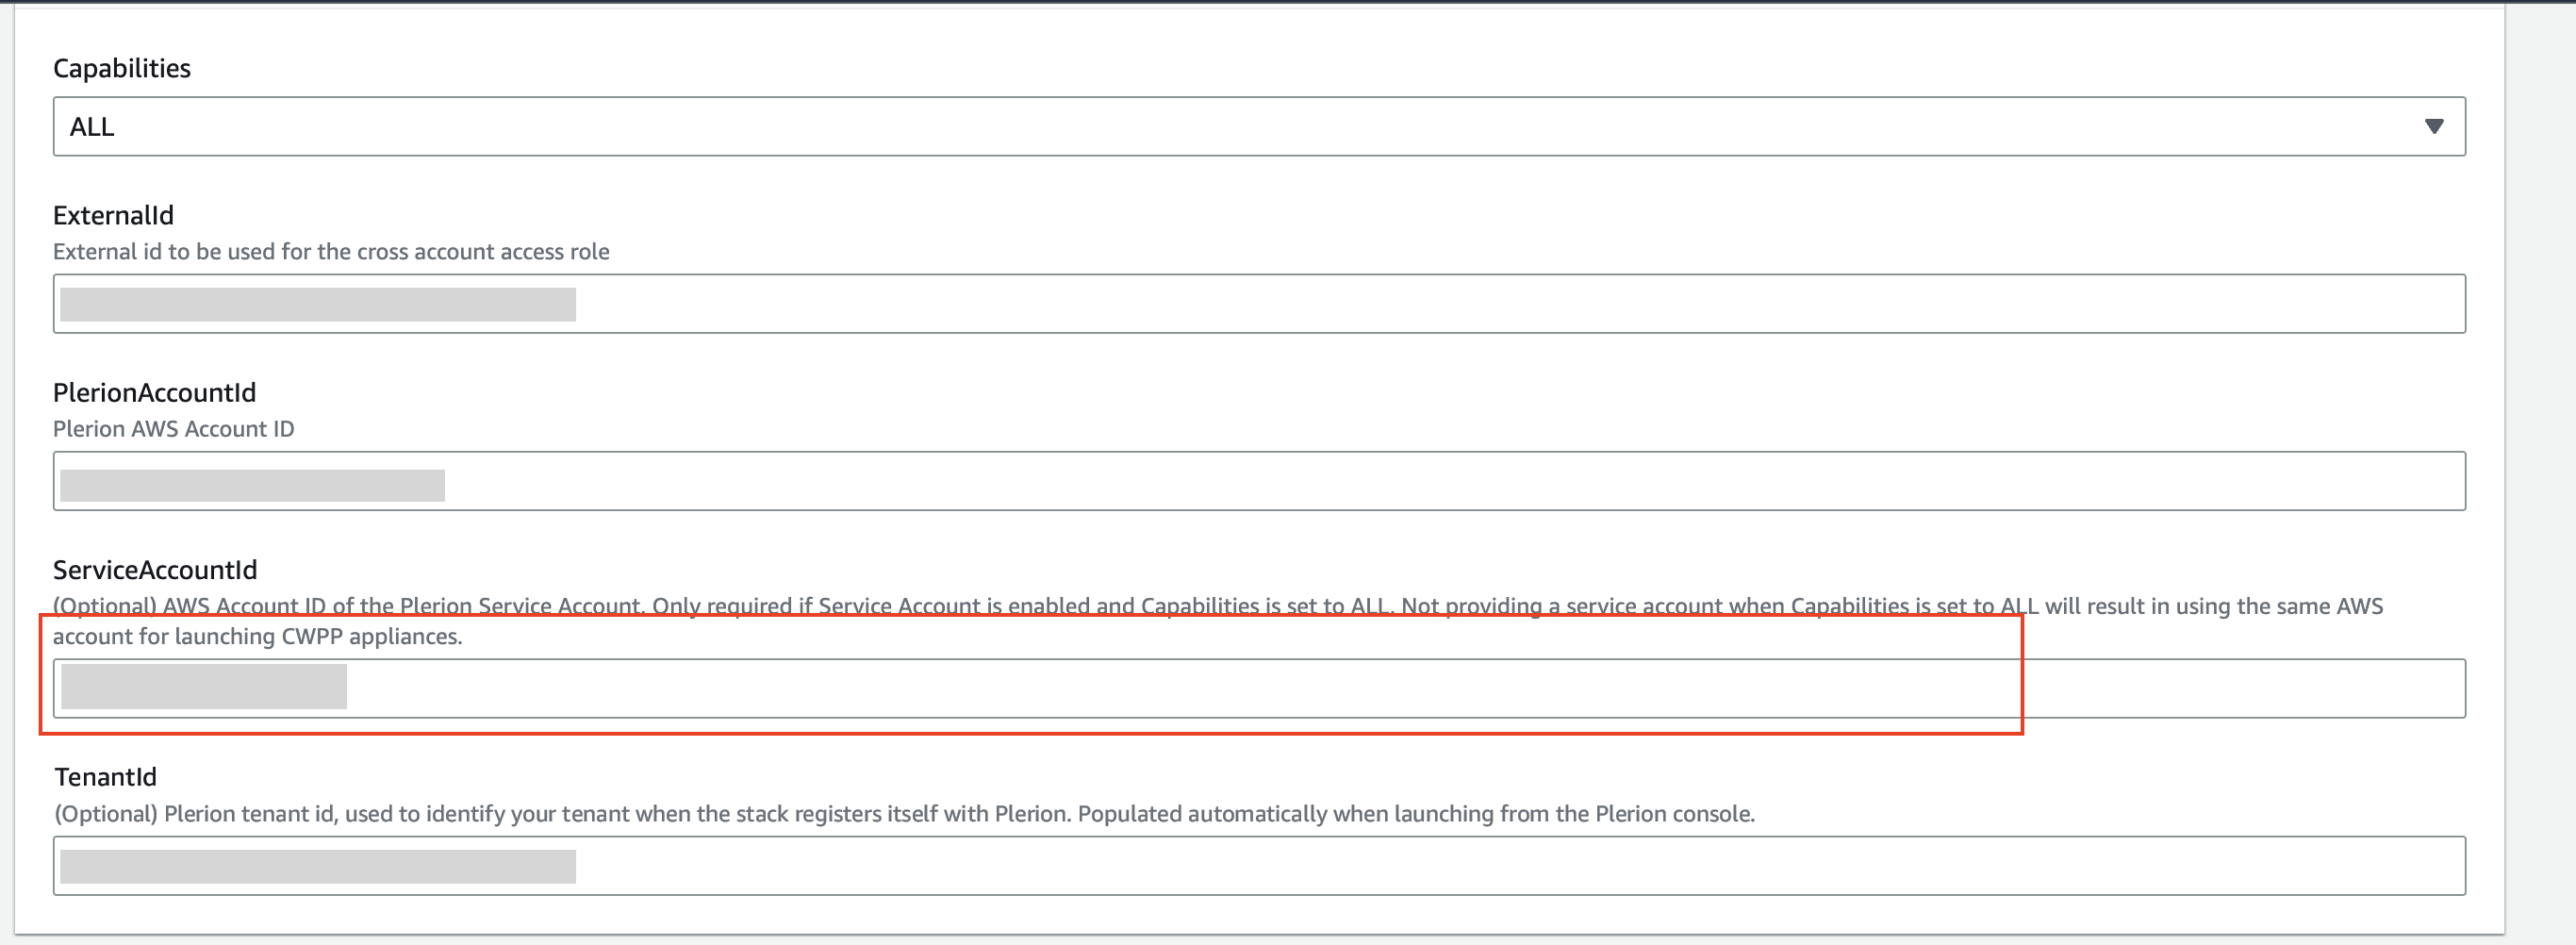
After the stack completes, the AWS integration will be created and linked to your AWS service account.
Onboard multiple AWS accounts using StackSets
On the Plerion dashboard, go to Settings > Integrations
Find AWS account and click the + button
Add accounts using Multi-Account Onbooarding to add mutiple AWS accounts at once.Select your desired capabilities
- Select
CSPM,CIEMandCWPP - For the CWPP deployment, choose
Service accountand select your service account. - Click
Nextto continue.
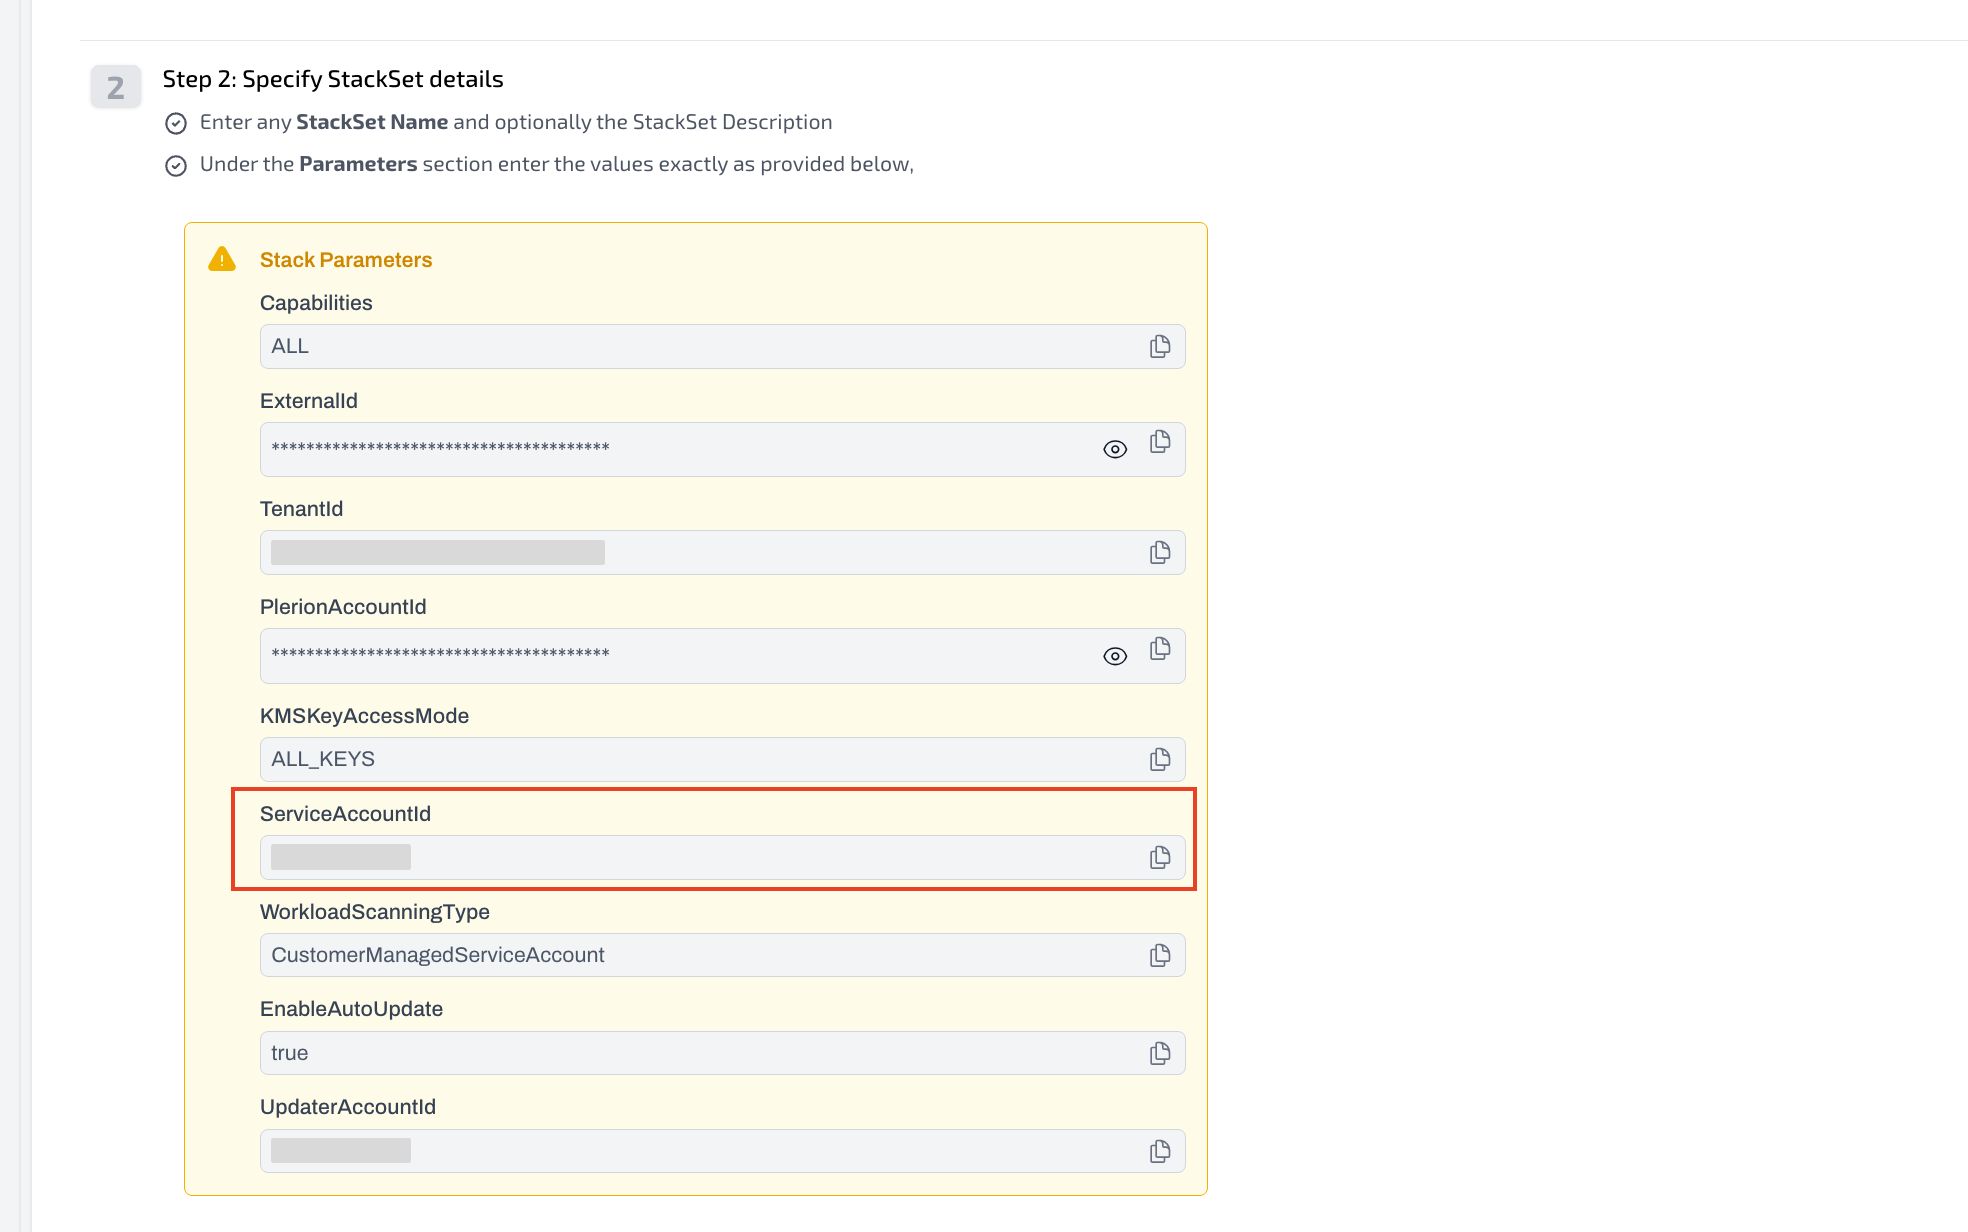
Choose Console or CLI and provide the ServiceAccountId
- Use the ServiceAccountId shown in Plerion.
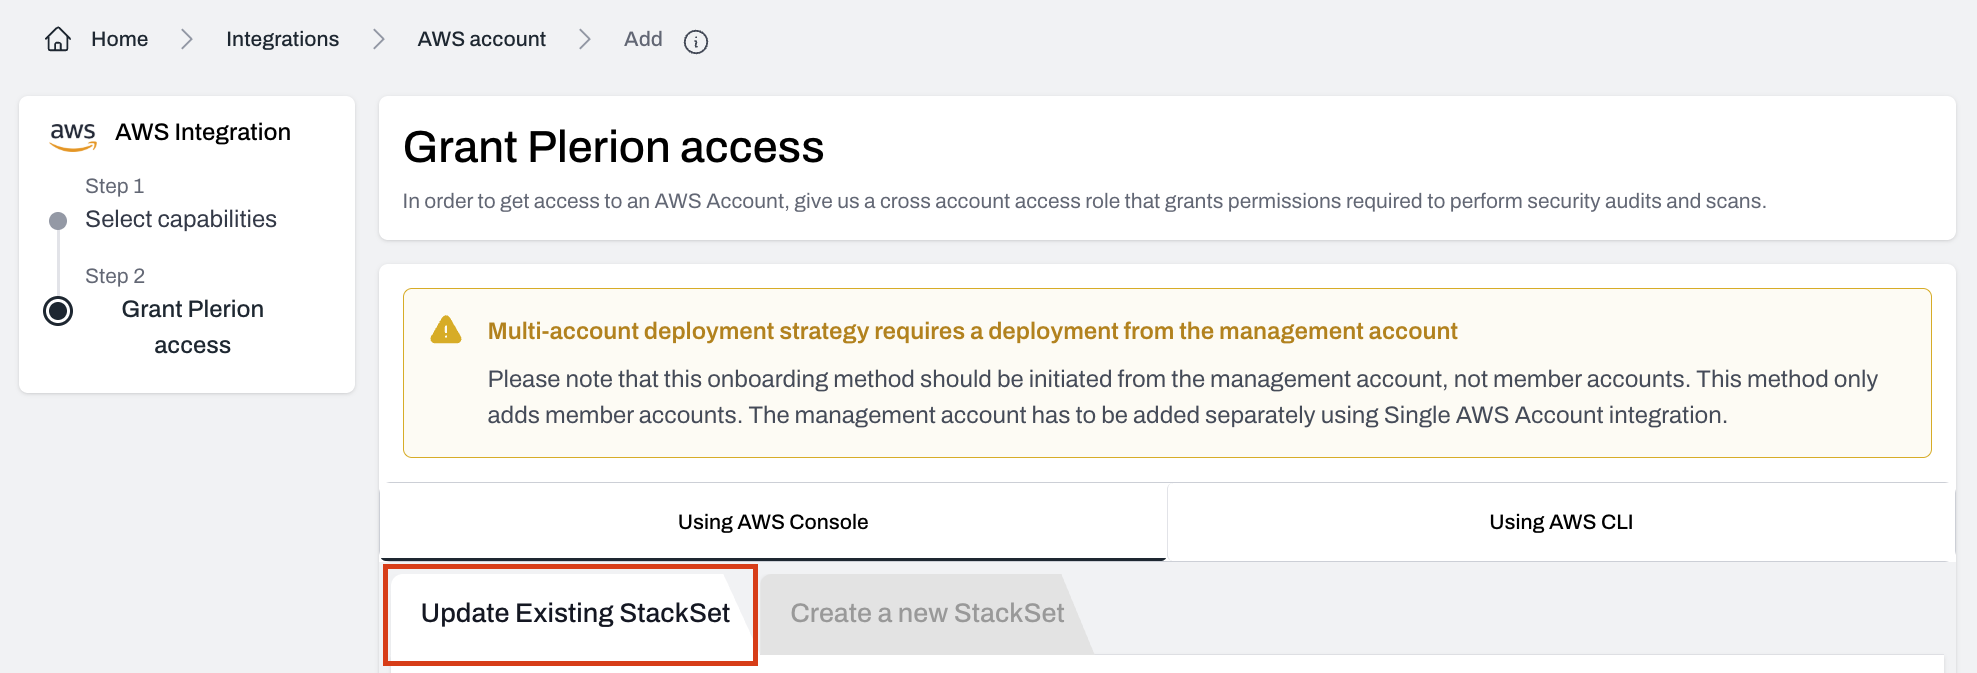
If adding more accounts later, use Update Existing StackSet
After the stack completes, the AWS integration will be created and linked to your AWS service account.
Update existing target accounts
Update a single AWS account
Open the AWS account you want to update
- On the Plerion dashboard, go to
Settings>Integrations, and find the AWS account you want to update - Click the edit icon next to Role ARN
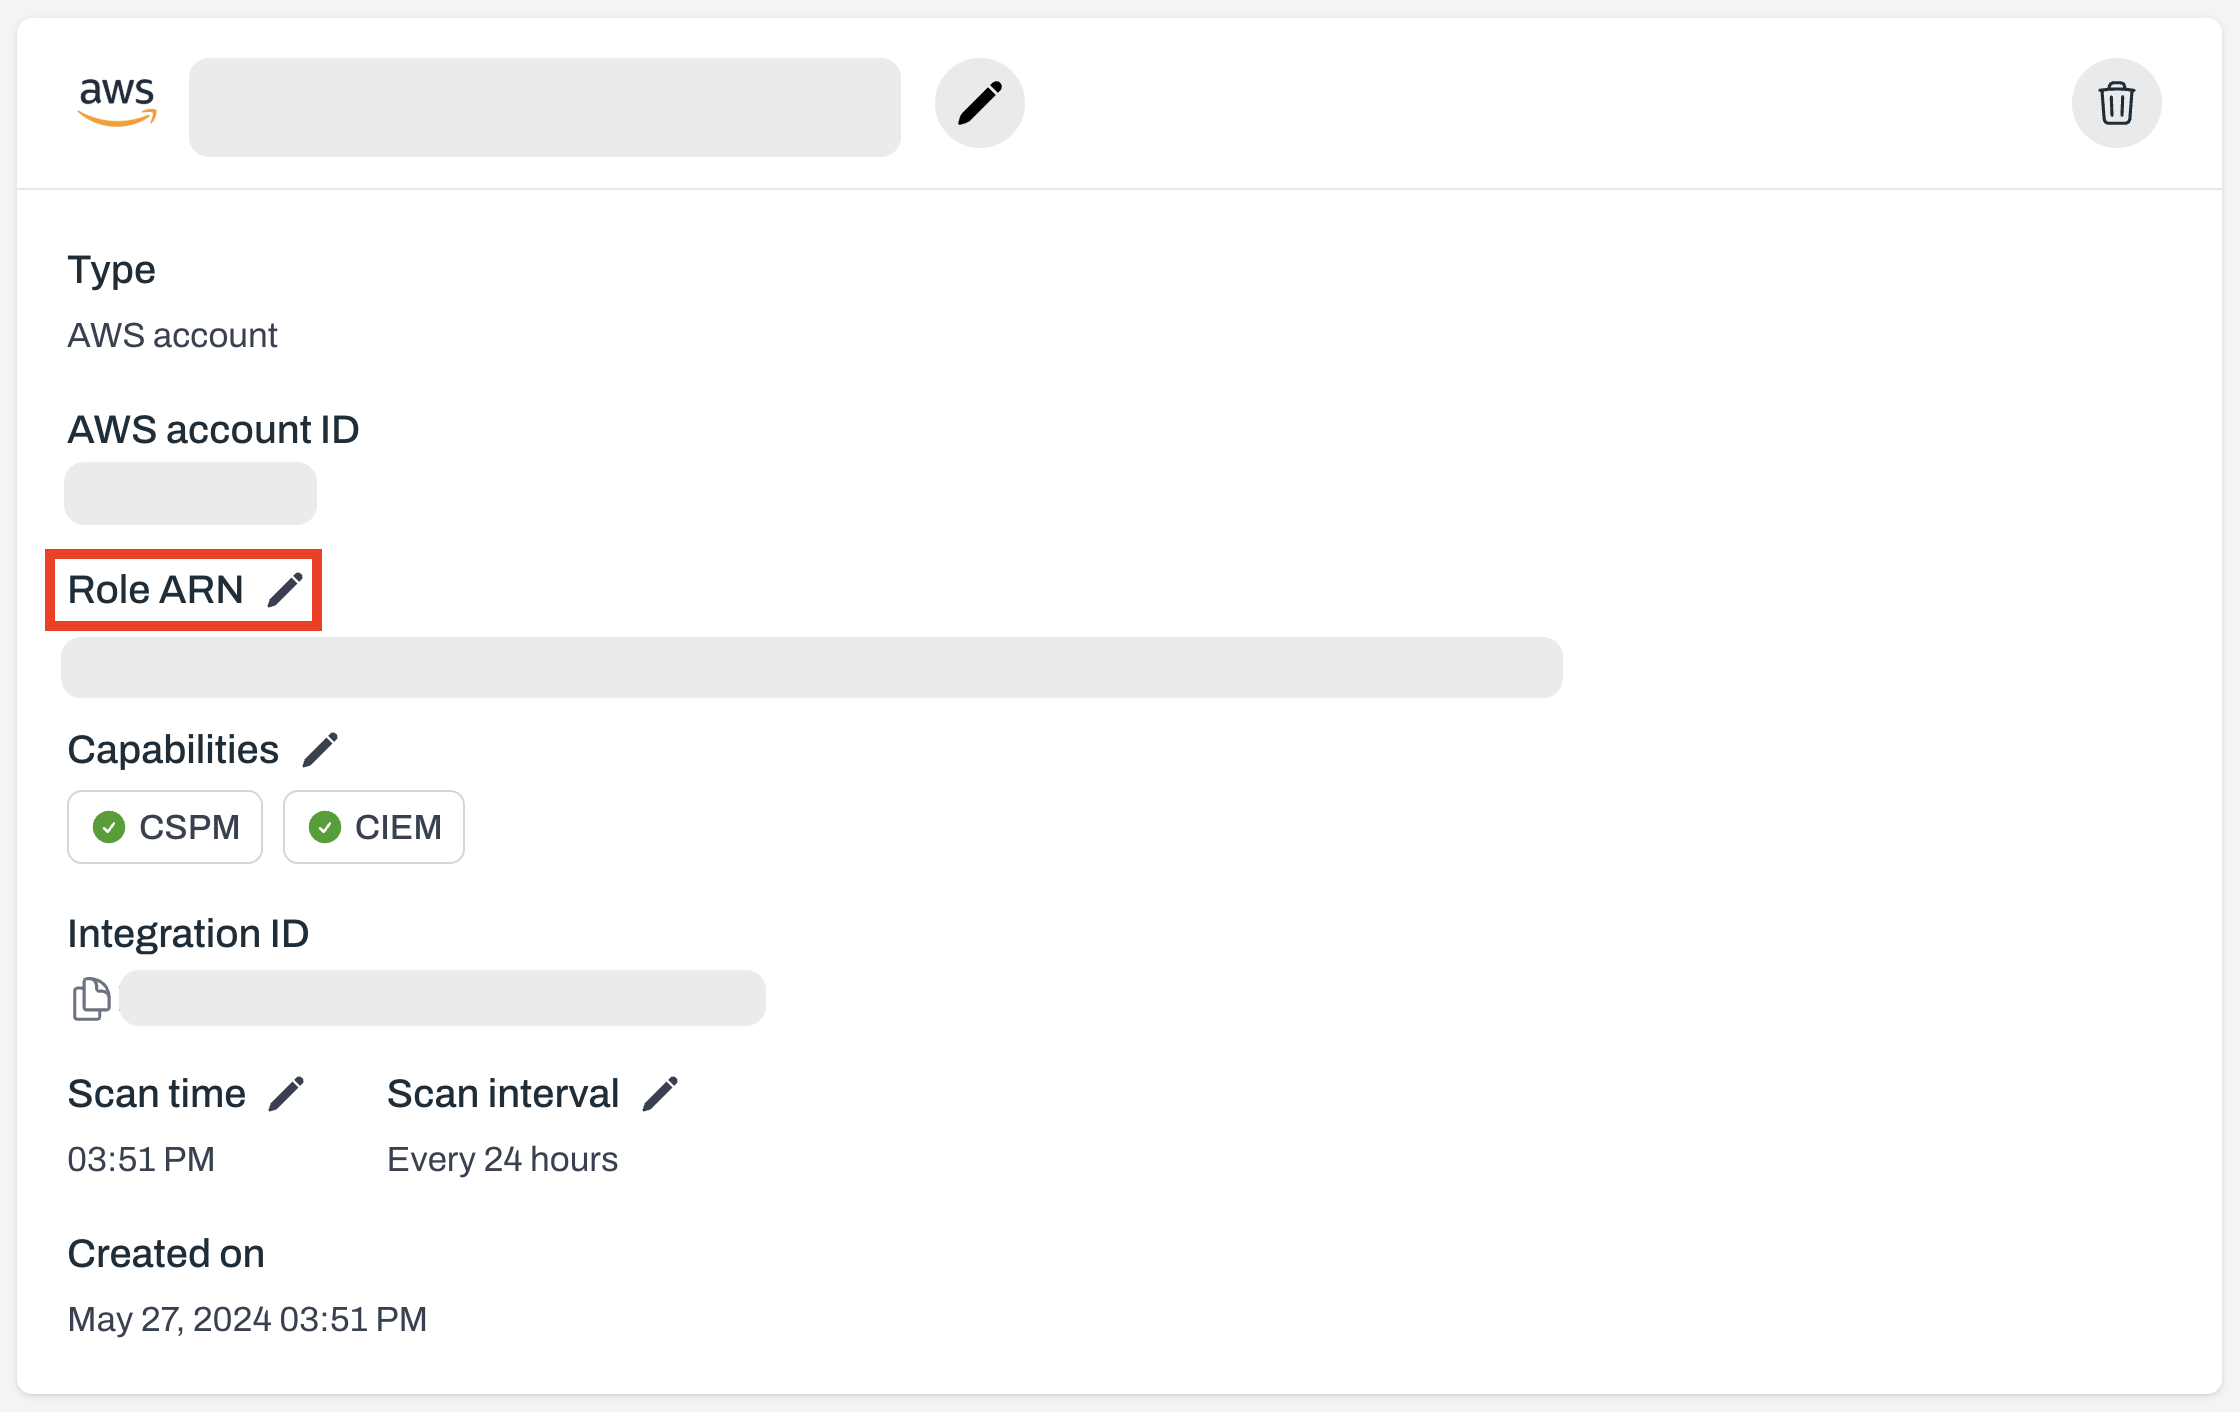
Enable CWPP and select the service account
Under Deployment strategy, choose
Service account and select the service account you created earlier.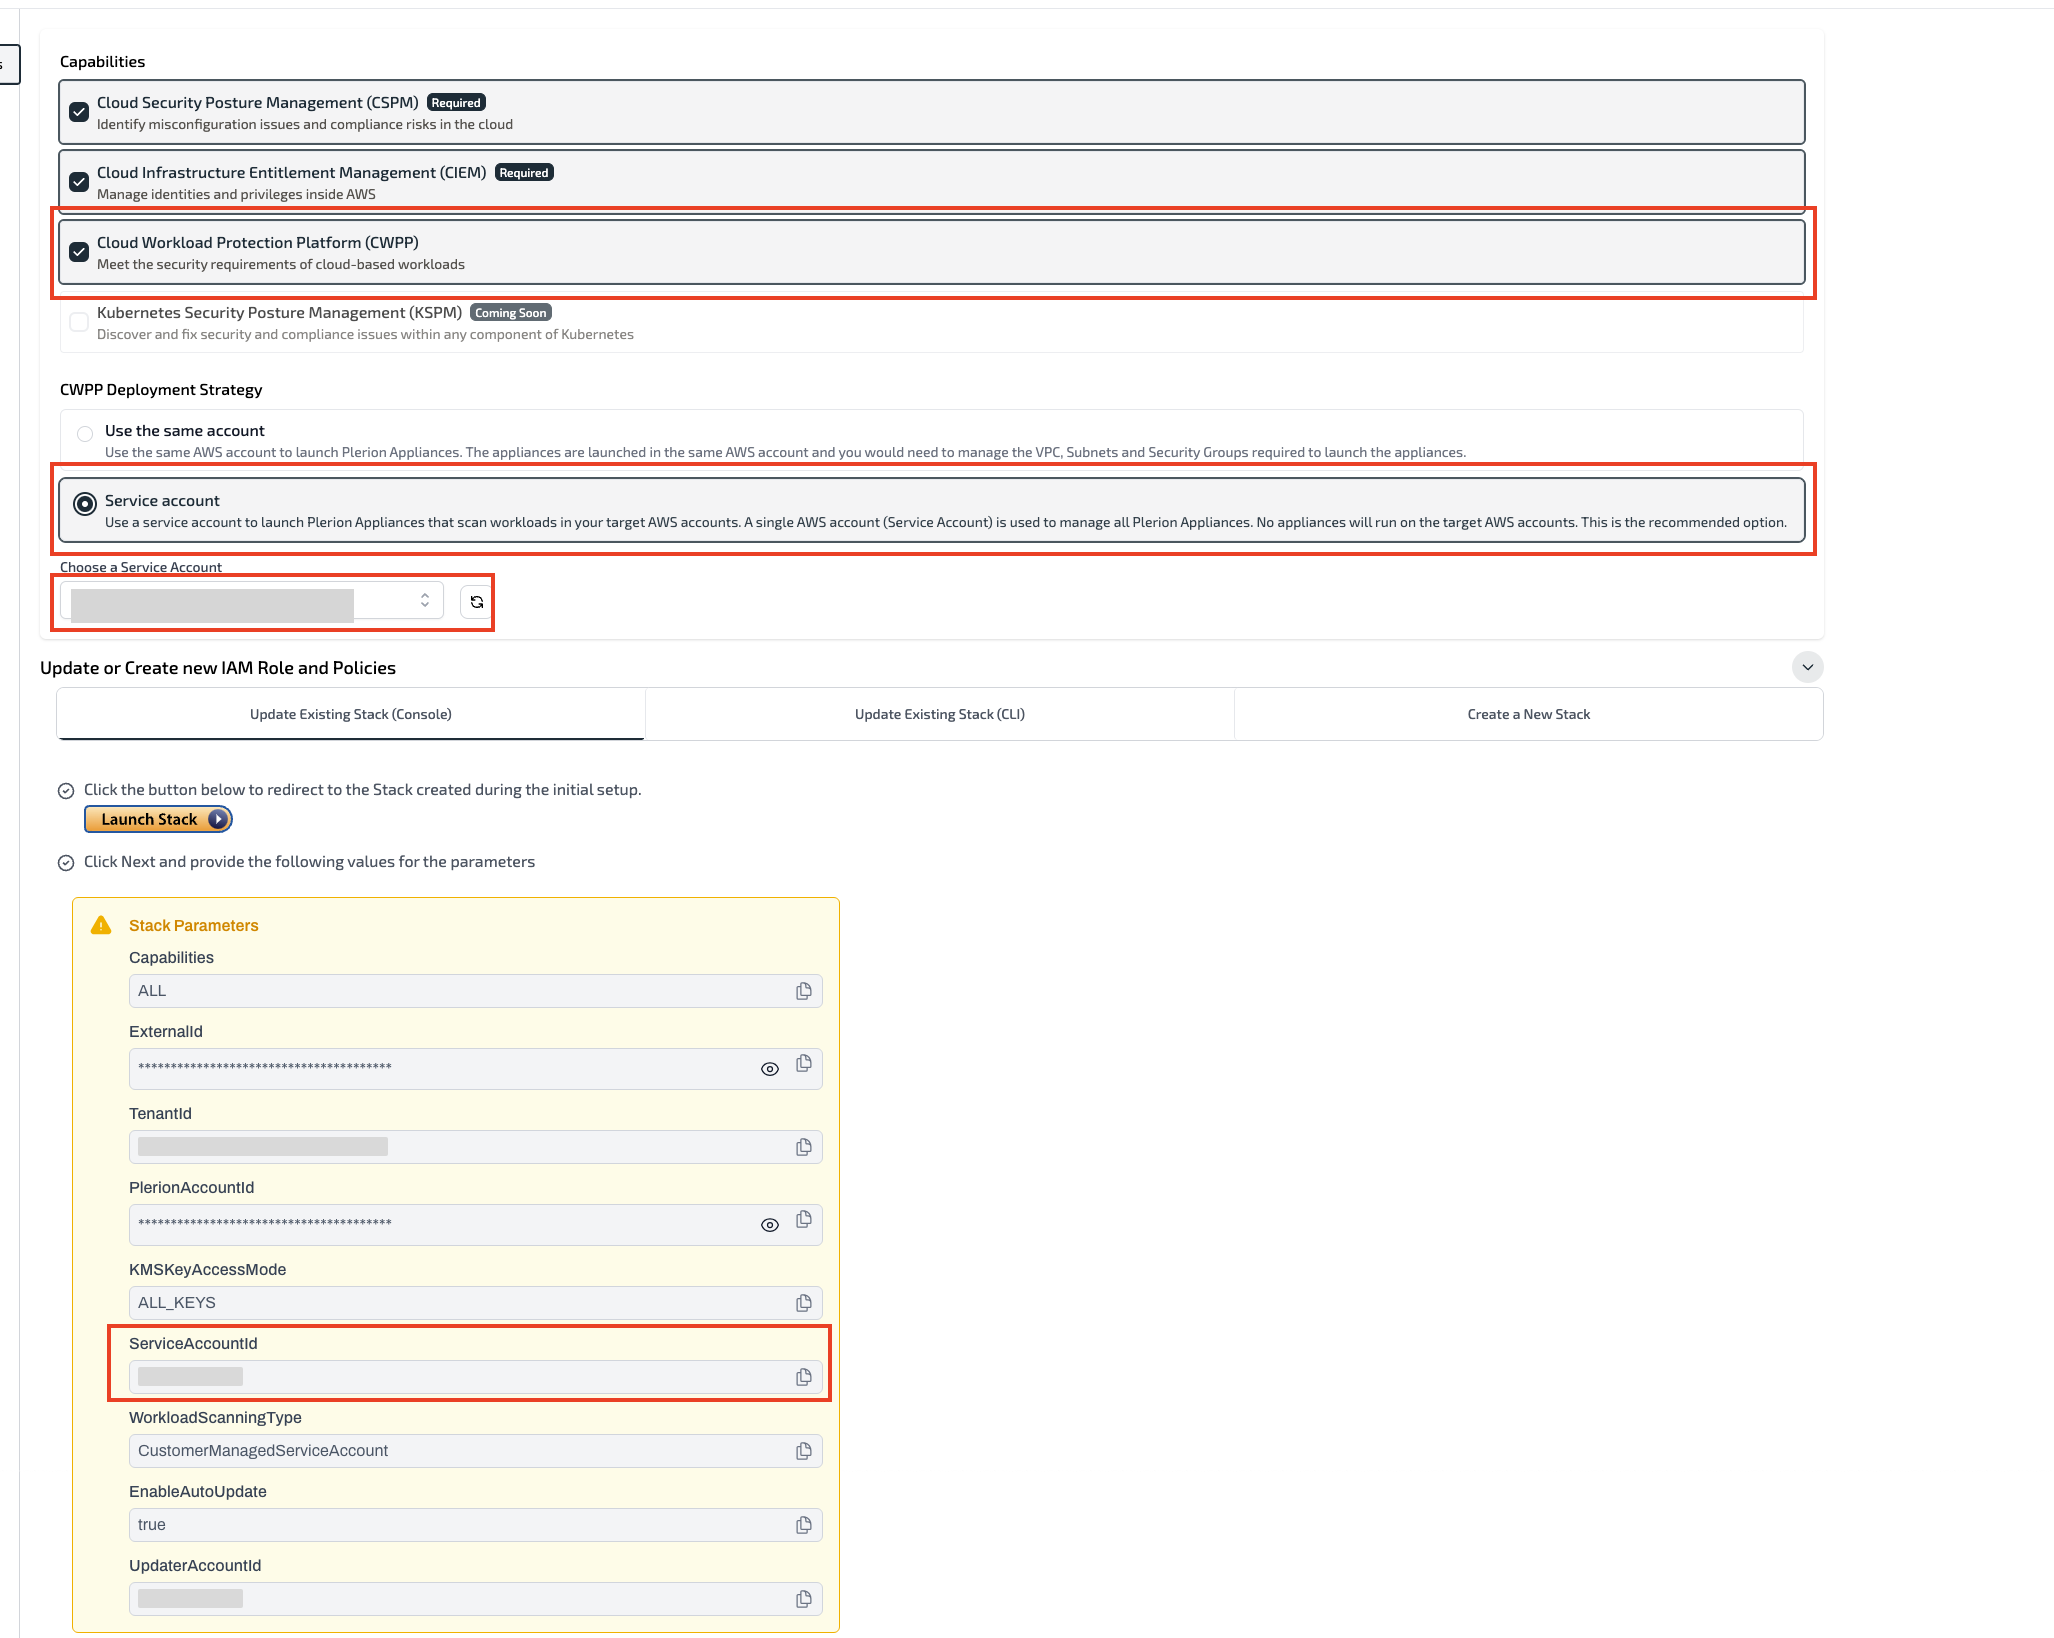
Update stack parameters if required
Run the update in Automated mode (recommended)
- Update the stack using the AWS Console or CLI by following the instructions in Plerion.
- Automated mode is recommended for simplicity and reliability.
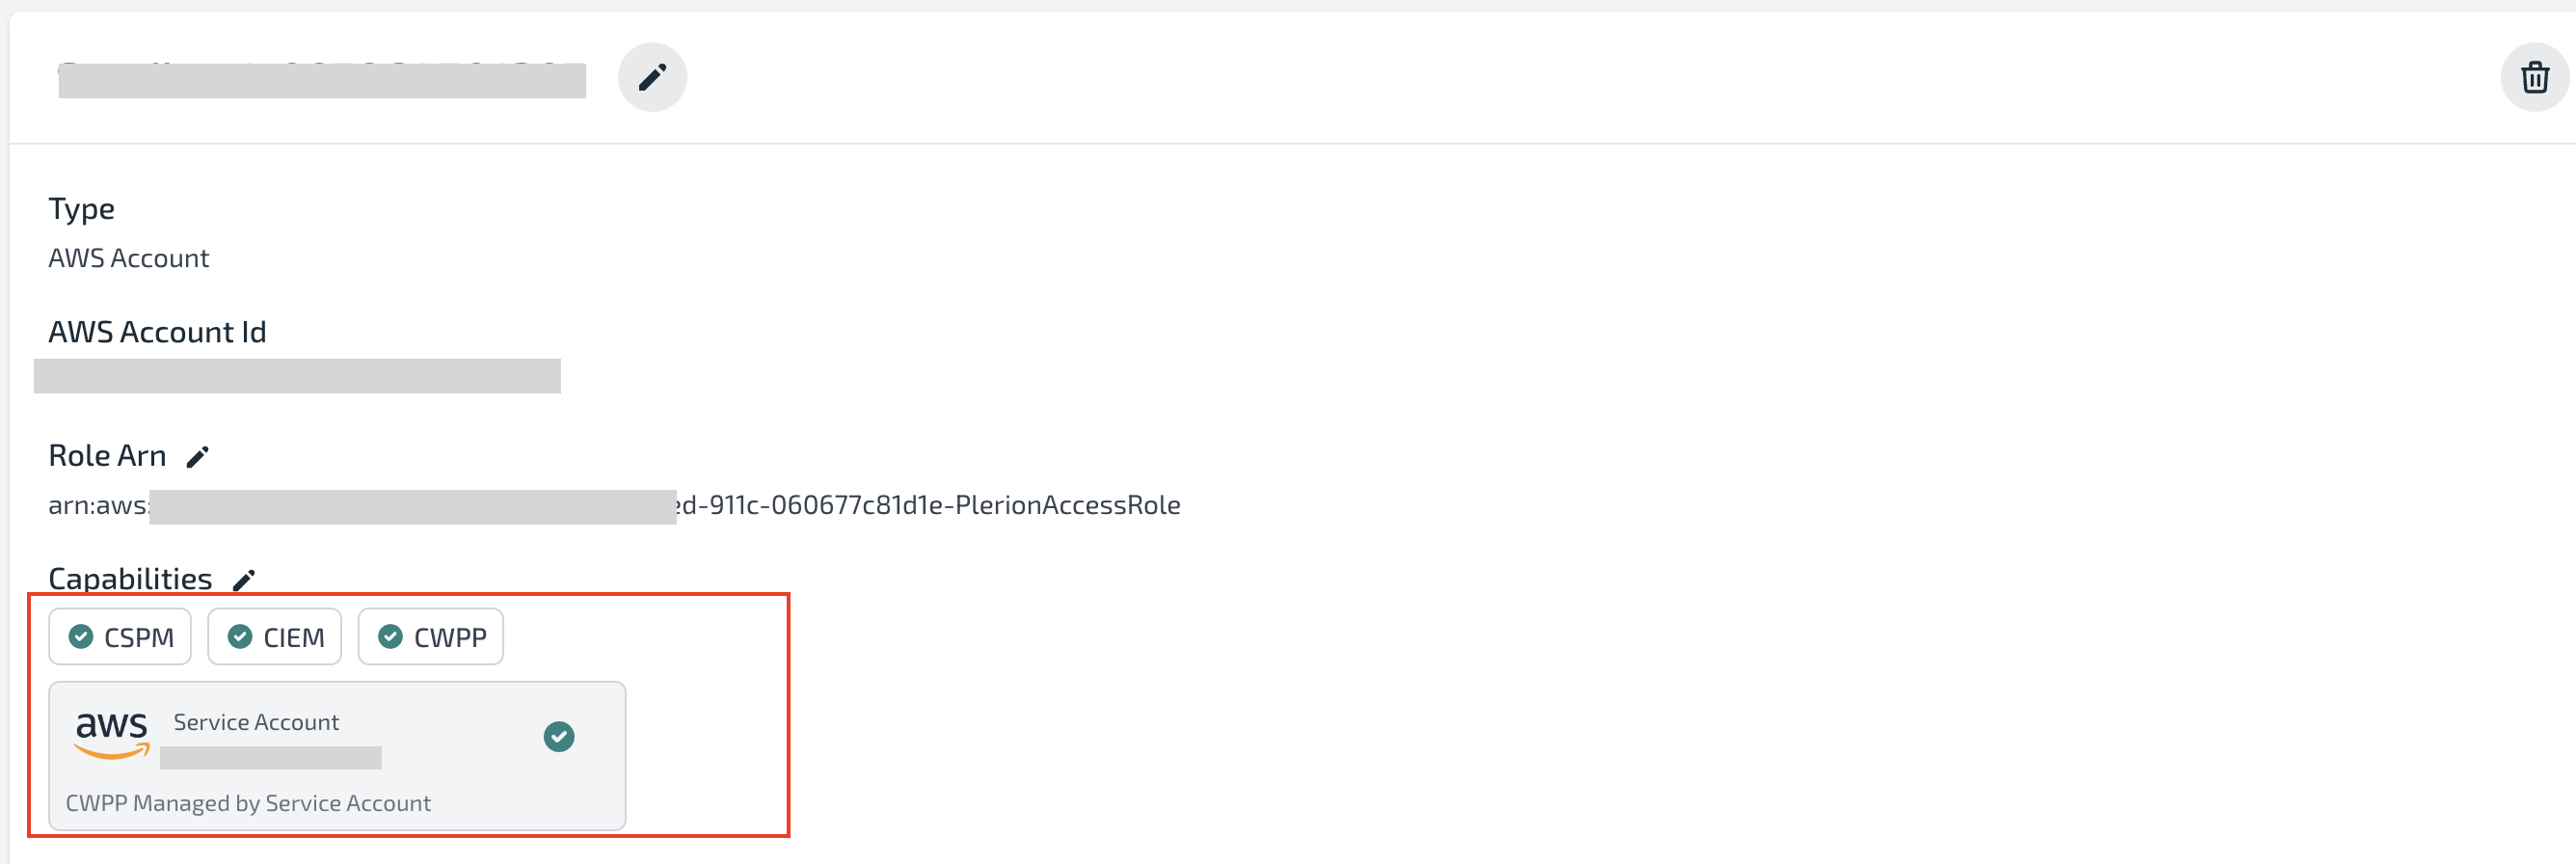
Confirm the integration is updated and linked
Update multiple AWS accounts
Open the AWS management account integration
- On the Plerion dashboard, go to
Settings>Integrations, and find the AWS management account you want to update - Click the edit icon next to Role ARN
Select Multi Account Onboarding
- In the Edit integration page, choose
Update using Multi Account Onboarding. - On the Select capabilities screen, enable
CSPM,CIEM, andCWPP. - Under Deployment strategy, select Service account and choose the service account you created earlier.
Open Update Existing StackSet and follow the guide
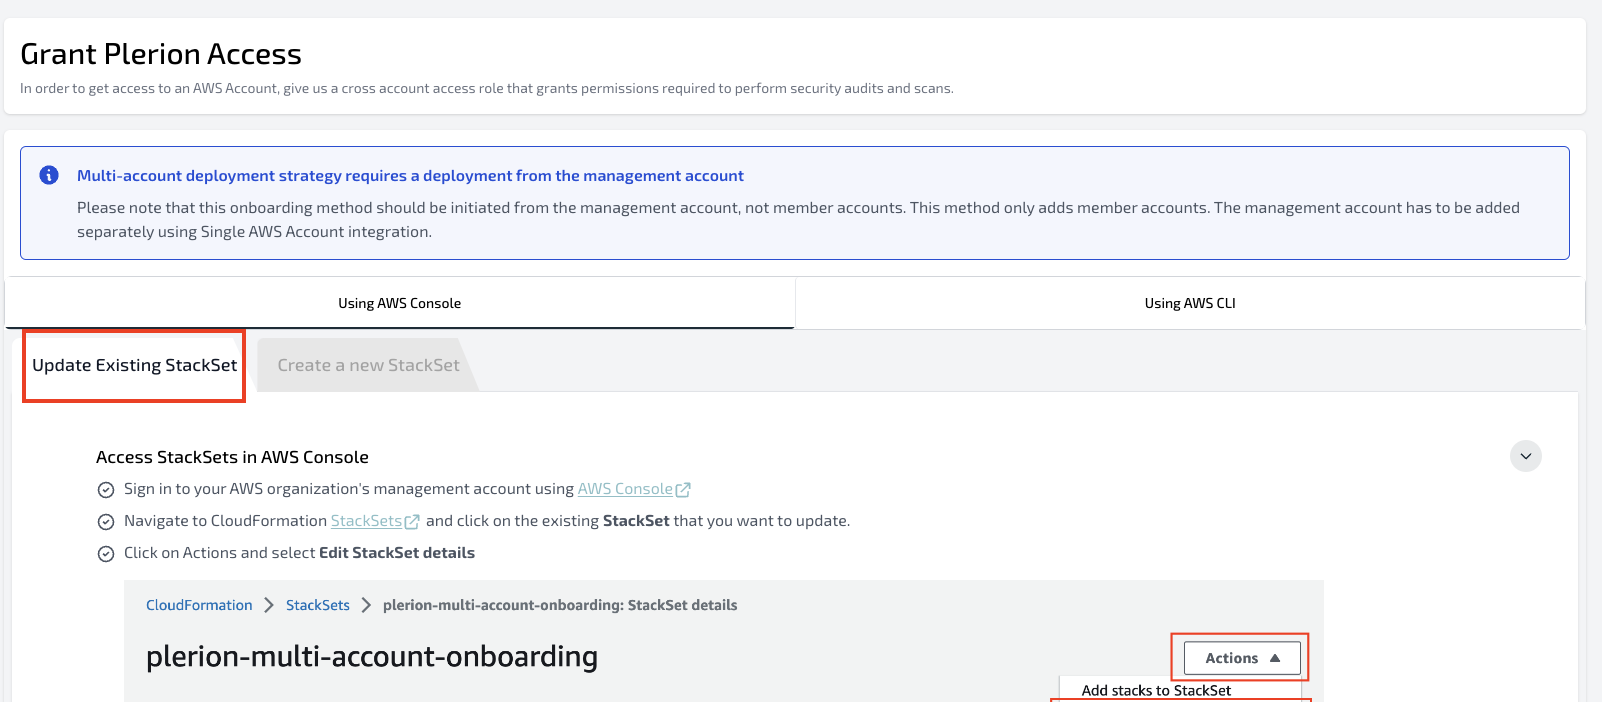
Provide the ServiceAccountId parameter
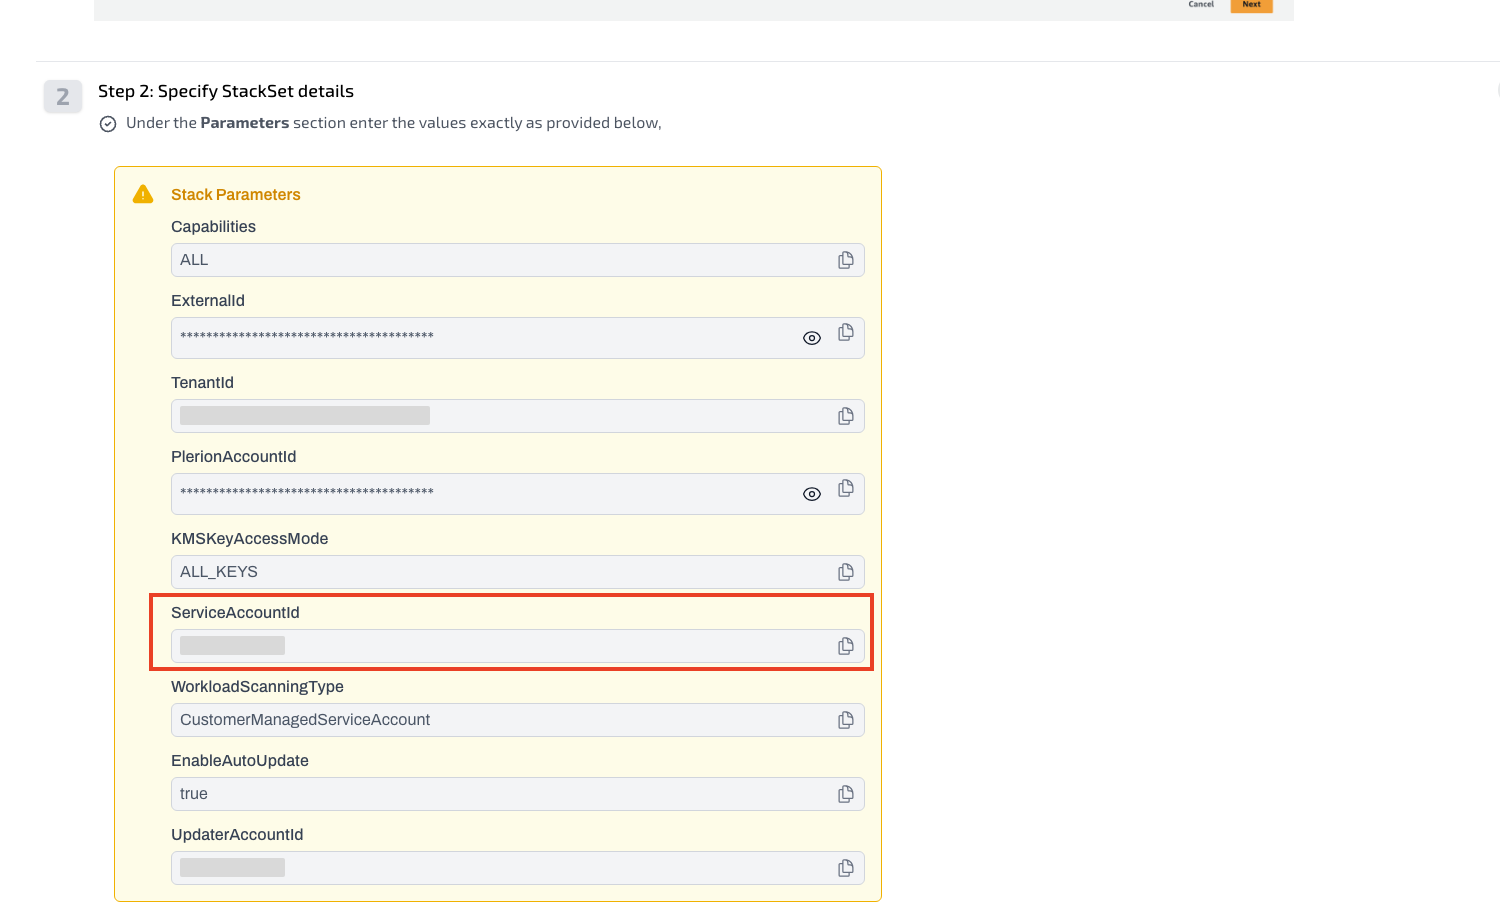
Run the update in Automated mode (recommended)
- Complete the update using the AWS Console or CLI, as instructed in Plerion.
- Automated mode is recommended for simplicity and reliability.
Confirm integrations are updated and linked
Verify the link
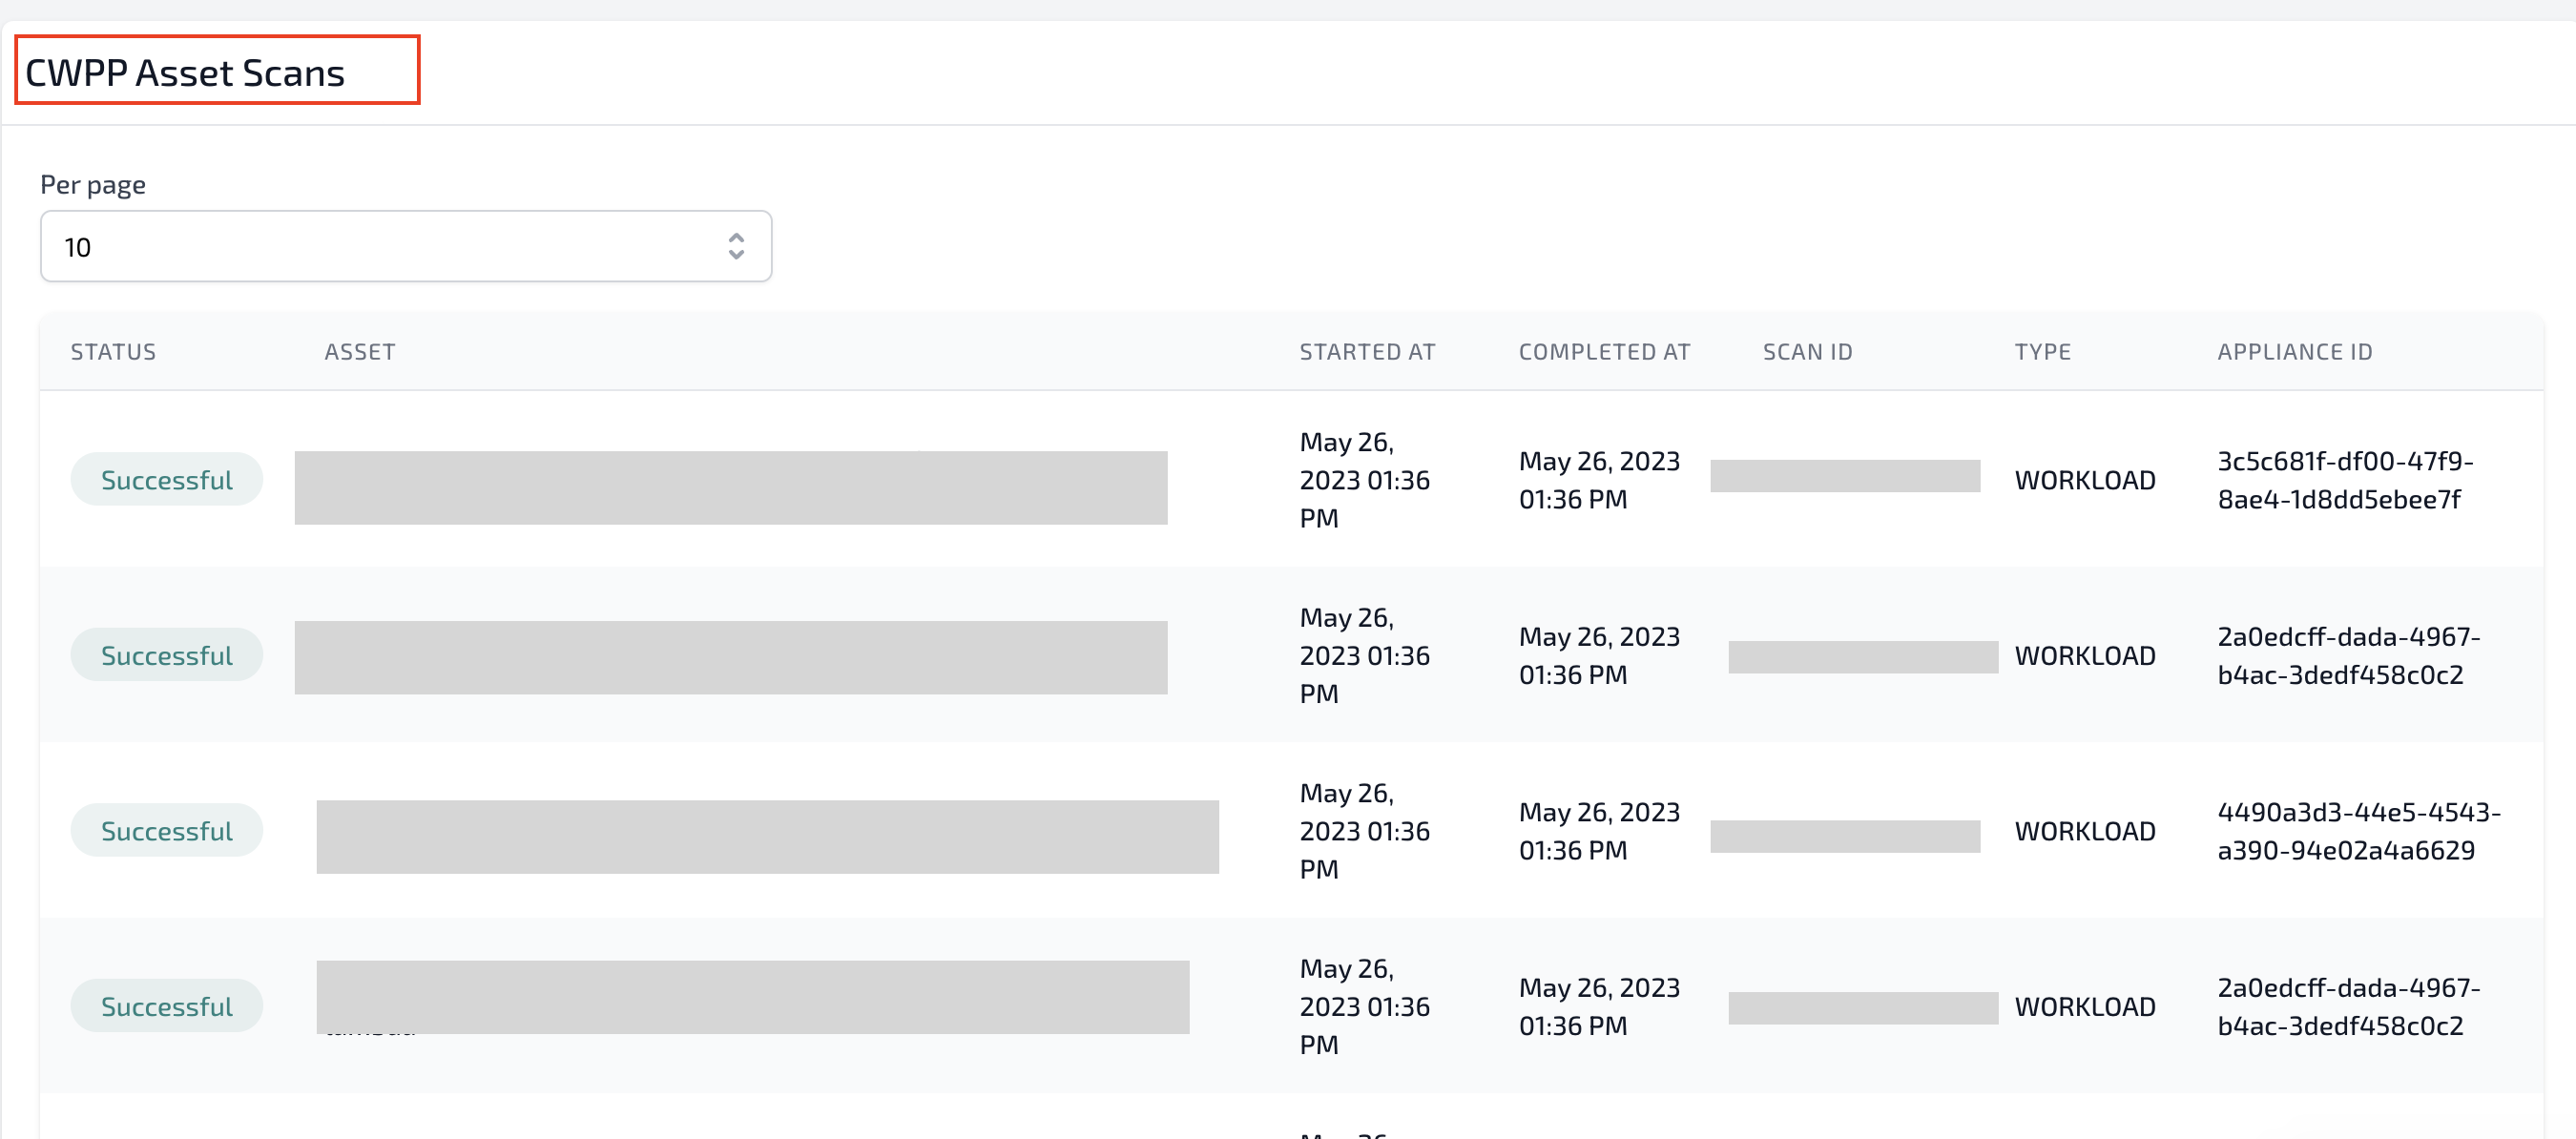
On the Plerion dashboard, go toSettings → Integrations and open the AWS account integration.The integration will show the linked Service account, and CWPP scans will appear once they begin.
Additional resources created
PlerionApplianceRole(IAM role in the target account): Assumed by service account appliances to run scans in the target account.