With the ClickUp integration, you can automatically turn Plerion alerts into tasks in your ClickUp workspace, so your team can track and respond in the workspace they already use every day.
Note: This is a one-way outbound integration. Alerts created or updated in Plerion will appear in ClickUp, but changes made directly in ClickUp will not sync back to Plerion.

Steps to integrate ClickUp with Plerion

1

On the Plerion dashboard, go to Settings > Integrations
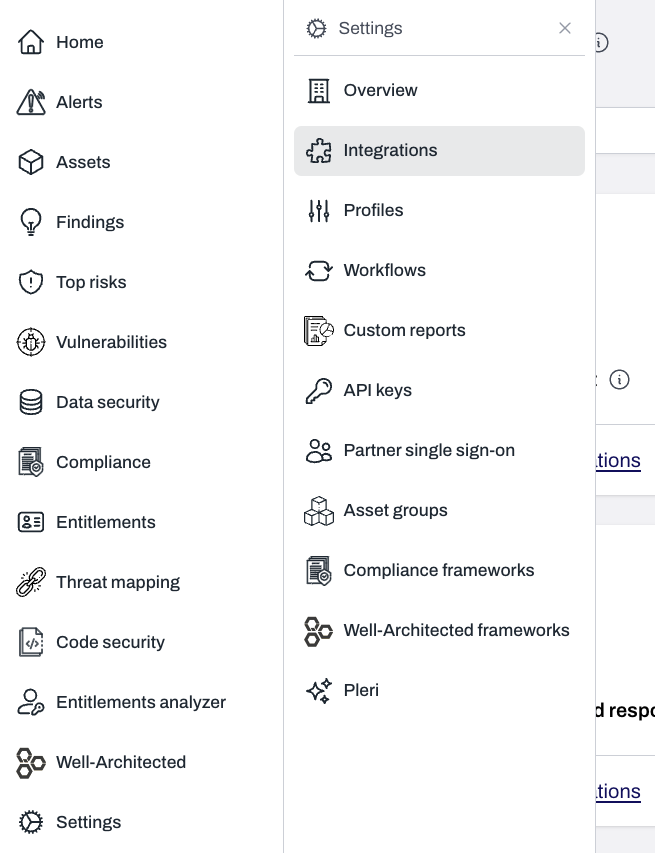
Sidebar navigation with Settings expanded and Integrations highlighted
2

Find ClickUp and click the + button
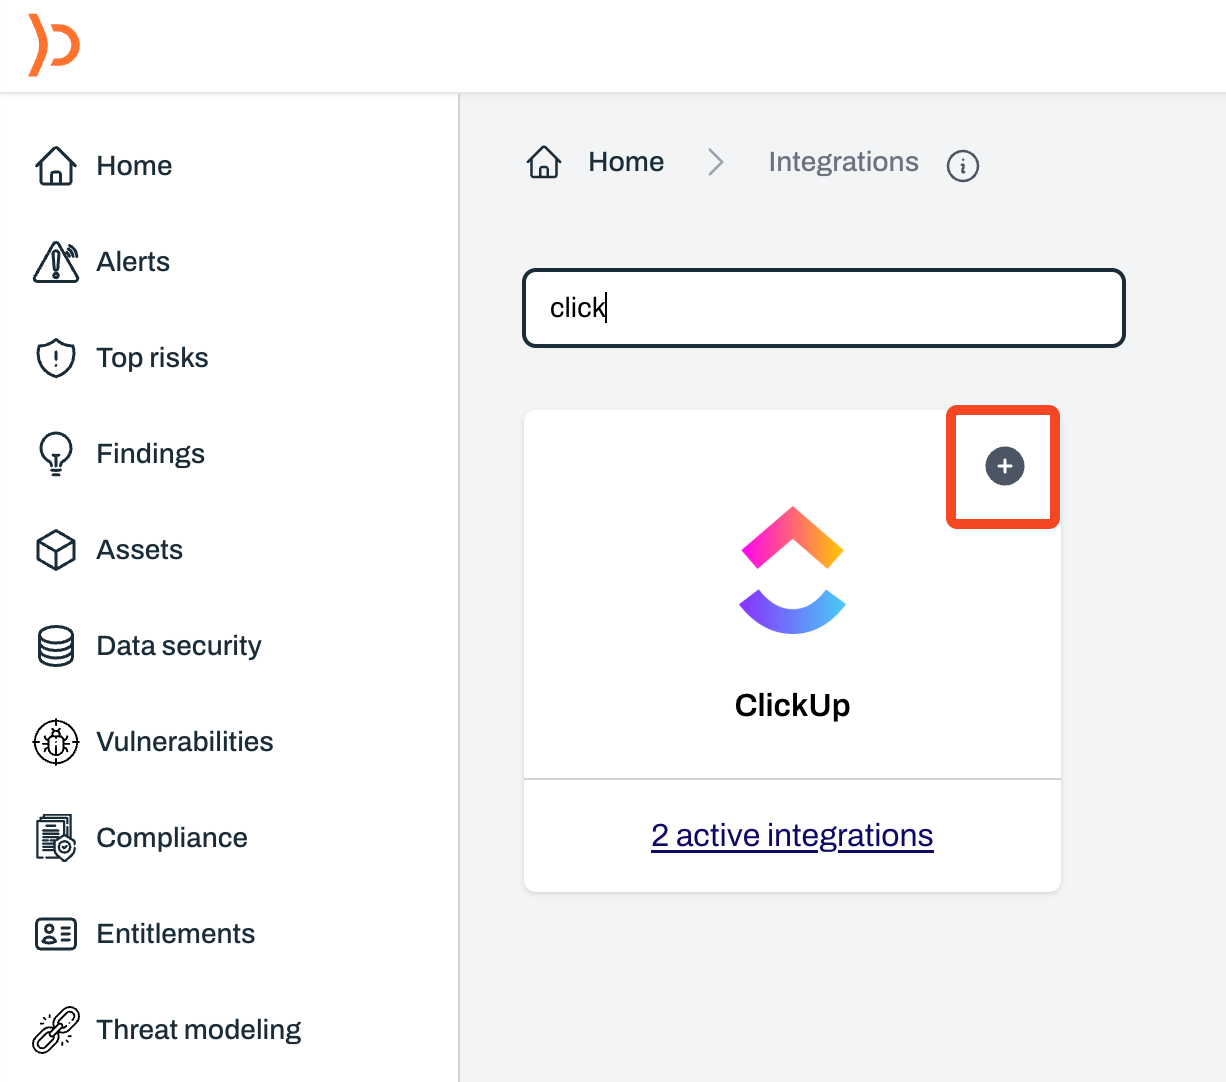
Integrations page with ClickUp option and plus button to add integration
3

On the Connect ClickUp page, enter a name for your integration and select Connect ClickUp

Connect ClickUp page showing fields for integration name and Connect ClickUp button
4

A ClickUp OAuth pop-up will appear

Review the requested permissions and click Accept to authorize the connection.
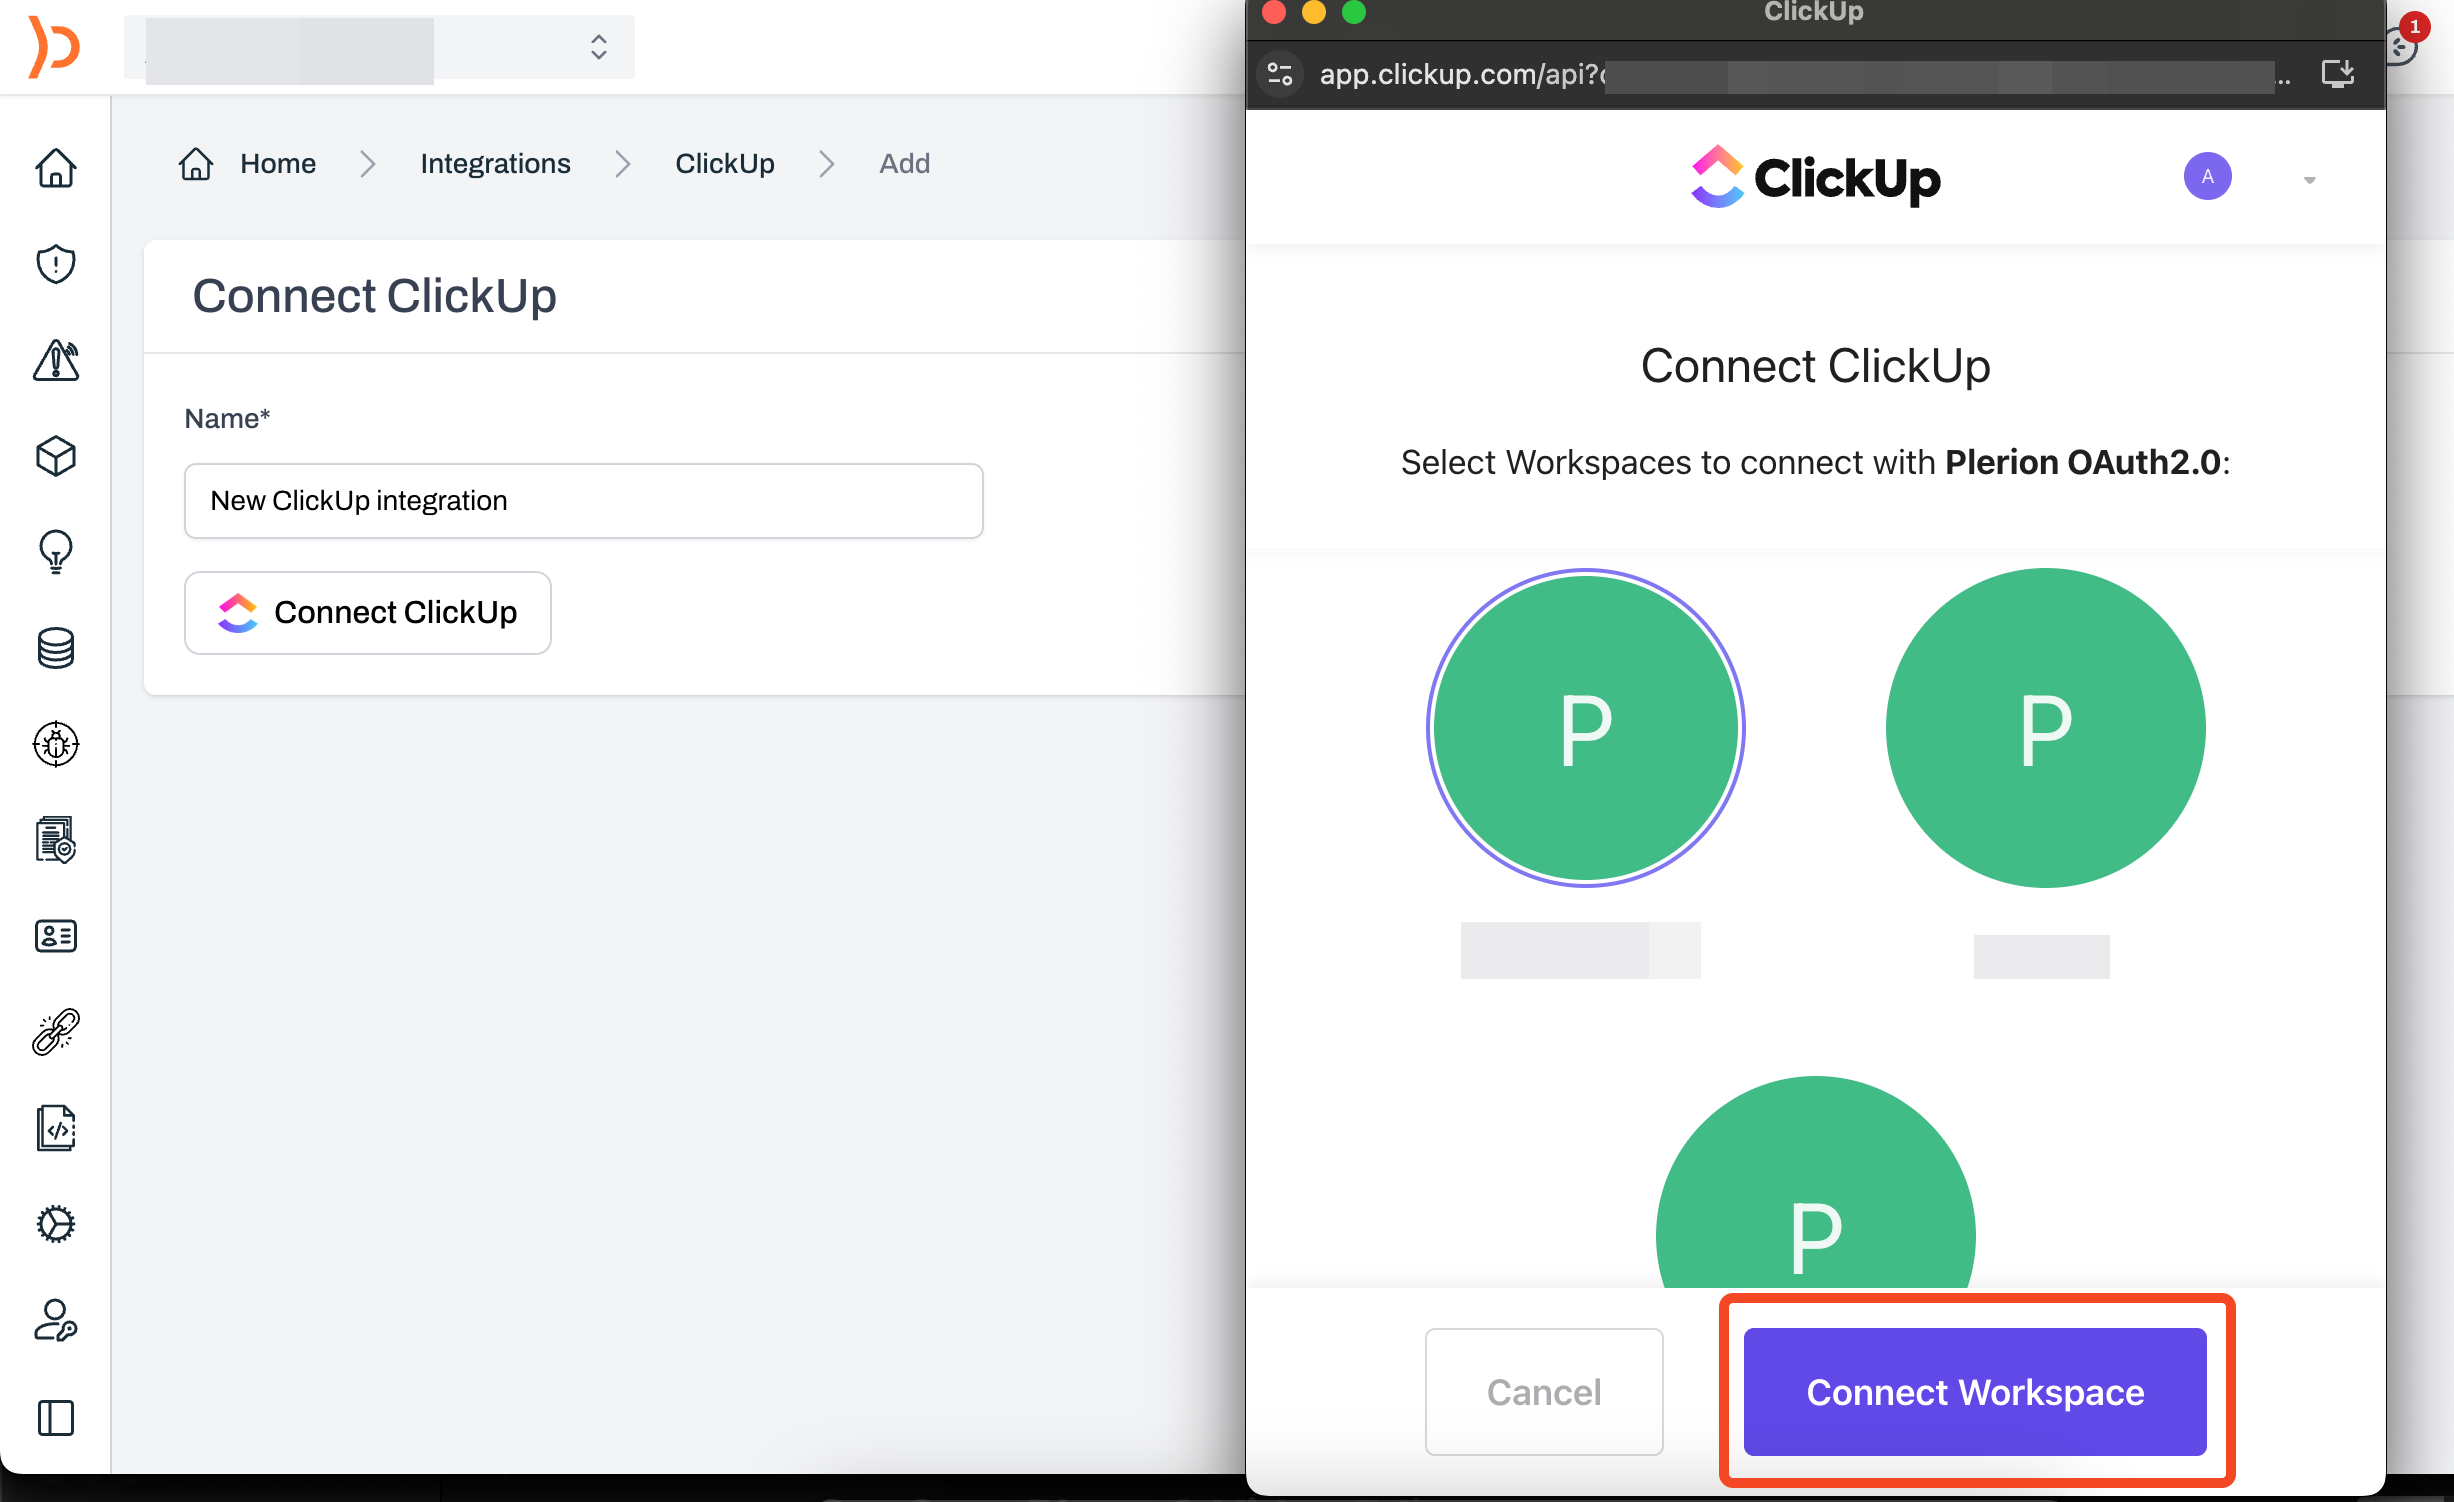
ClickUp OAuth pop-up requesting access
5

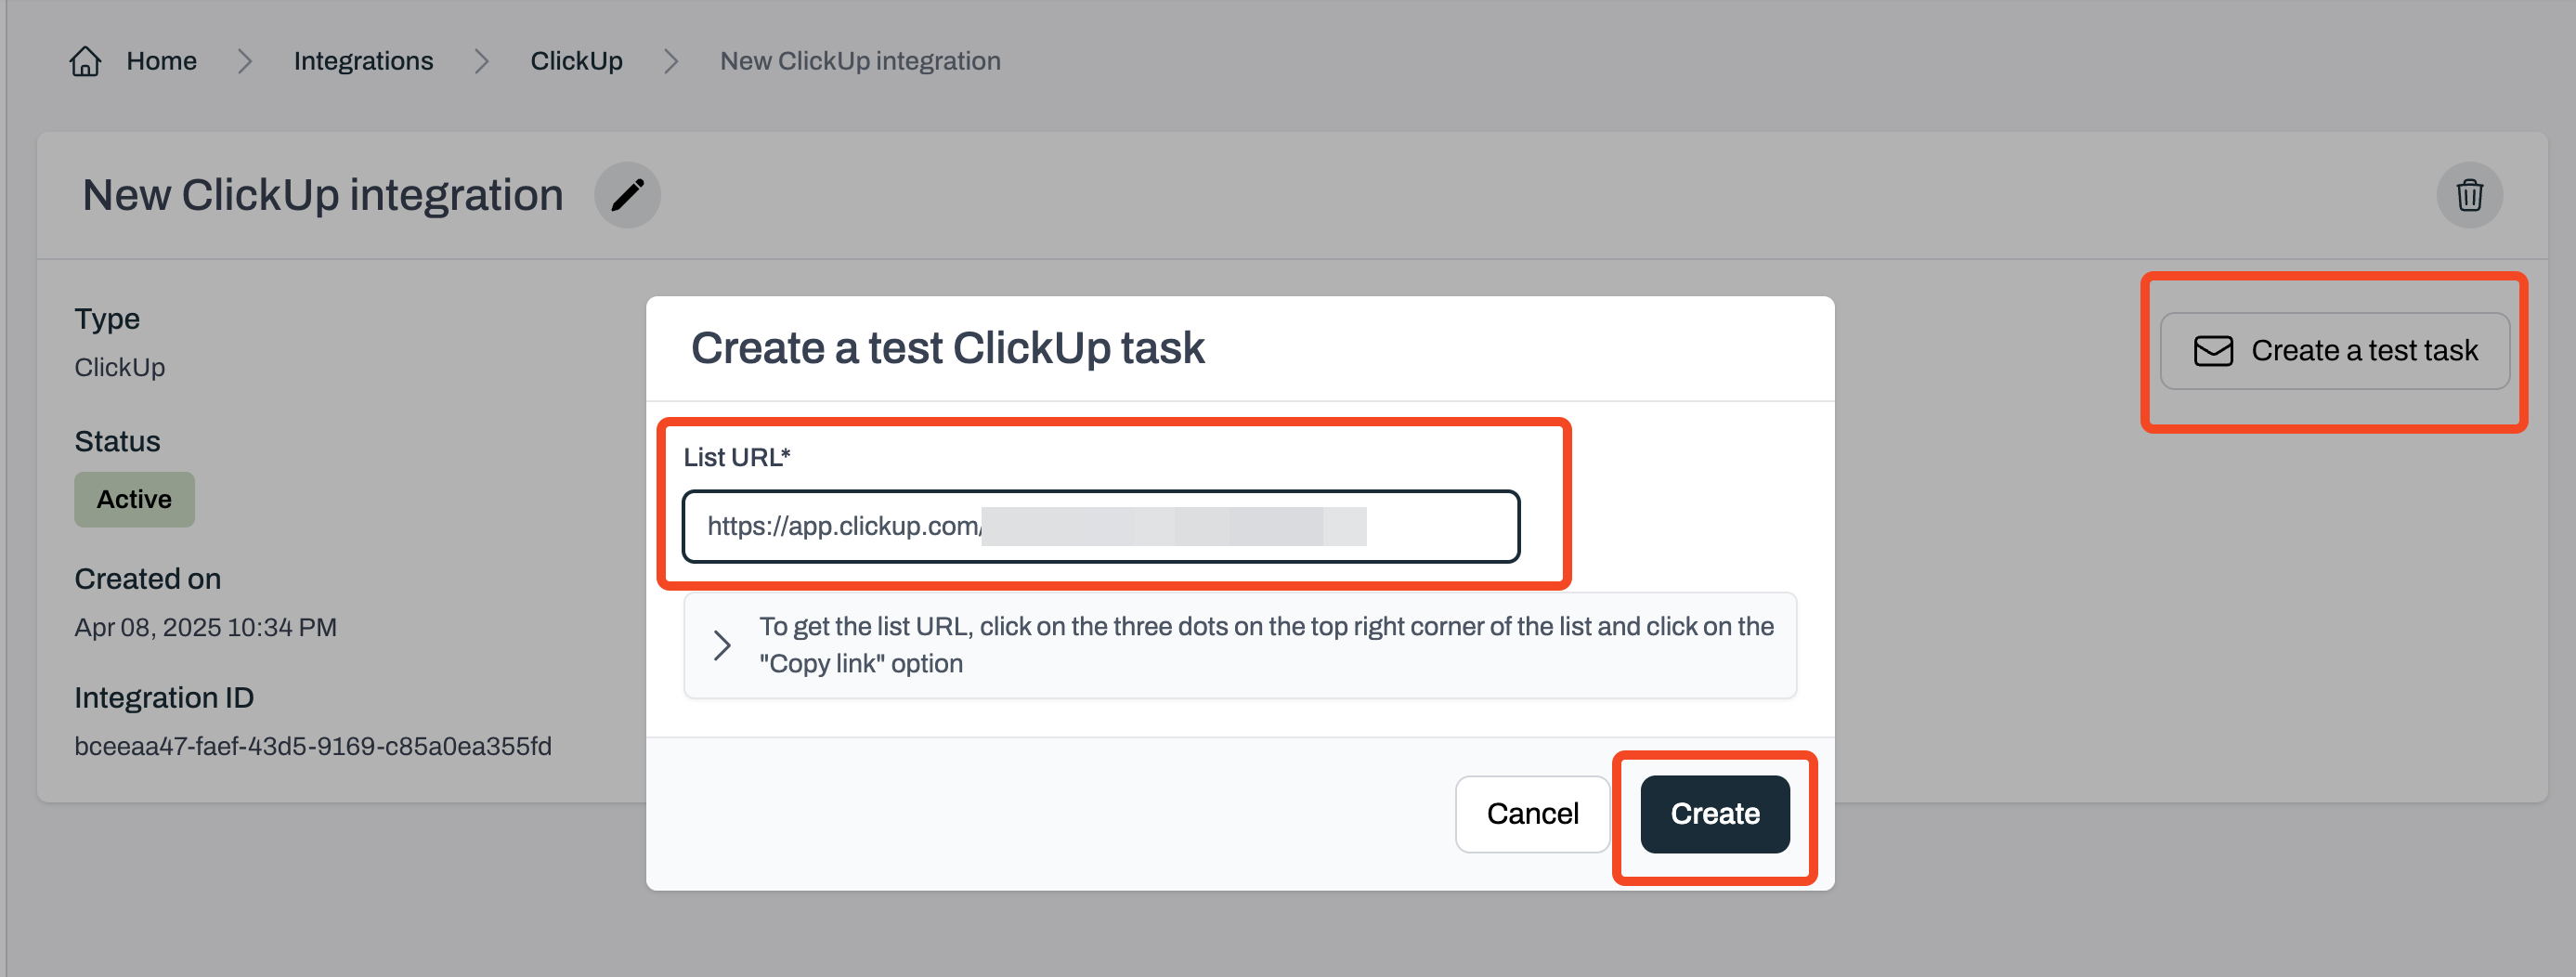
Test your ClickUp integration

Enter the list URL where the test task should be created. To find it, open ClickUp, click the three dots in the top-right corner of the list, and click Copy link.
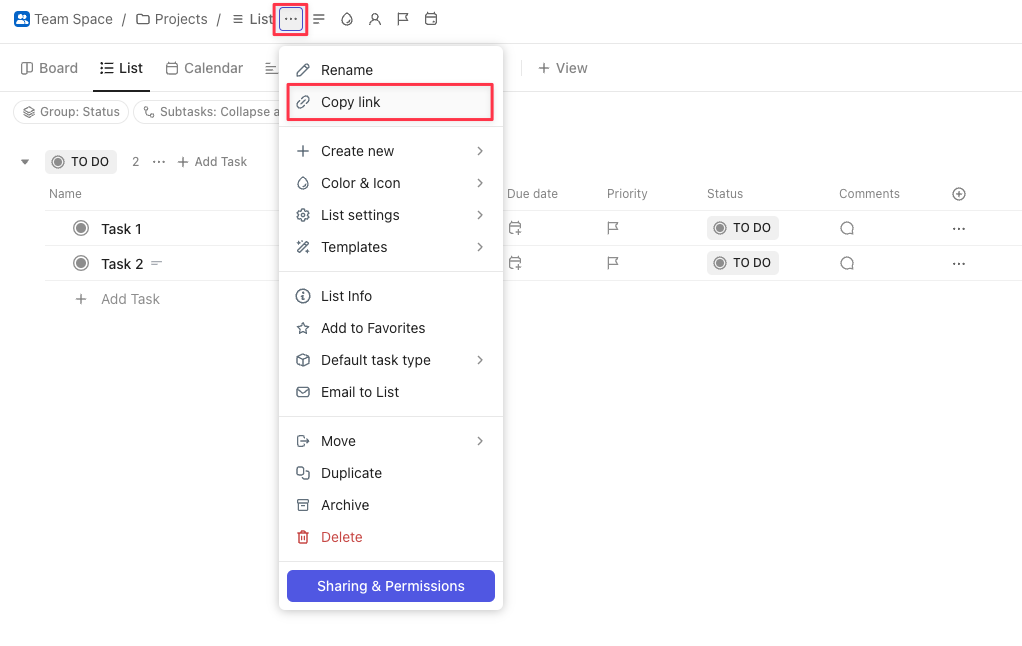
ClickUp app list menu with Copy link option highlighted

Plerion platform showing test task creation for ClickUp
6

Review your test task in ClickUp

If the test is successful, Plerion will display a link to the created ClickUp task.
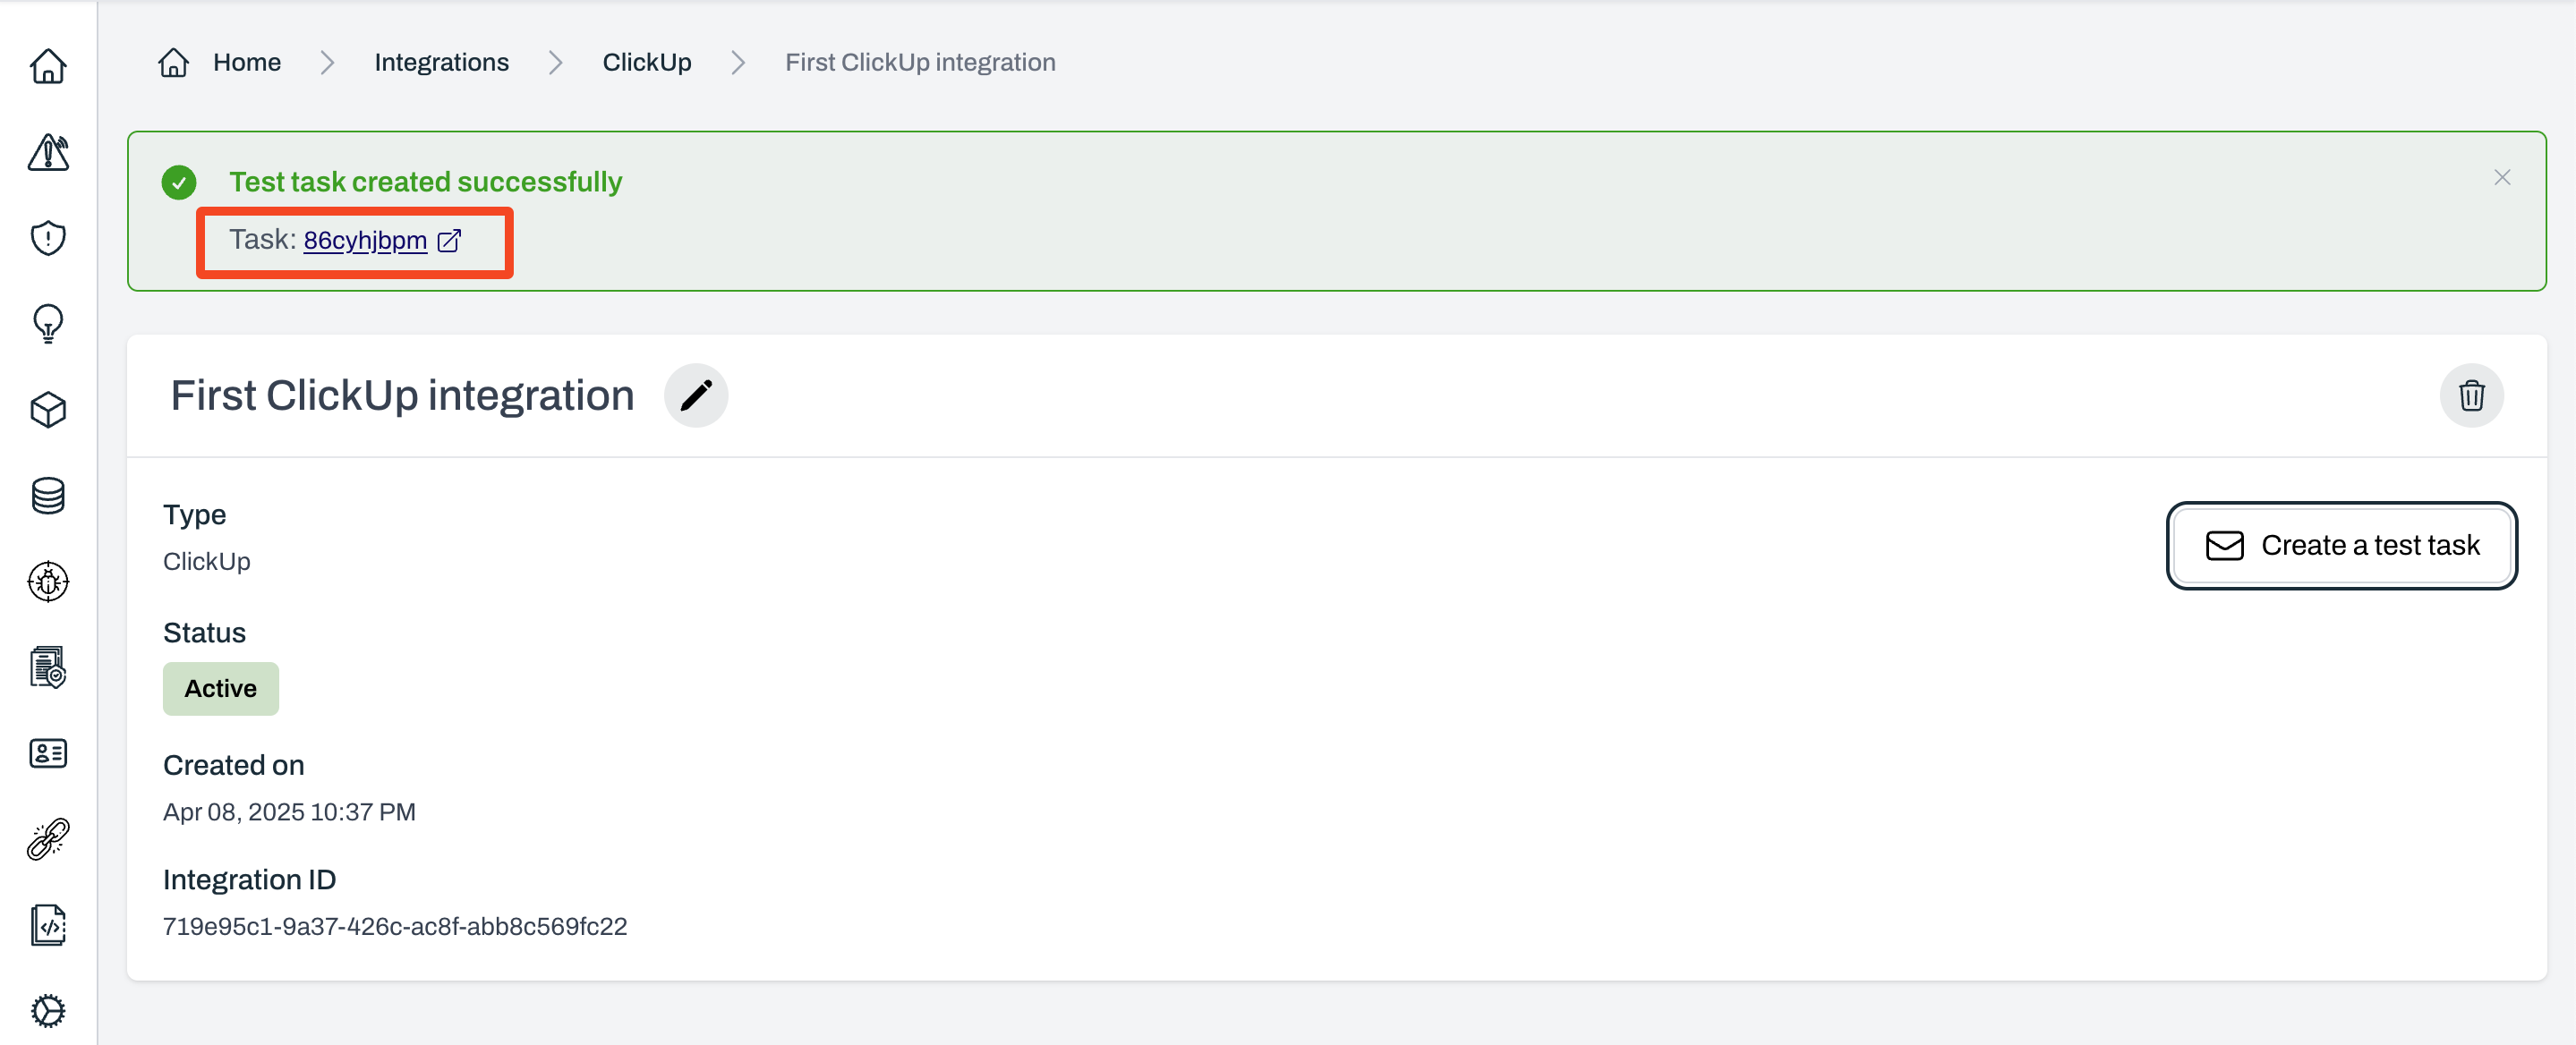
Confirmation message on Plerion with link to created ClickUp task
I