Steps to add a Microsoft Entra ID integration
1
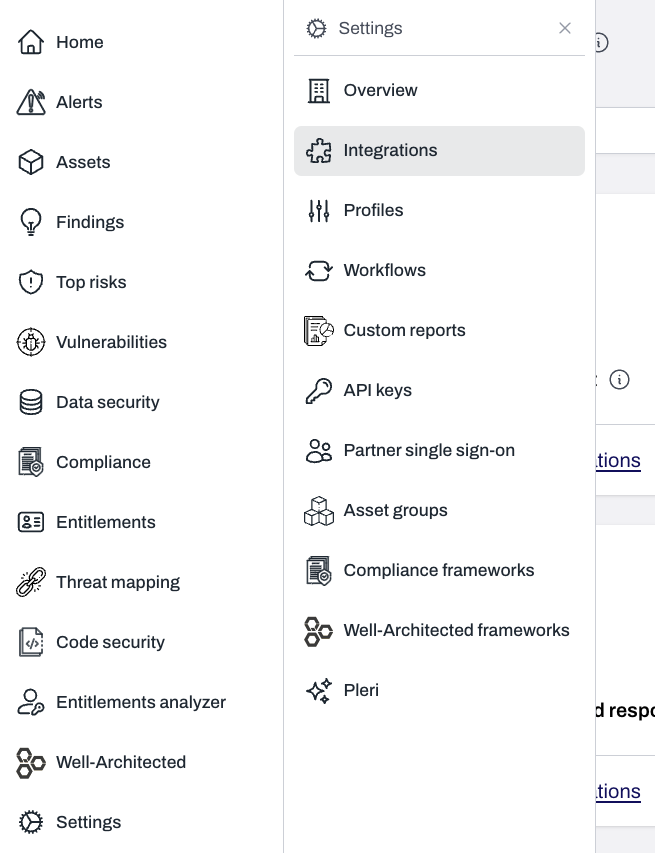
On the Plerion dashboard, go to Settings > Integrations
2
Find Microsoft Entra ID and click the + button

3
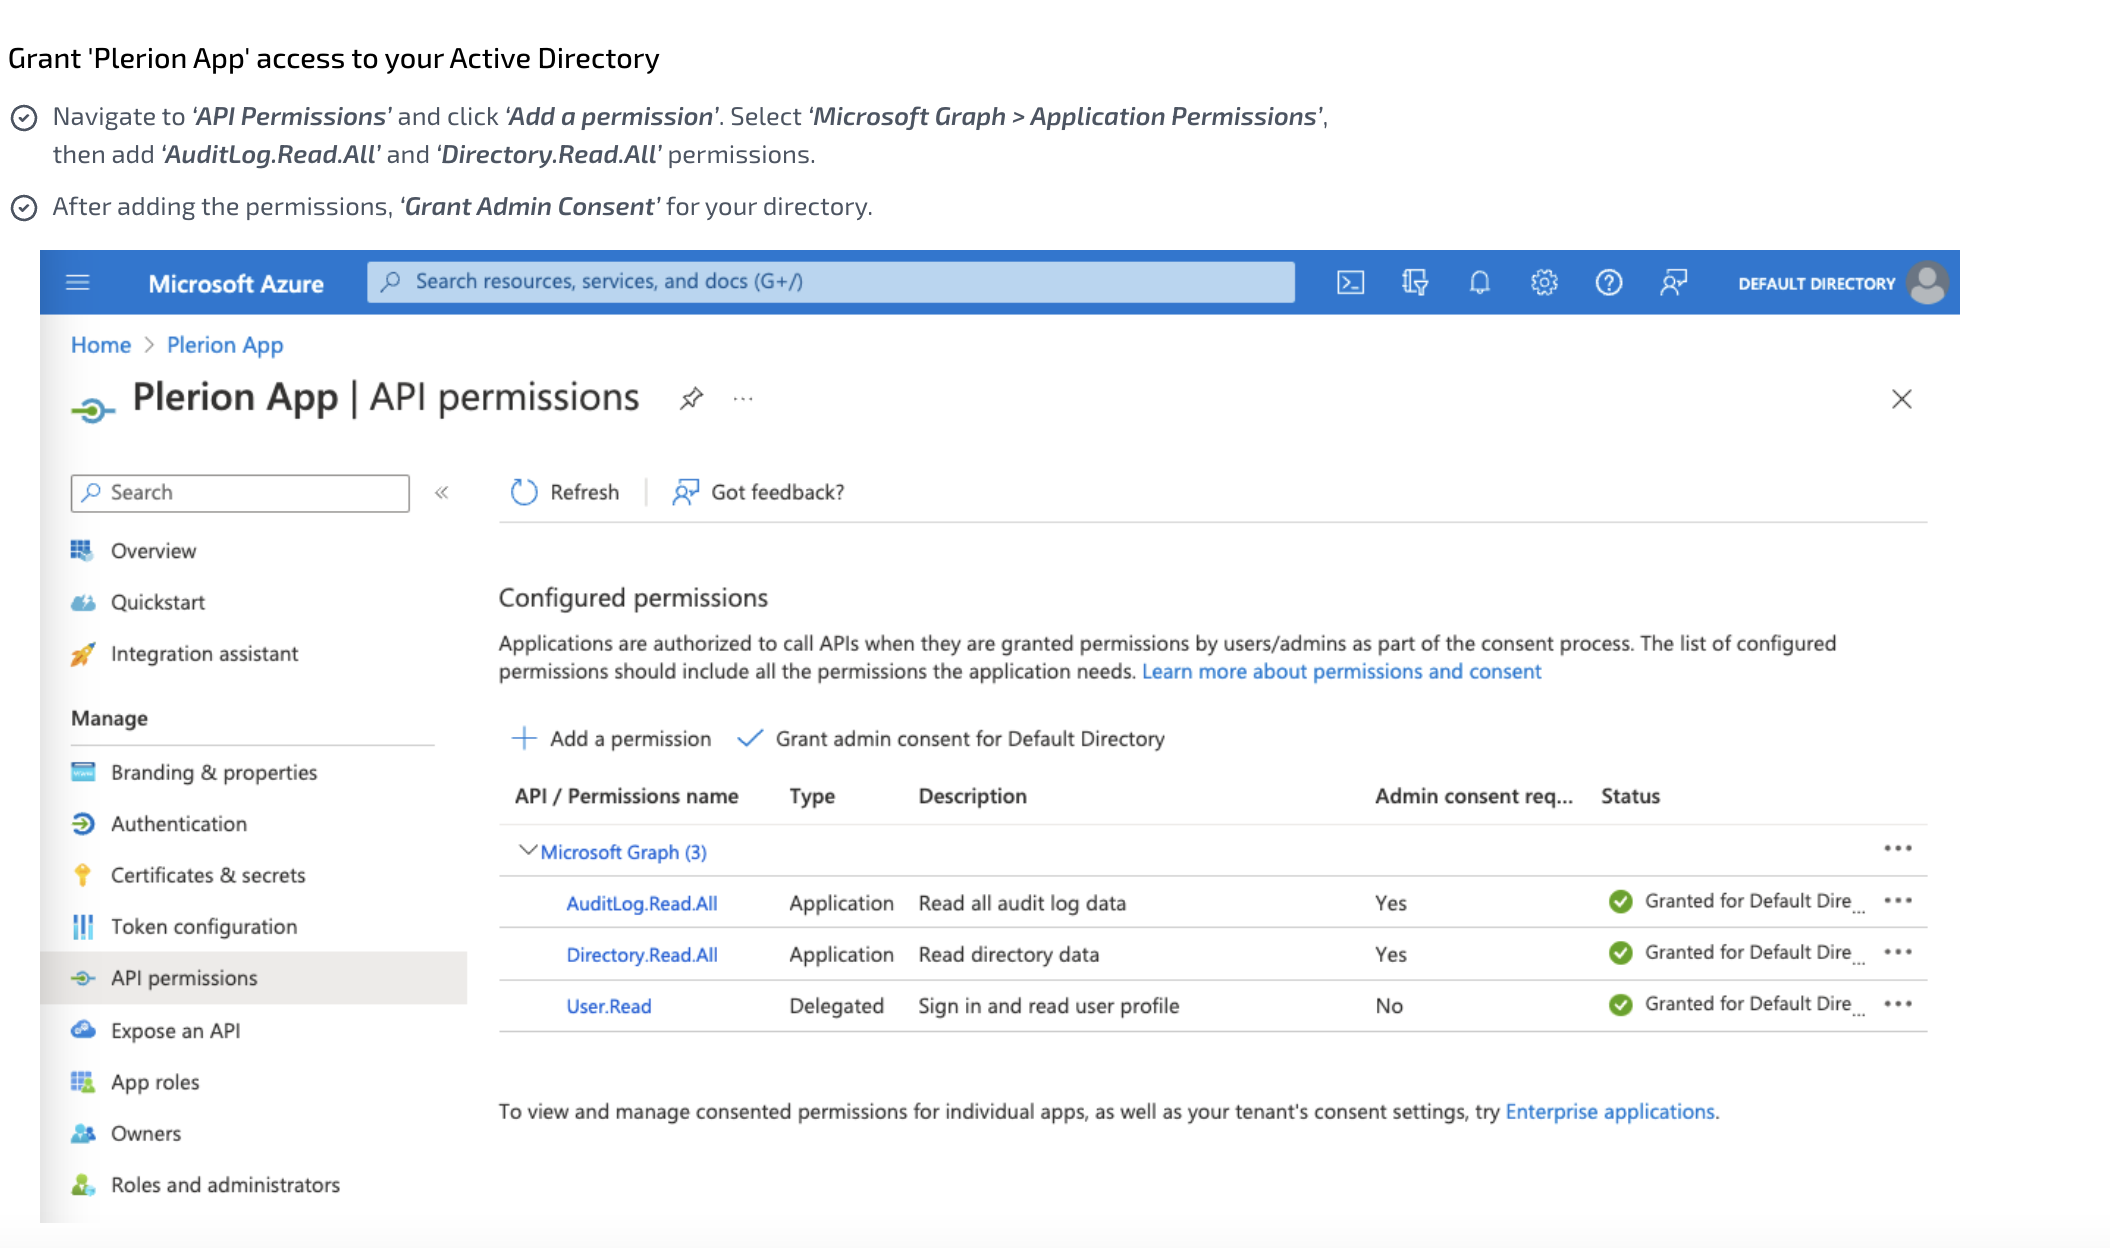
Create a new app registration in Azure
- Follow the instructions provided on the Connect Microsoft Entra ID page to register an app in Azure.
- Ensure the app registration has the required permissions.
4
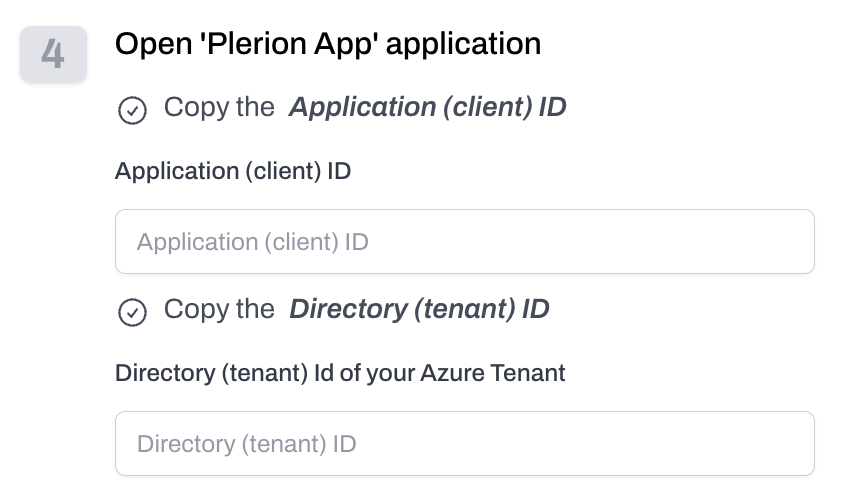
Enter application details in Plerion
- Provide the Application ID, Directory ID, and Client Secret from the Azure App registration.
- Then click
Add.

5
Add Azure subscriptions linked to the directory
After Microsoft Entra ID is connected, you will be prompted to add subscriptions linked to that directory.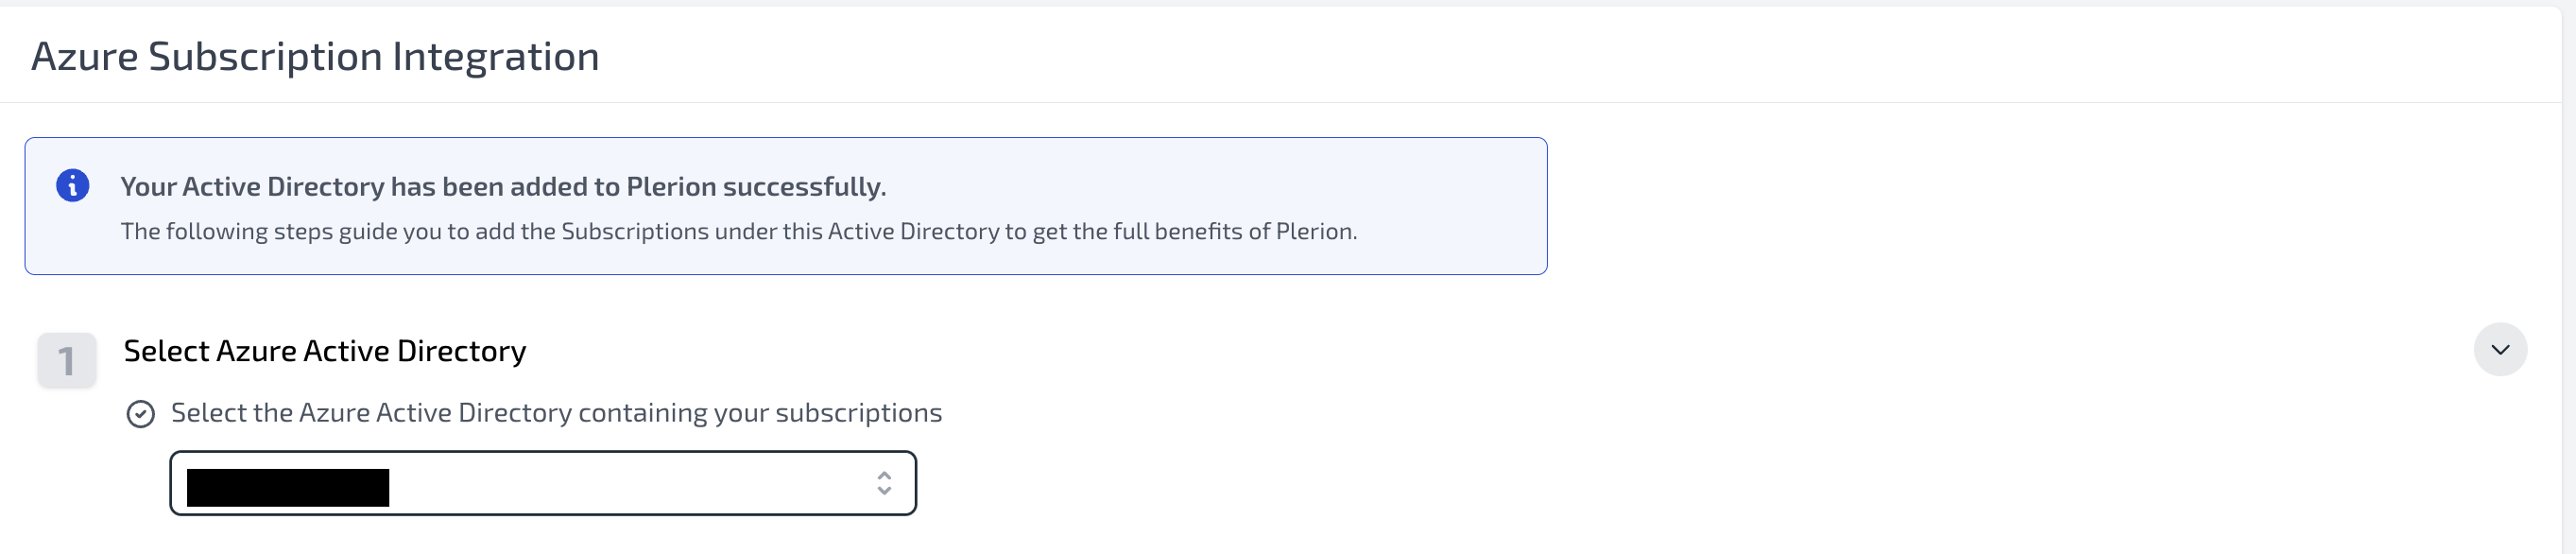
6
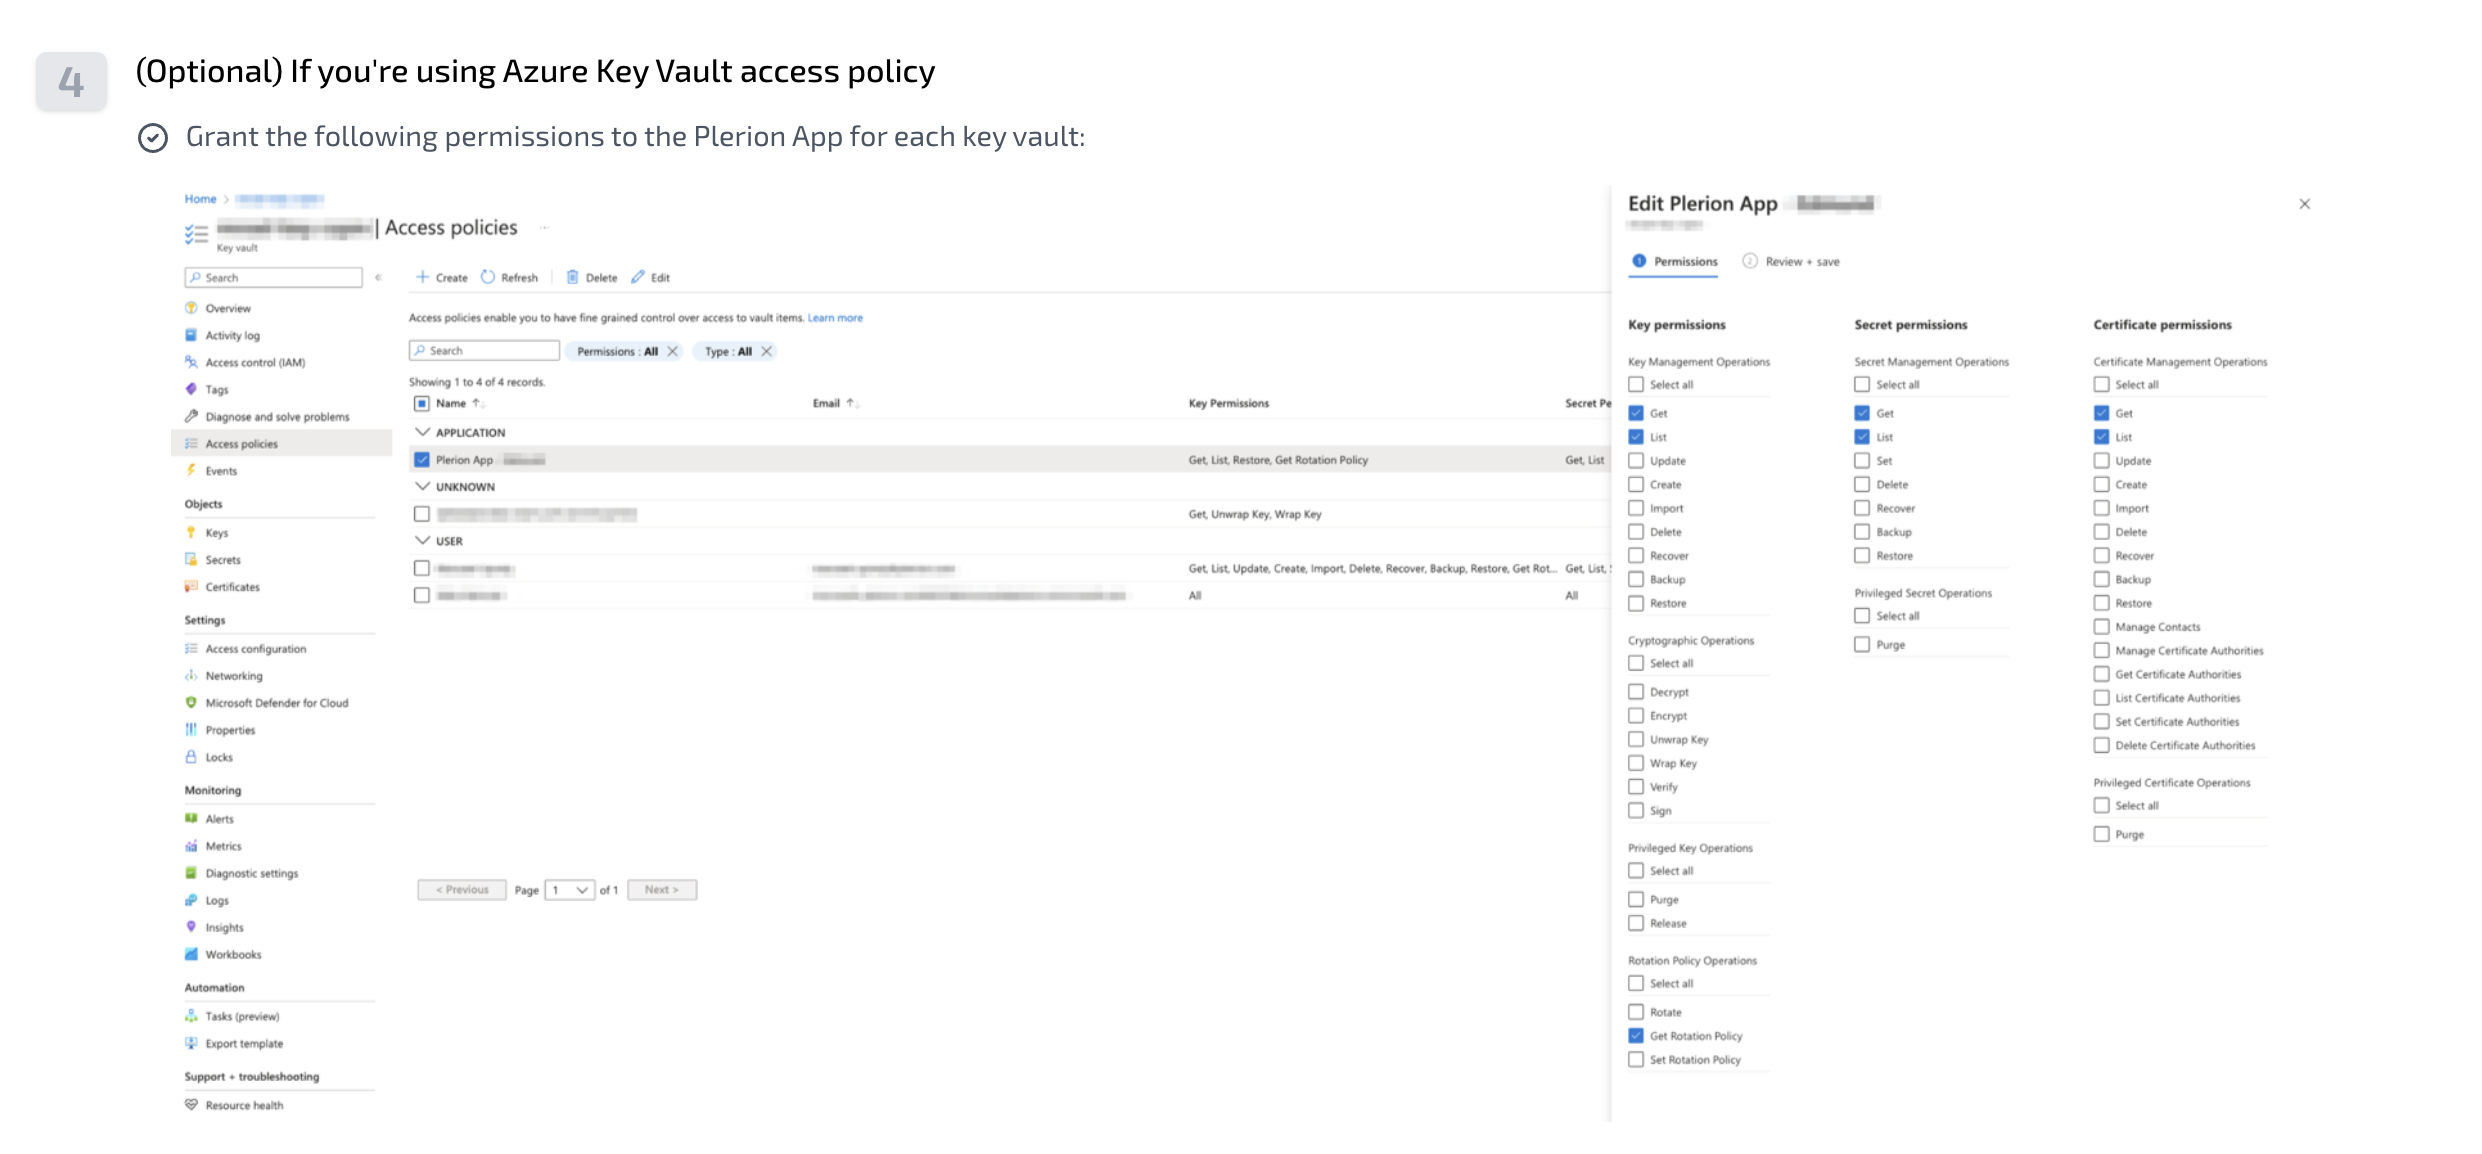
Grant the app registration subscription access
Provide the app registration with access to each subscription, using either the Azure CLI or Azure Portal as instructed.
7
Add extra permissions (optional)
You may assign additional permissions if required for advanced use cases.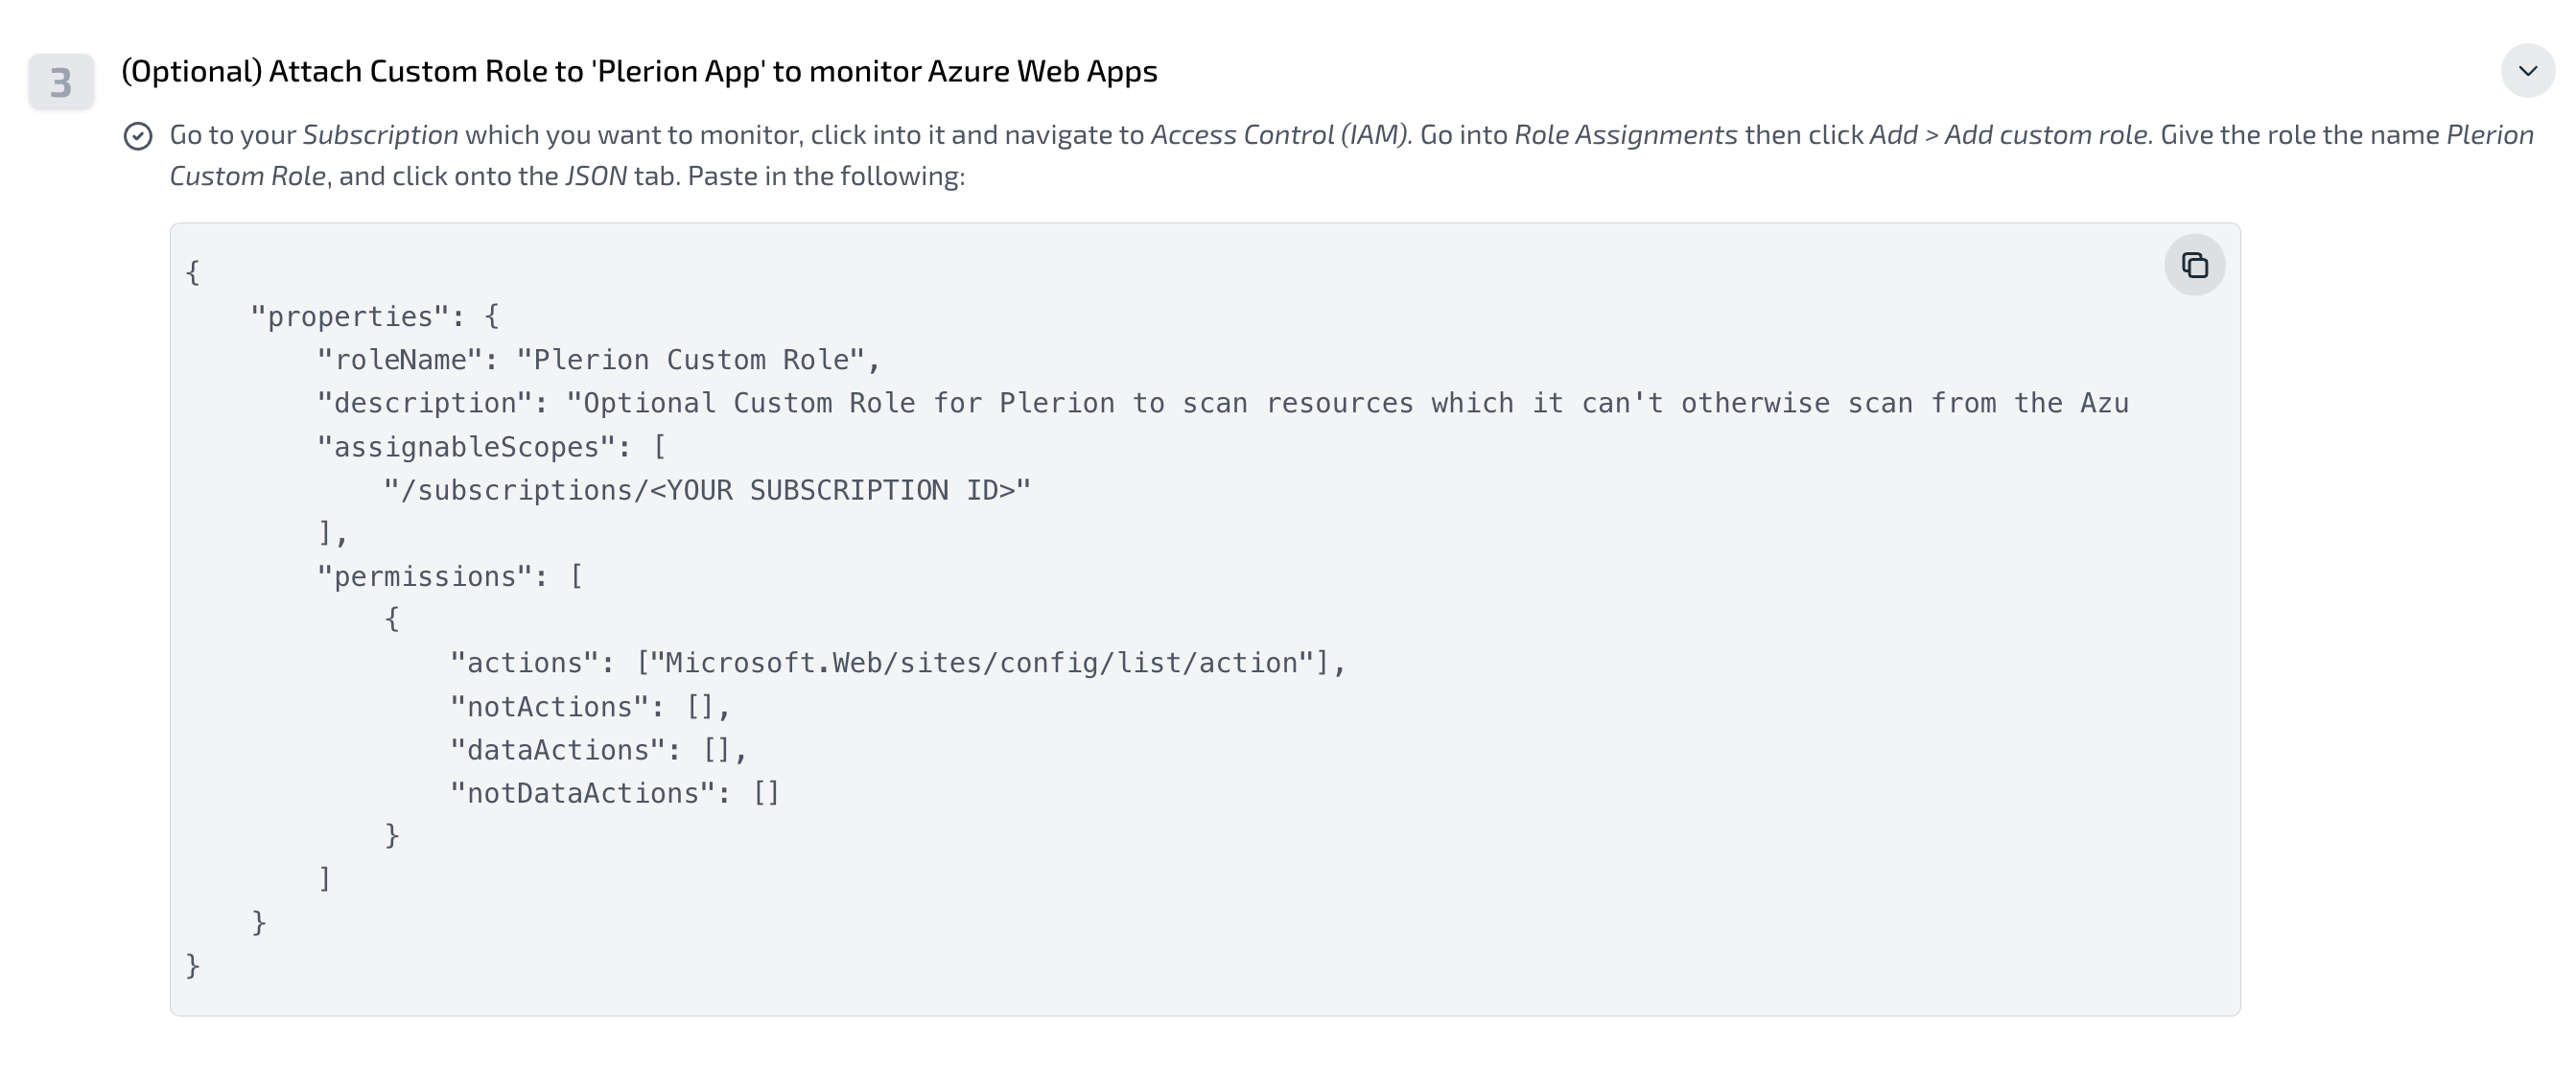
8
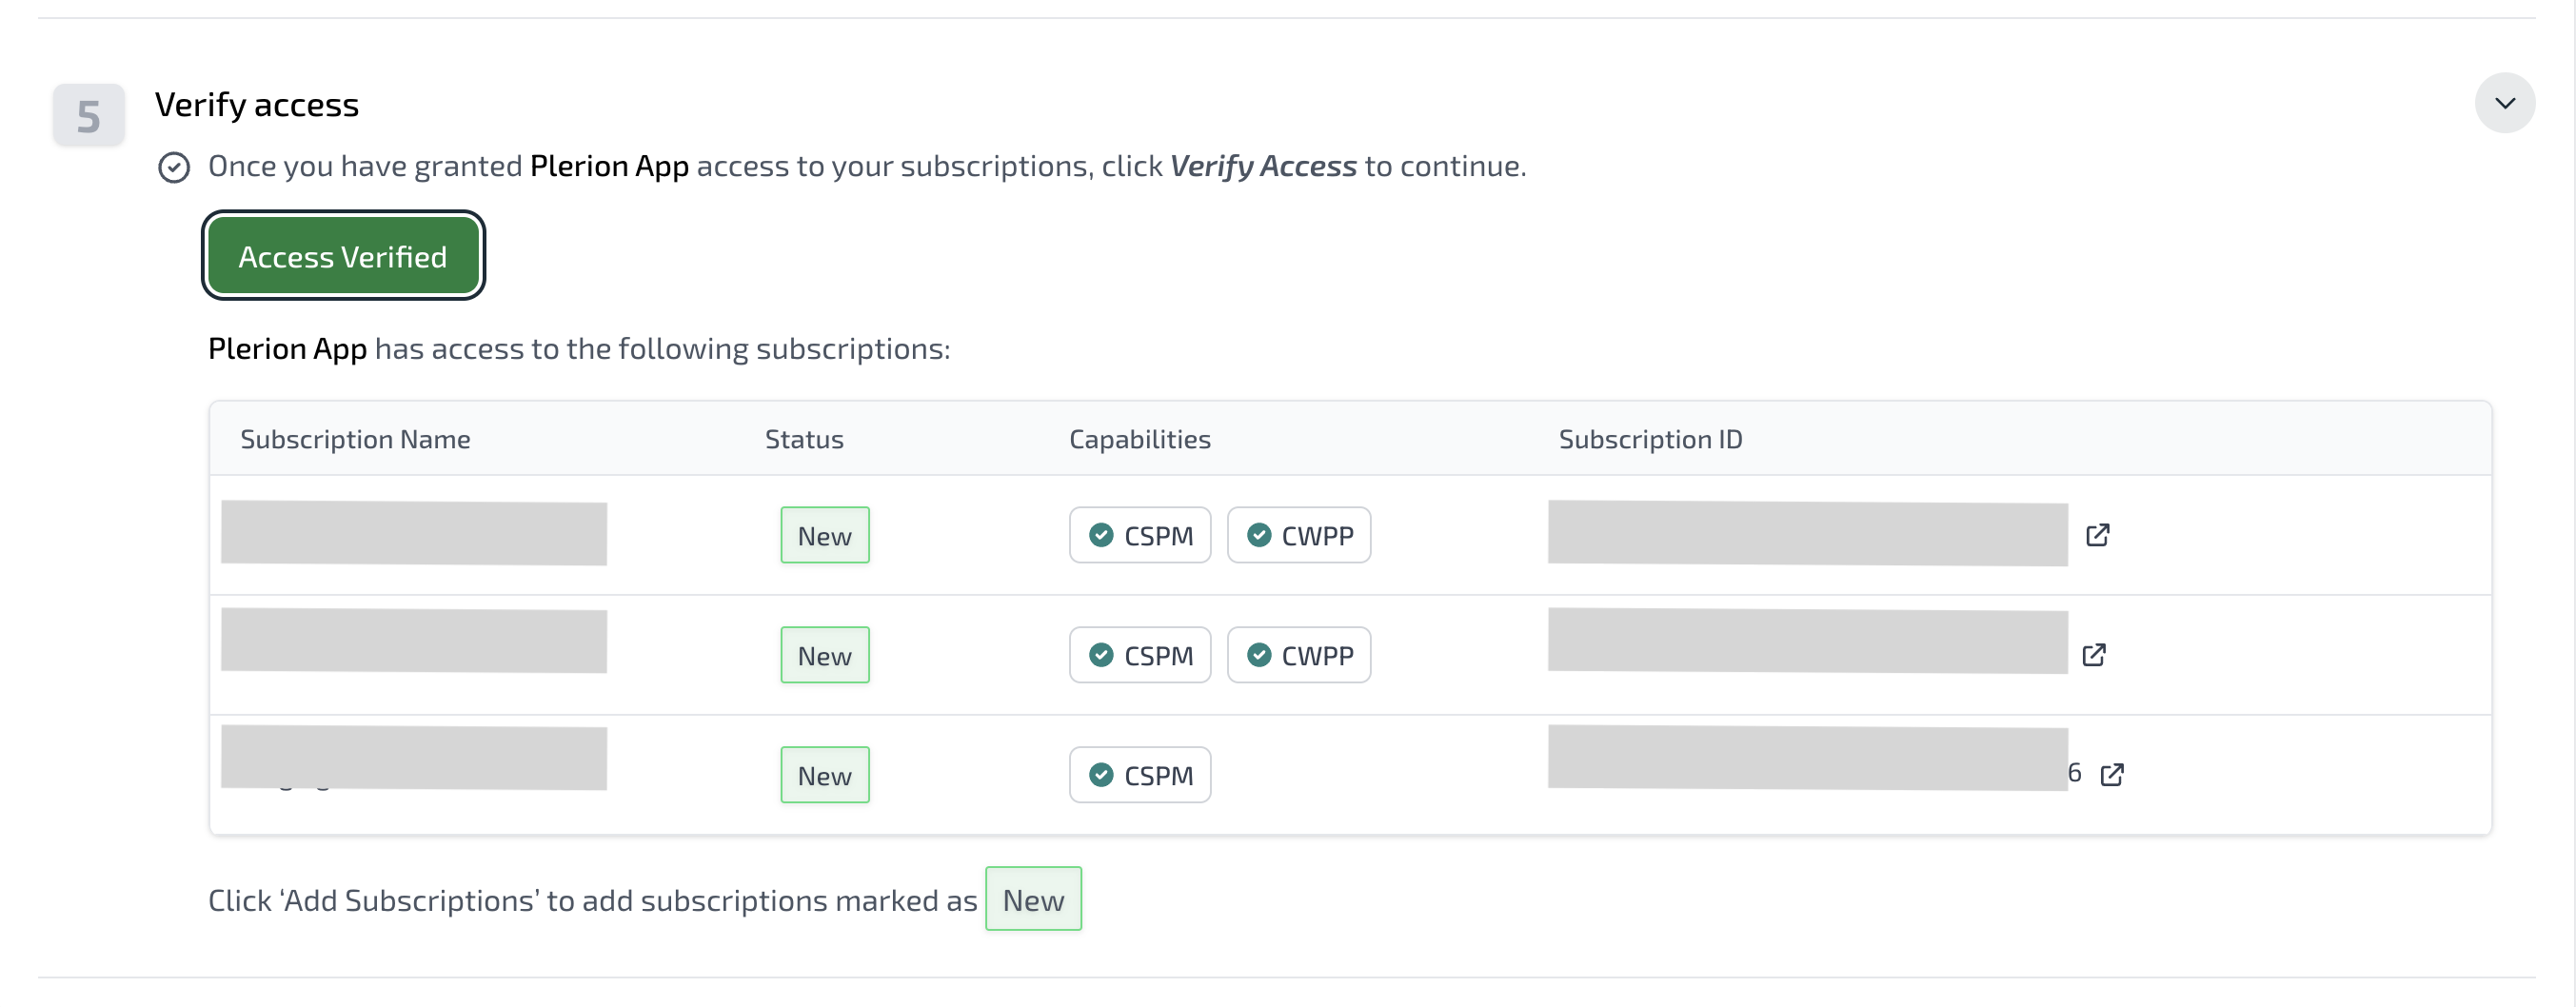
Verify access to subscriptions
- Click
Verify accessto confirm that subscriptions are correctly configured. - Plerion will display all subscriptions available based on the permissions provided.
9
Add subscriptions to Plerion
- Select the subscriptions you want to add and click
Add subscriptions. - These subscriptions will now be available in your tenant for scanning.