
Roles for API keys
Each user can hold two keys per tenant. A key is created with one role and keeps it until you change it. The roles a key can hold are the tenant-level roles of its tenant:- Tenant admin (default): every operation of the API, on every integration in the tenant. Keys created before roles existed hold this role.
- Tenant read-only: reads within the tenant.
- Custom roles: any role an organization admin has created for this tenant. A custom role can hold a subset of permissions and can limit them to specific integrations or integration groups.
Organization-level roles do not apply, because a key lives in one tenant.
403 Forbidden. A role change applies from the next request made with the key.
Steps to create a key
1
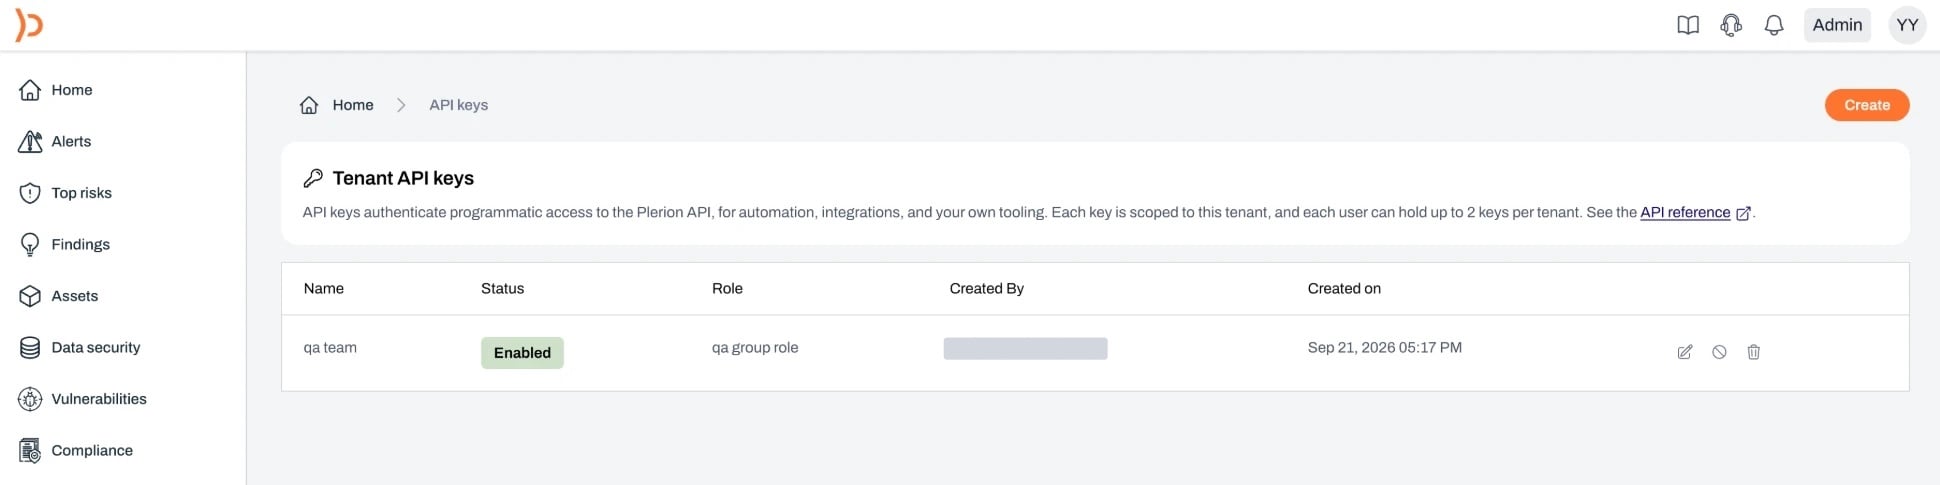
Go to Settings > API keys and click Create
2
Name the key
Enter an API key name of 2 to 64 characters that says what the key is for.
3
Choose the role
Use the Role dropdown. Tenant admin is selected by default.Under the form, the Permissions panel shows the role’s actions and the integrations they apply to, and the Operations panel lists every API operation the key can call. Tick Show N operations this key cannot call to list the refused ones too. Click a refused operation to see the permission it needs. You can click 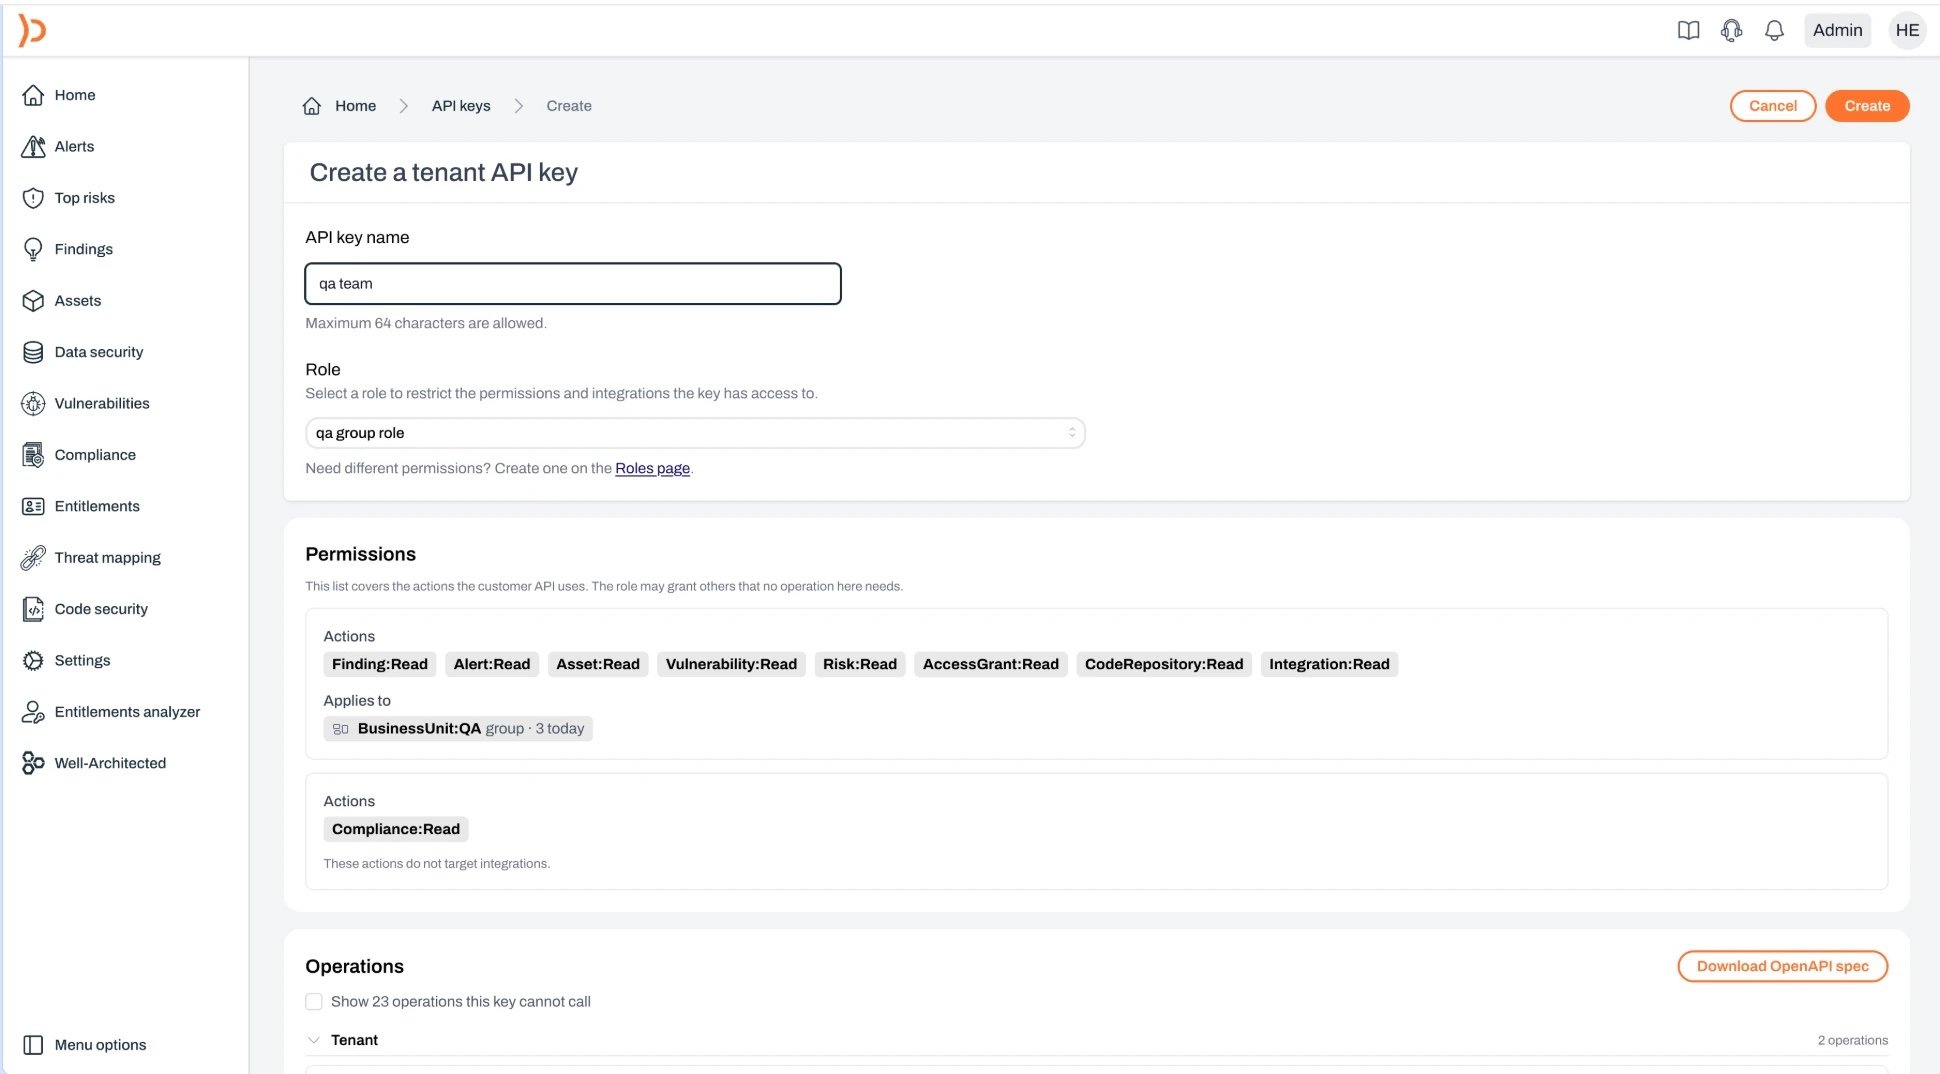
Download OpenAPI spec here too, which saves the API reference limited to the selected role.4
Click Create and copy the key
The key is shown once. Copy it and store it in your secrets manager.Below the key, the same Permissions and Operations panels describe the key you just created. 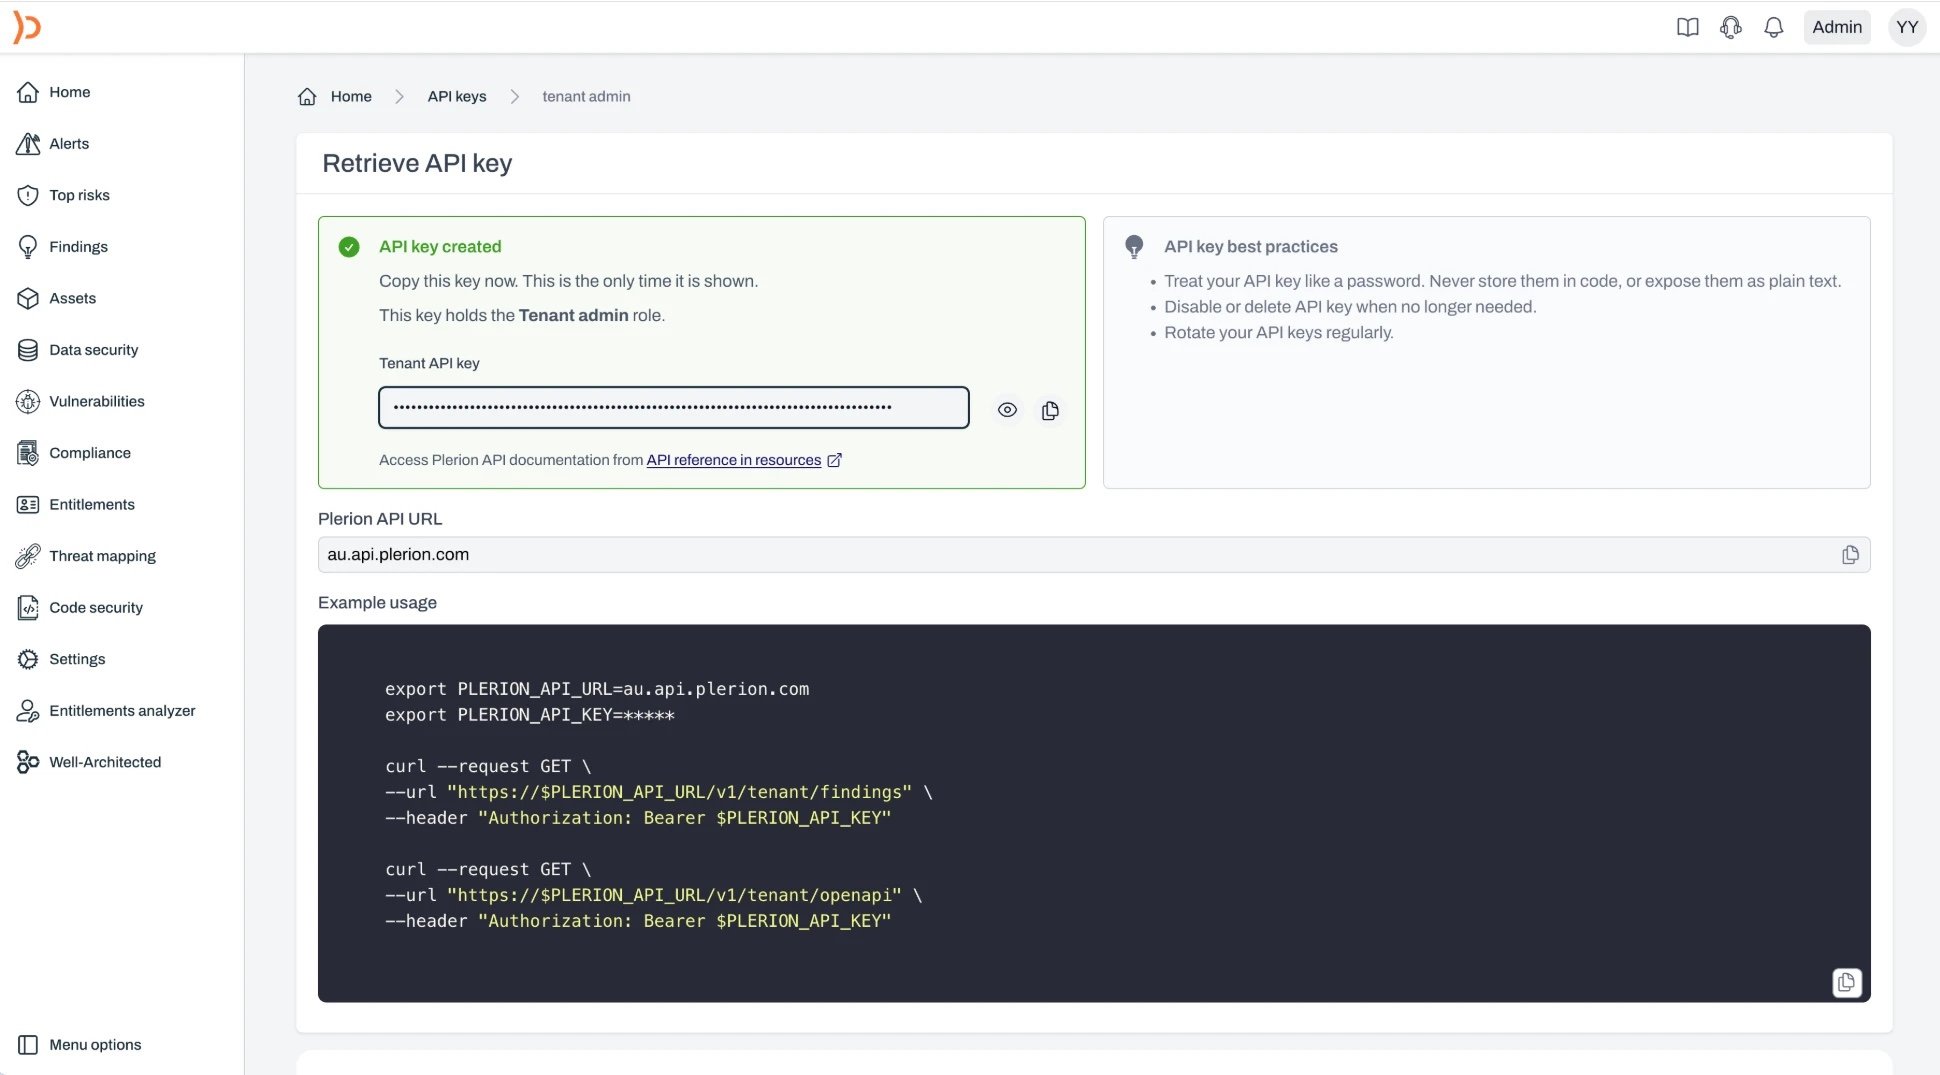
Download OpenAPI spec saves the API reference limited to this key as a JSON file.Managing existing keys
The API keys list shows each key’s Name, Status, Role, Created By, and Created on. If a key’s role has been deleted, the Role column shows a warning, and the key’s requests are refused until you give it another role. Click a key’s row to open it. The key page shows its details, its Role, and the Permissions and Operations panels for the selected role. To change the role, pick another one from the dropdown. The panels update to what that role allows, andSave changes applies it. The key holds its current role until you save.
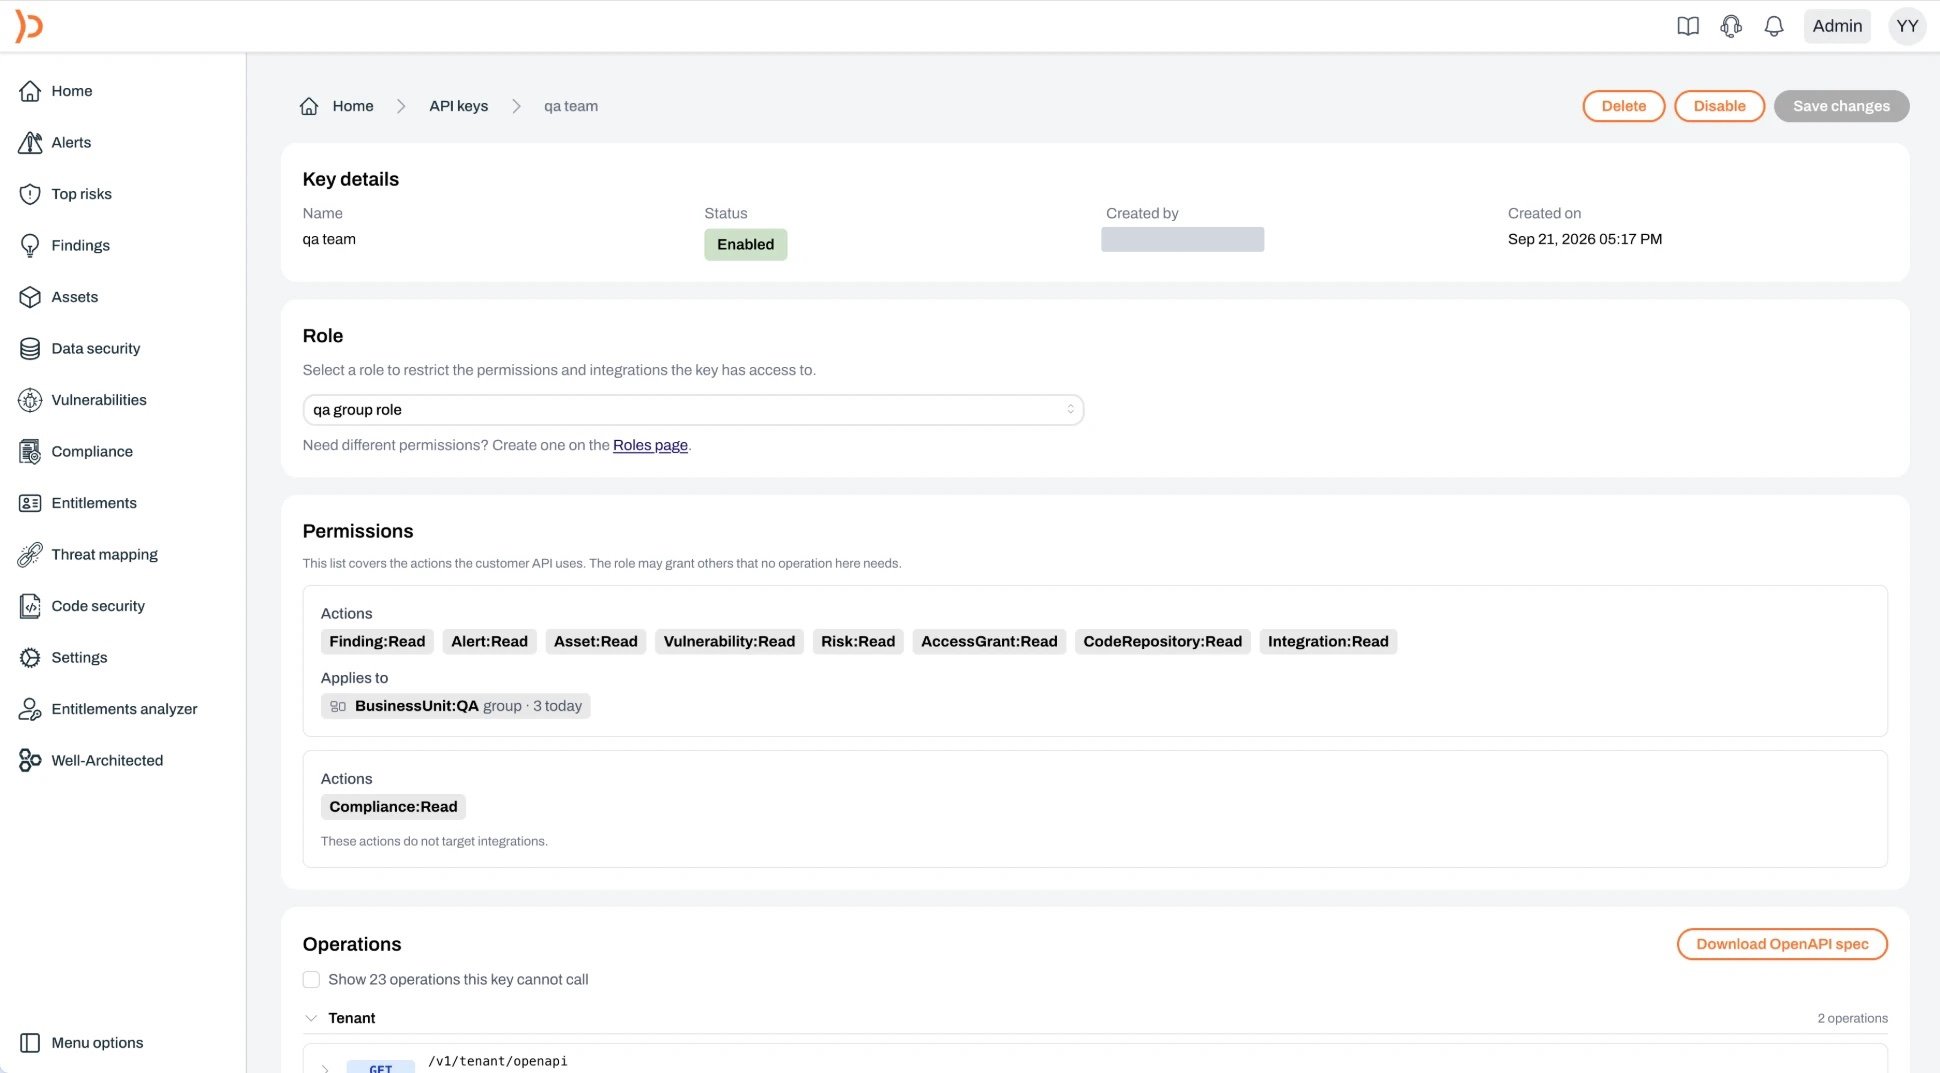
- Edit: opens the key page.
- Disable or Enable: a disabled key is refused until it is enabled again.
- Delete: removes the key permanently.

Asking the API what a key can do
GET /v1/tenant/openapi returns the API reference as an OpenAPI 3.1 document limited to the calling key. Operations the role cannot call are left out. Each operation names the permission that authorizes it under x-plerion-actions and the integrations in scope under x-plerion-integration-scope. Send Accept: application/yaml to receive YAML instead of JSON.