> ## Documentation Index
> Fetch the complete documentation index at: https://docs.plerion.com/llms.txt
> Use this file to discover all available pages before exploring further.
# Service account prerequisites
> Prepare your AWS account for use as a Plerion service account by verifying regions, enabling availability, and ensuring EC2 quotas can support appliance deployment.
## Before you begin
Choose which AWS account to use as your service account:
* **Recommended:** Create a new AWS account specifically for the service account to isolate costs and avoid impacting existing workloads.
* **Alternative:** You can use an existing AWS account.
***
## Prerequisites
New AWS accounts may not have all regions enabled by default, and manual activation may be required. Check and activate regions as needed before installing the service account infrastructure.
### Verify AWS region availability
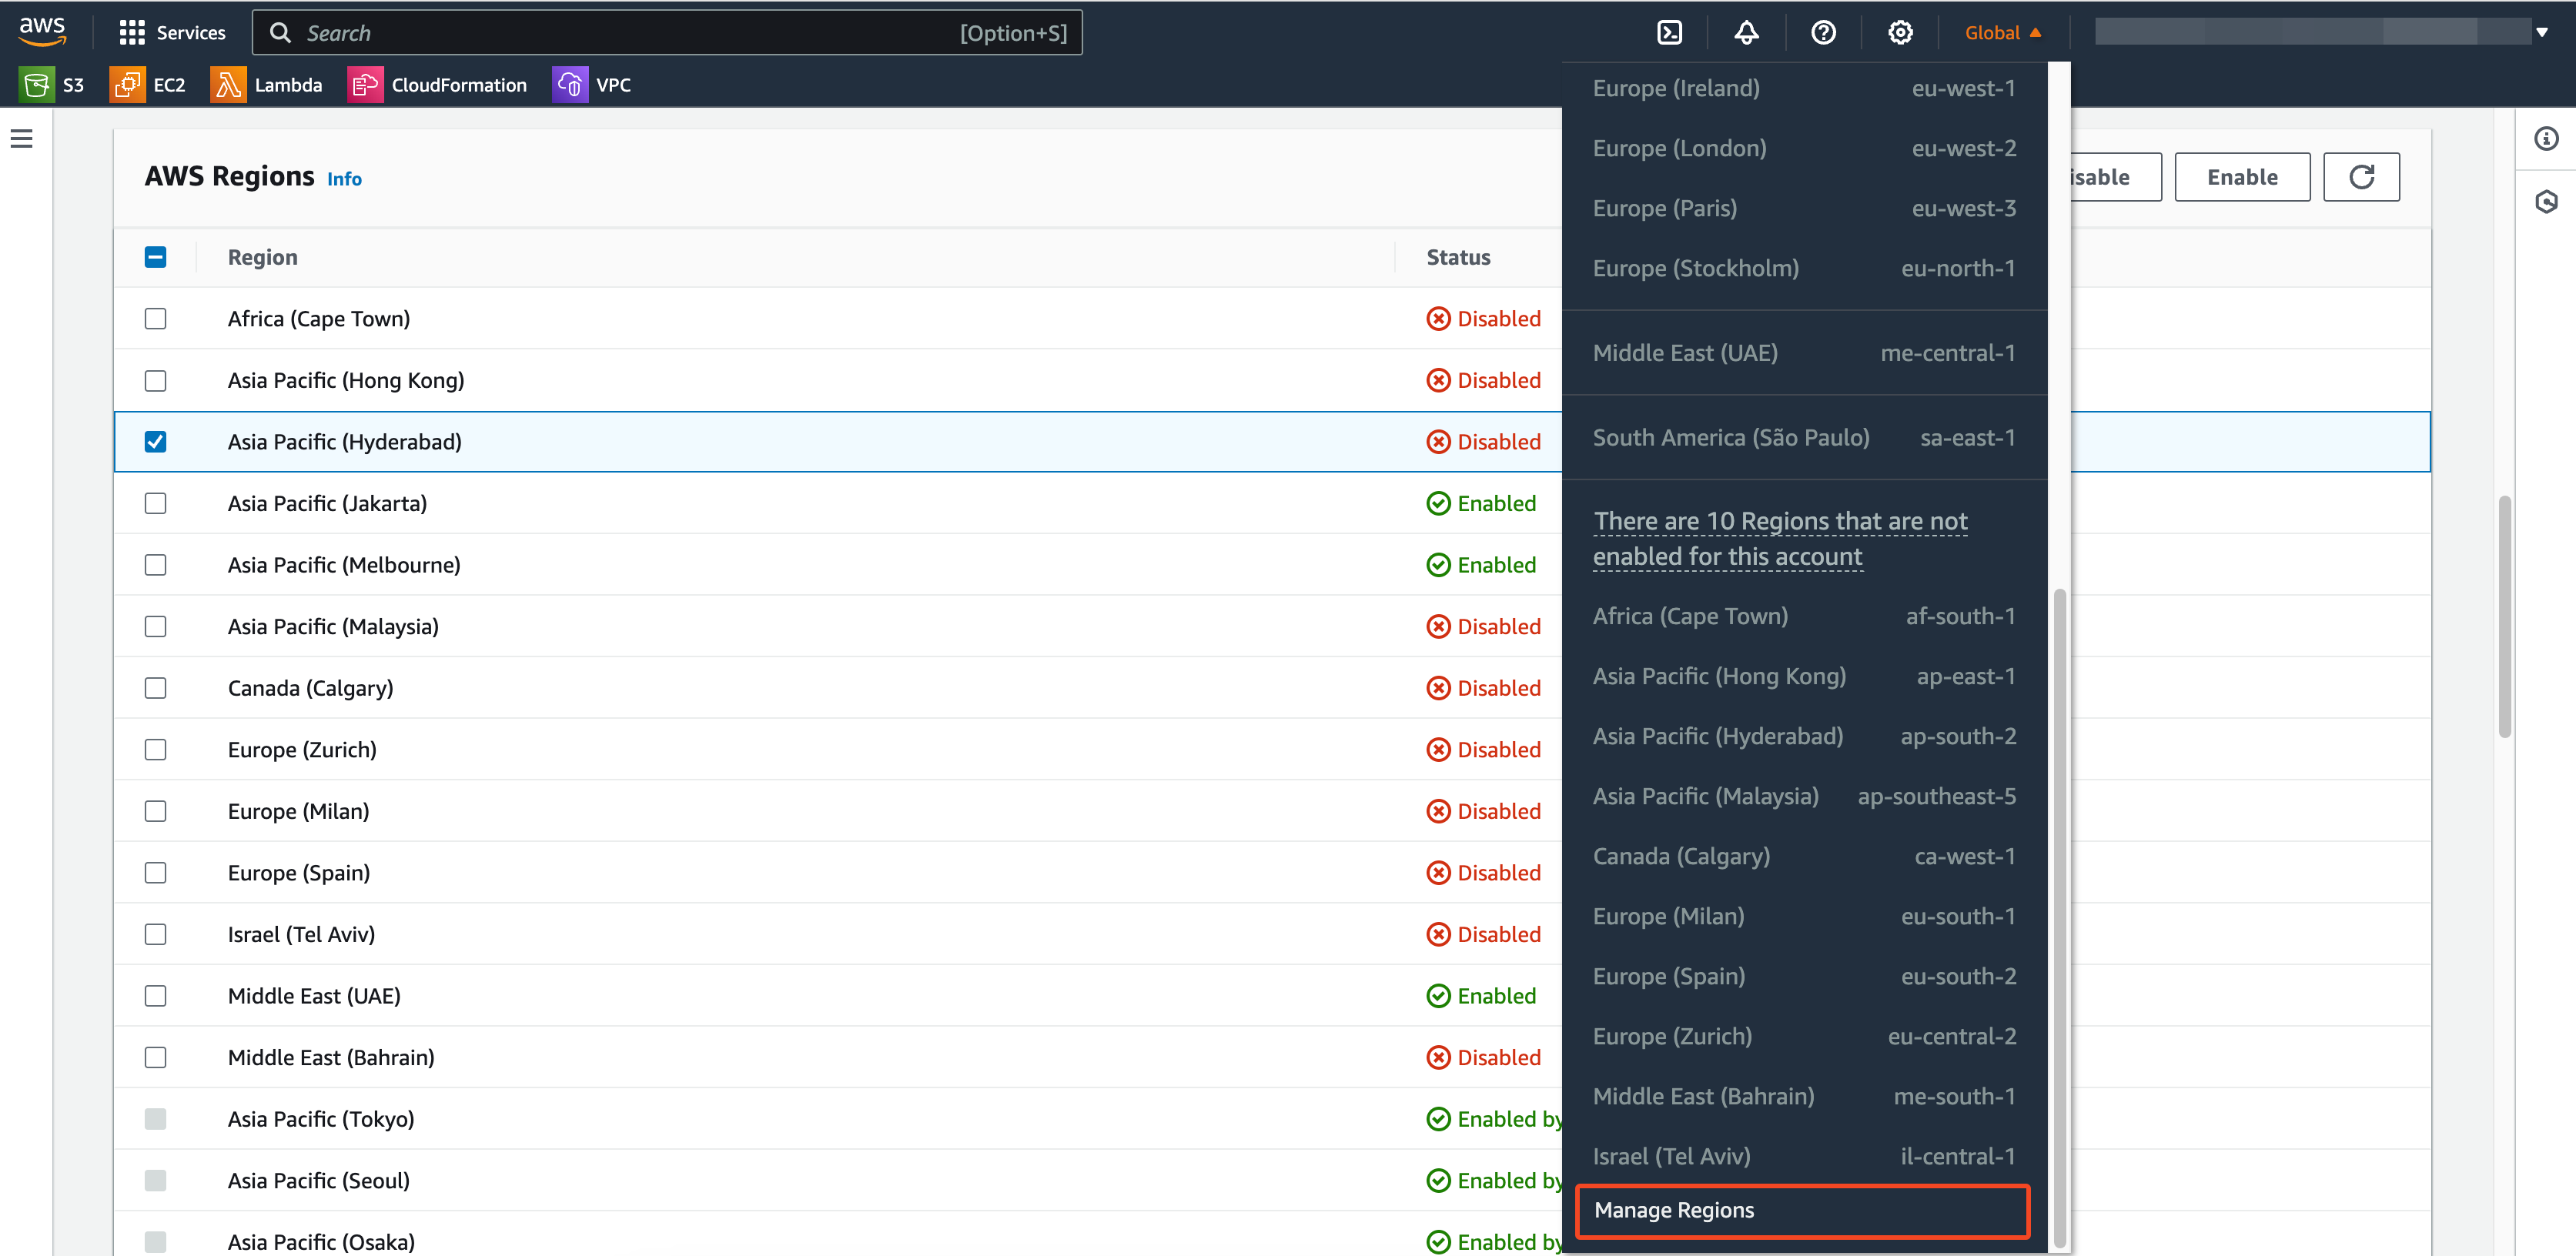
* Open the region selector in the top-right corner and choose `Manage regions`.
* Enable the regions you plan to use.
 * Open the **EC2 service** in your target region.
* Try to launch **10 t3.micro** instances or **1 large instance**.
* If the region is inactive, you’ll see an error message:
* Open the **EC2 service** in your target region.
* Try to launch **10 t3.micro** instances or **1 large instance**.
* If the region is inactive, you’ll see an error message:
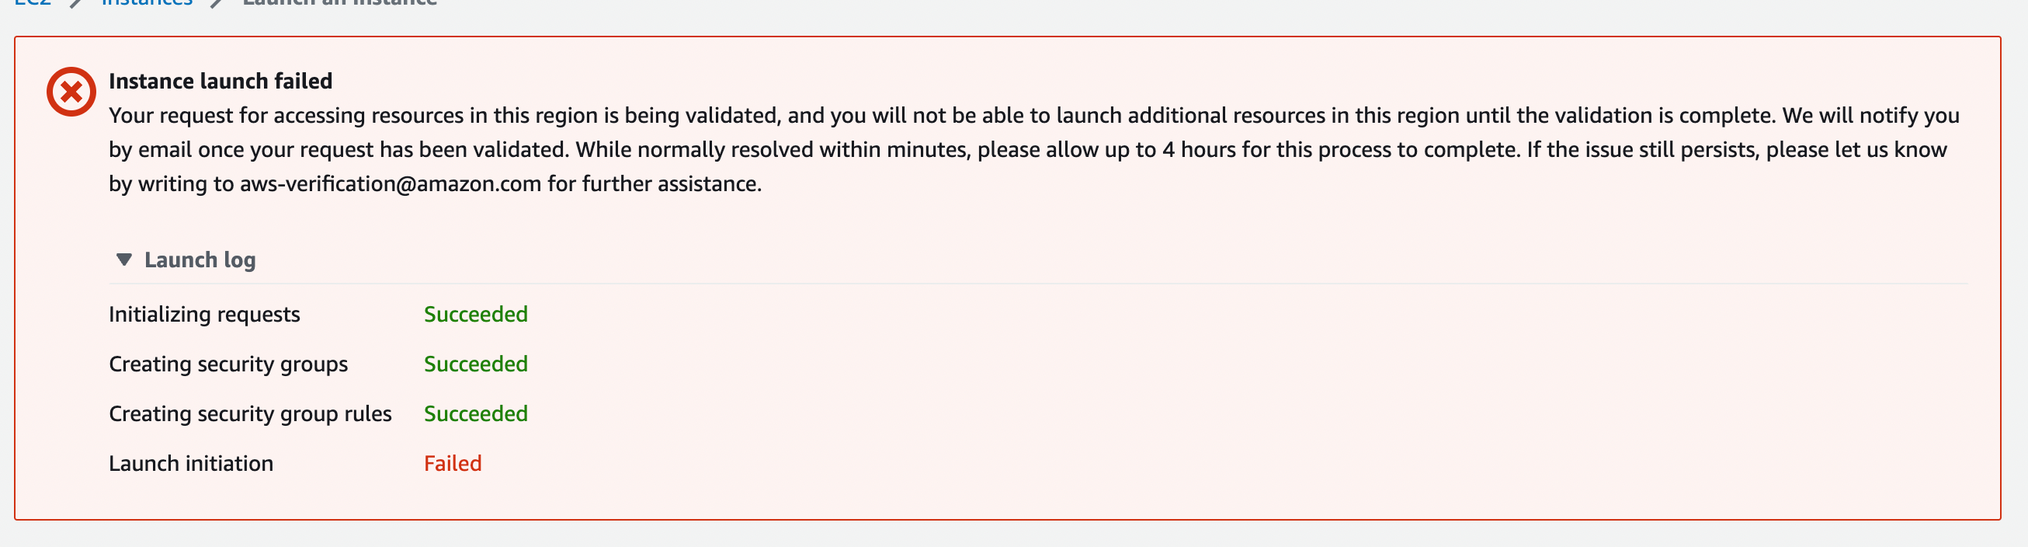 * AWS typically activates a region within 10–15 minutes and sends a confirmation email.
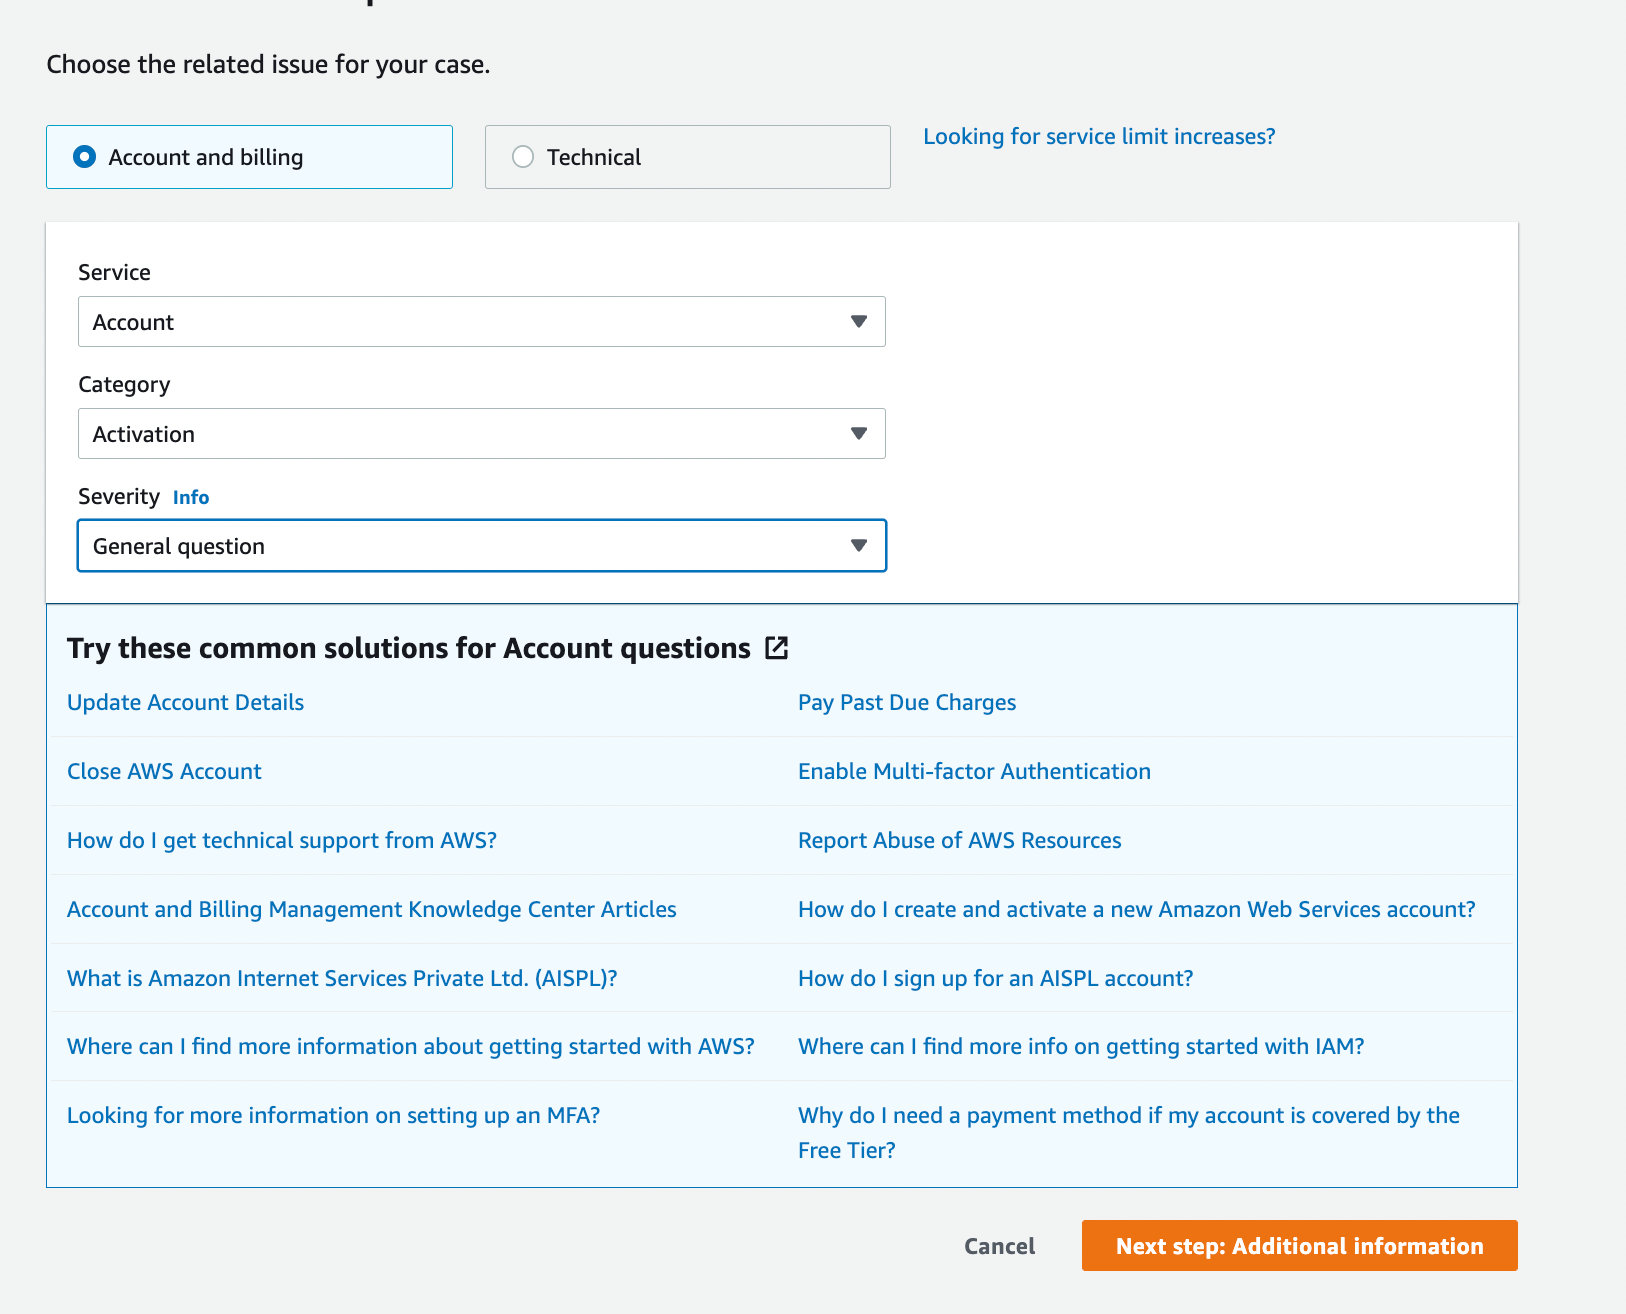
* If no email arrives, raise a support ticket in the [AWS Support Center](https://console.aws.amazon.com/support/home#/).
* AWS typically activates a region within 10–15 minutes and sends a confirmation email.
* If no email arrives, raise a support ticket in the [AWS Support Center](https://console.aws.amazon.com/support/home#/).
 Remember to terminate the EC2 instances after testing region activation.
***
### Verify AWS service quotas
The AWS service account deploys appliances as EC2 instances to perform CWPP scans. By default, these appliances use the `c7i.xlarge` instance type in supported regions. If `c7i.xlarge` is not available in a region, the service account will fall back to using `t3.large`.
* c7i.xlarge: 4 vCPUs, 8 GiB memory
* t3.large: 2 vCPUs, 8 GiB memory
A service account will deploy up to **10 appliances** in a region. To support this, ensure the EC2 quota **Running On-Demand Standard (A, C, D, H, I, M, R, T, Z) instances** is **at least 40**.
Default EC2 quotas are often set below the required threshold. To ensure service account appliances can be deployed, you may need to request a quota increase in each region you plan to use.
Follow these steps to check your current quota and request an increase if needed:
Use the region selector in the top-right corner to confirm you’re in the correct region.
In the navigation pane, choose `AWS services`, then search for `EC2` and select `Amazon Elastic Compute Cloud (Amazon EC2)`.
Enter `Running On-Demand Standard (A, C, D, H, I, M, R, T, Z) instances` in the search field and select the matching quota.
* The minimum required for a service account is **40**.
* If your applied value is lower, continue with a quota increase request.
* On the quota details page, click `Request quota increase`.
* Confirm the quota name is **Running On-Demand Standard (A, C, D, H, I, M, R, T, Z) instances** and the region is correct.
* Enter a new value of `40 or higher` and submit the request.
* A confirmation message should appear at the top of the screen.
***
## Next step
Once you’ve confirmed regions and quotas, continue with service account setup:
* [Getting started with an AWS service account](/guides/integrations/aws/service-account/getting-started-with-aws-service-account)
Remember to terminate the EC2 instances after testing region activation.
***
### Verify AWS service quotas
The AWS service account deploys appliances as EC2 instances to perform CWPP scans. By default, these appliances use the `c7i.xlarge` instance type in supported regions. If `c7i.xlarge` is not available in a region, the service account will fall back to using `t3.large`.
* c7i.xlarge: 4 vCPUs, 8 GiB memory
* t3.large: 2 vCPUs, 8 GiB memory
A service account will deploy up to **10 appliances** in a region. To support this, ensure the EC2 quota **Running On-Demand Standard (A, C, D, H, I, M, R, T, Z) instances** is **at least 40**.
Default EC2 quotas are often set below the required threshold. To ensure service account appliances can be deployed, you may need to request a quota increase in each region you plan to use.
Follow these steps to check your current quota and request an increase if needed:
Use the region selector in the top-right corner to confirm you’re in the correct region.
In the navigation pane, choose `AWS services`, then search for `EC2` and select `Amazon Elastic Compute Cloud (Amazon EC2)`.
Enter `Running On-Demand Standard (A, C, D, H, I, M, R, T, Z) instances` in the search field and select the matching quota.
* The minimum required for a service account is **40**.
* If your applied value is lower, continue with a quota increase request.
* On the quota details page, click `Request quota increase`.
* Confirm the quota name is **Running On-Demand Standard (A, C, D, H, I, M, R, T, Z) instances** and the region is correct.
* Enter a new value of `40 or higher` and submit the request.
* A confirmation message should appear at the top of the screen.
***
## Next step
Once you’ve confirmed regions and quotas, continue with service account setup:
* [Getting started with an AWS service account](/guides/integrations/aws/service-account/getting-started-with-aws-service-account)