> ## Documentation Index
> Fetch the complete documentation index at: https://docs.plerion.com/llms.txt
> Use this file to discover all available pages before exploring further.
# SCIM provisioning with Microsoft Entra ID
> Configure automatic provisioning in Microsoft Entra ID to manage Plerion users and user groups
With **Microsoft Entra ID provisioning**, you can have Entra ID create, update, and deactivate Plerion users, and sync your Entra ID groups to Plerion as user groups, from the enterprise application you already use for single sign-on. Entra ID provisions on a schedule rather than on every change, so allow for that delay when you test.
Before you start, enable SCIM in Plerion and copy the SCIM base URL and a **readWrite** organization API key. See [SCIM provisioning](/guides/administration/scim/overview#steps-to-enable-scim-in-plerion). You also need the enterprise application you created in the [Azure single sign-on](/guides/administration/sso/azure) guide, because SCIM provisions users while SAML is used for authentication only.
***
## Steps to configure Entra ID provisioning
* Sign in to the Microsoft Entra admin center.
* Go to `Enterprise applications` and open the application you created for Plerion single sign-on.
* Go to `Provisioning` and click `New configuration`.
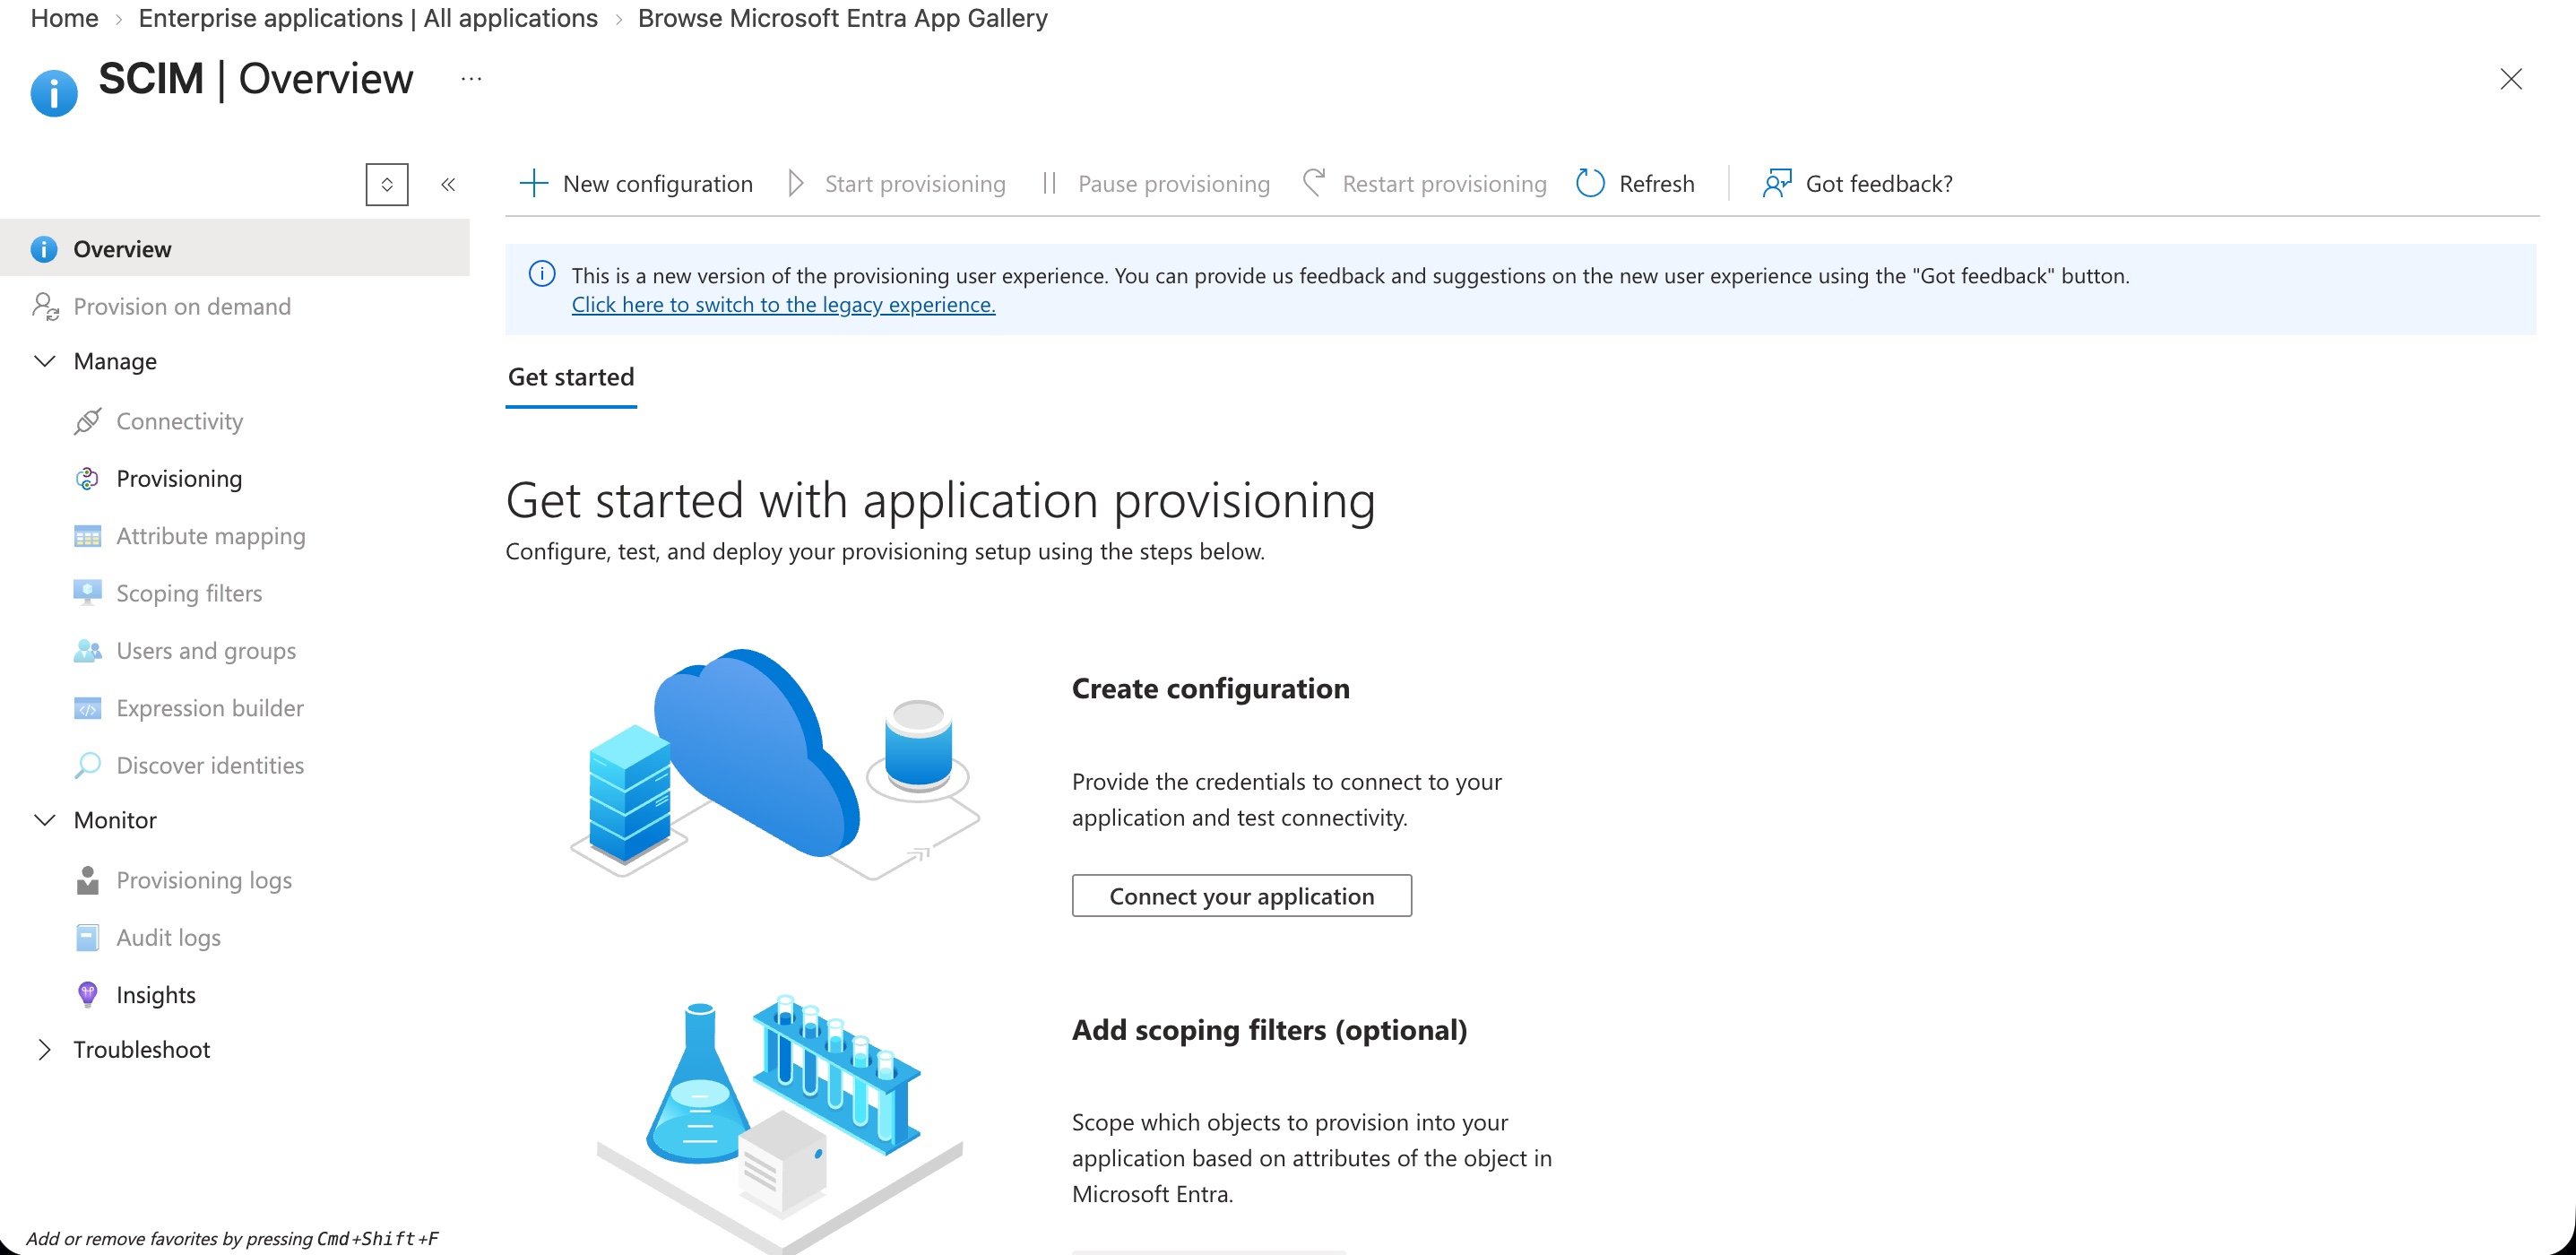 * Leave the authentication method as `Bearer authentication`.
* In `Tenant URL`, paste the SCIM base URL you copied from Plerion.
* In `Secret token`, paste your **readWrite** organization API key.
* Click `Test connection` and confirm it succeeds, then click `Create`.
* Leave the authentication method as `Bearer authentication`.
* In `Tenant URL`, paste the SCIM base URL you copied from Plerion.
* In `Secret token`, paste your **readWrite** organization API key.
* Click `Test connection` and confirm it succeeds, then click `Create`.
 * Under `Mappings`, open `Provision Microsoft Entra ID Users` and confirm that `userPrincipalName` maps to `userName` and that the mail attribute maps to the primary email, because Plerion derives the Plerion email address from those fields.
* Open `Provision Microsoft Entra ID Groups` and confirm it is enabled, with `displayName` mapped to `displayName` and `members` mapped to `members`. Each synced group appears in Plerion under `Admin` > `Directory` > `User groups`, marked as managed by your identity provider.
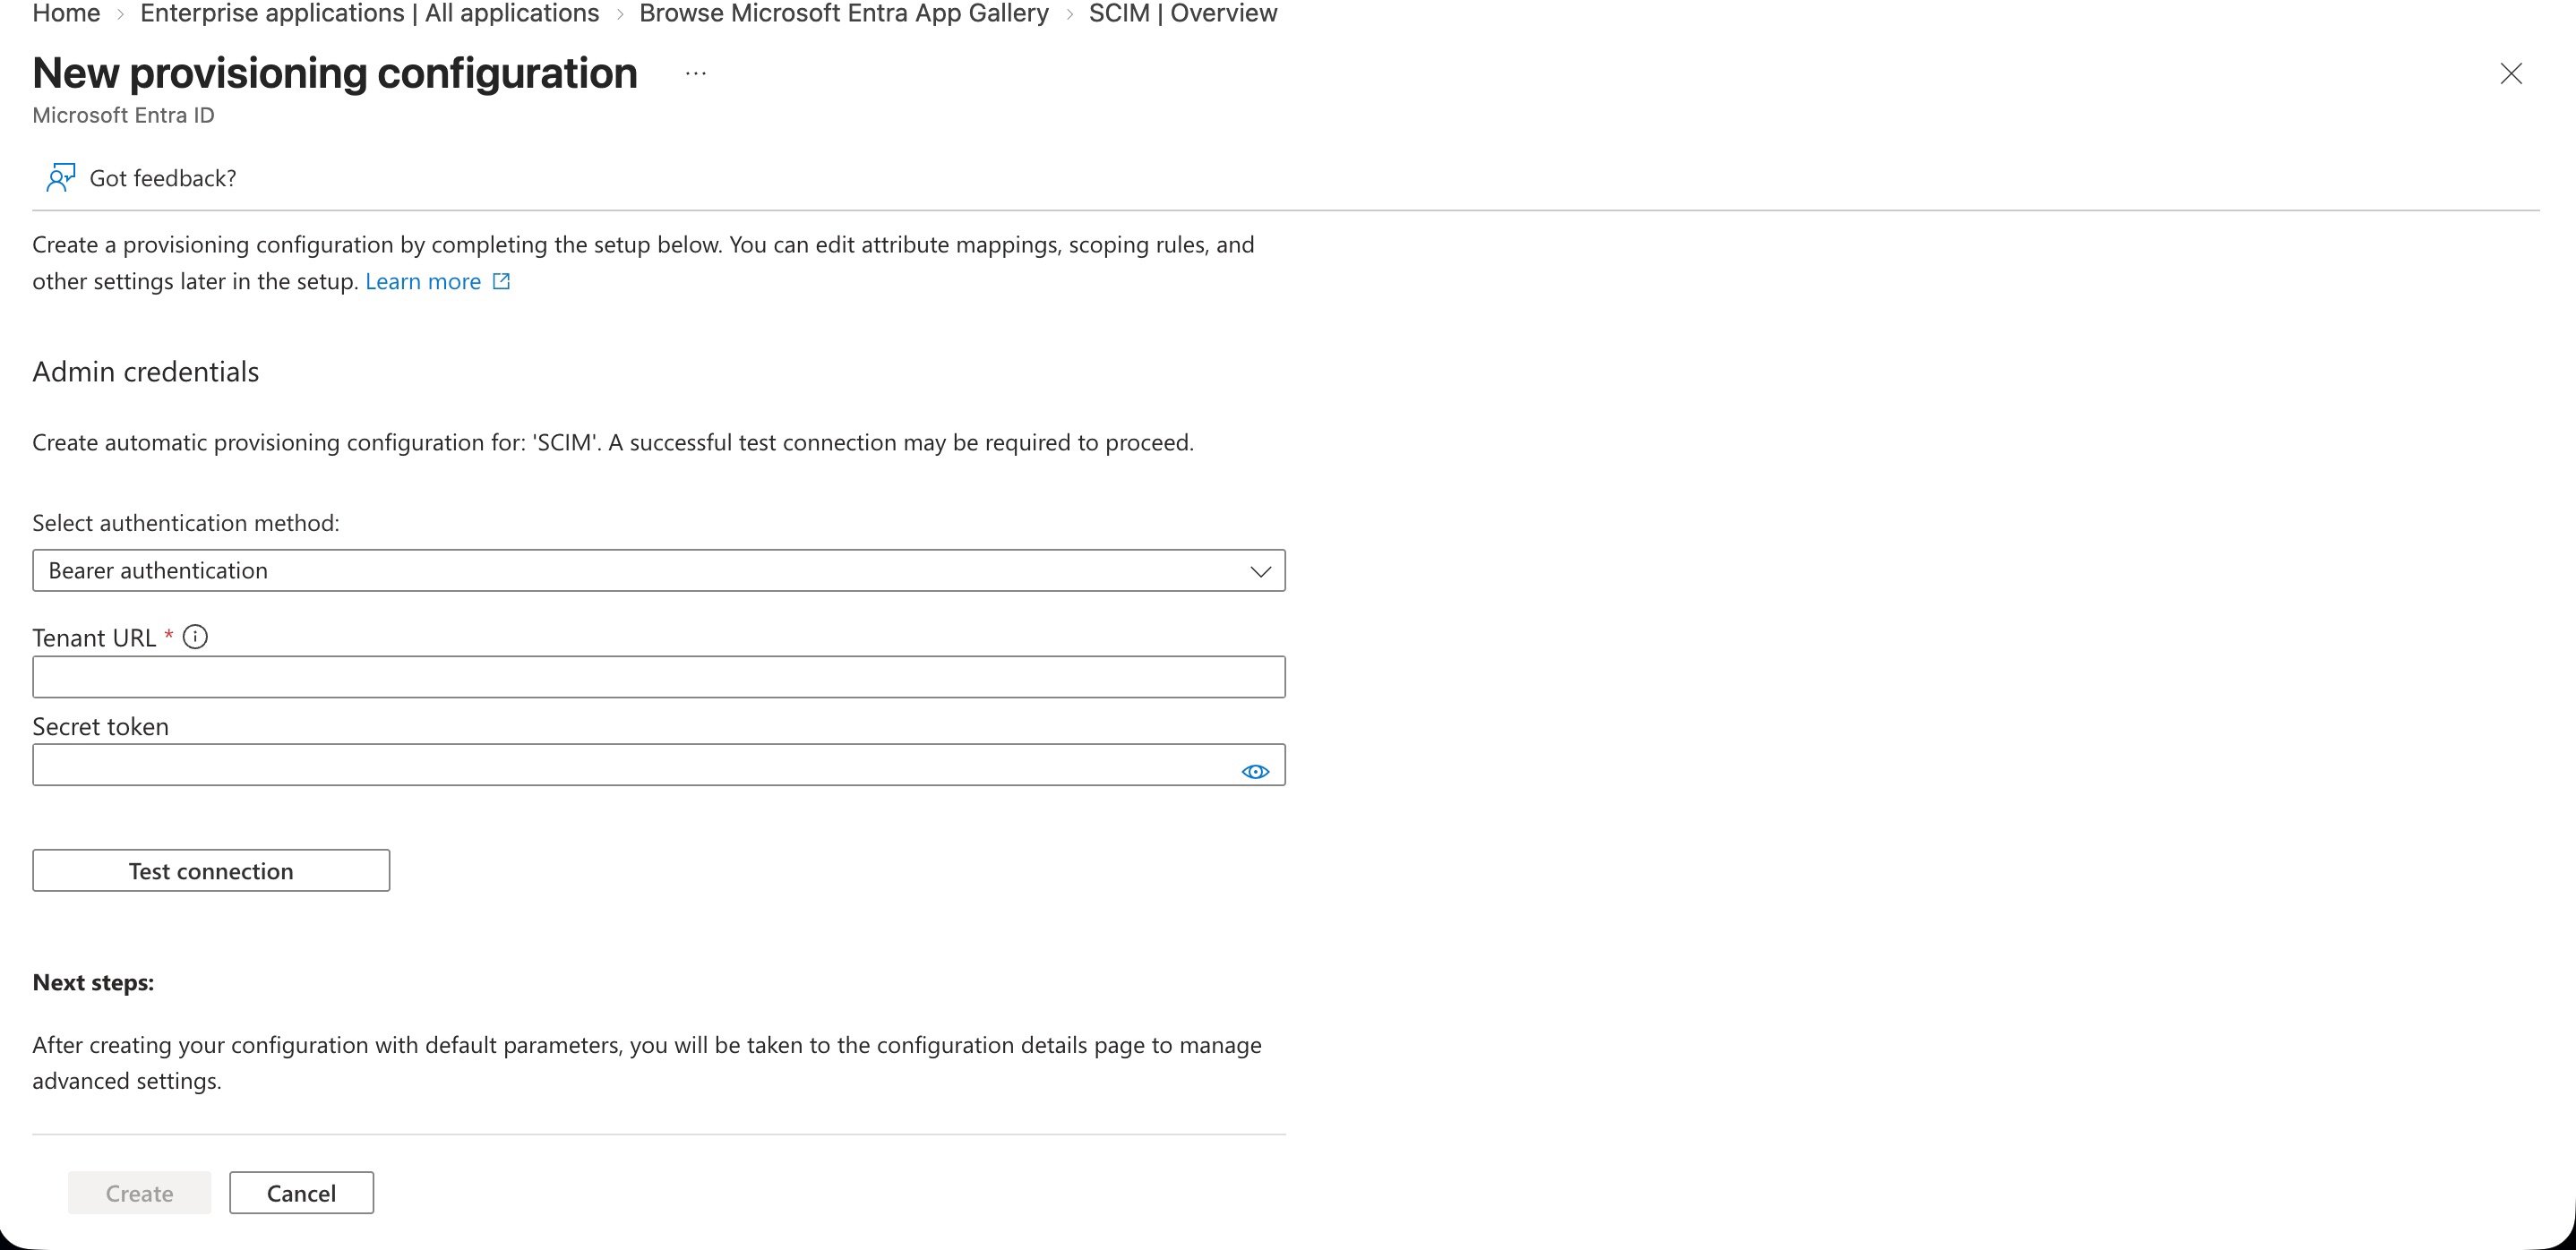
* On the `Properties` tab, confirm `Provisioning scope` is `Sync only assigned users and groups`.
* Assign groups under `Users and groups`. Their members are provisioned as users and the groups themselves as user groups.
* Click `Start provisioning`. The first cycle starts within a few minutes.
* Under `Mappings`, open `Provision Microsoft Entra ID Users` and confirm that `userPrincipalName` maps to `userName` and that the mail attribute maps to the primary email, because Plerion derives the Plerion email address from those fields.
* Open `Provision Microsoft Entra ID Groups` and confirm it is enabled, with `displayName` mapped to `displayName` and `members` mapped to `members`. Each synced group appears in Plerion under `Admin` > `Directory` > `User groups`, marked as managed by your identity provider.
* On the `Properties` tab, confirm `Provisioning scope` is `Sync only assigned users and groups`.
* Assign groups under `Users and groups`. Their members are provisioned as users and the groups themselves as user groups.
* Click `Start provisioning`. The first cycle starts within a few minutes.
 * In Plerion, go to `Admin` > `Directory` > `User groups`, open each synced group, and grant it the roles its members should hold. See [User groups](/guides/administration/user-groups).
* Until one of their groups grants a role, its members are refused at sign-in. A SCIM-managed user cannot be granted a role directly.
* Open `Provisioning logs` to confirm the users and groups were created.
* In Plerion, go to `Admin` > `Directory` > `Users` and confirm they appear with the roles their groups grant.
***
## Entra ID-specific behavior
* **Changes arrive in cycles, not instantly.** Entra ID runs an incremental cycle roughly every 40 minutes. A change you make in Entra ID can take that long to reach Plerion, including a deactivation. Use `Provision on demand` to push a single user immediately while you are testing.
* **Errors land in the provisioning logs.** Open `Provisioning logs` on the application, then match the message against the [troubleshooting table](/guides/administration/scim/overview#troubleshooting).
For the full user lifecycle and the break-glass rules that apply whatever your IdP, see [SCIM provisioning](/guides/administration/scim/overview).
* In Plerion, go to `Admin` > `Directory` > `User groups`, open each synced group, and grant it the roles its members should hold. See [User groups](/guides/administration/user-groups).
* Until one of their groups grants a role, its members are refused at sign-in. A SCIM-managed user cannot be granted a role directly.
* Open `Provisioning logs` to confirm the users and groups were created.
* In Plerion, go to `Admin` > `Directory` > `Users` and confirm they appear with the roles their groups grant.
***
## Entra ID-specific behavior
* **Changes arrive in cycles, not instantly.** Entra ID runs an incremental cycle roughly every 40 minutes. A change you make in Entra ID can take that long to reach Plerion, including a deactivation. Use `Provision on demand` to push a single user immediately while you are testing.
* **Errors land in the provisioning logs.** Open `Provisioning logs` on the application, then match the message against the [troubleshooting table](/guides/administration/scim/overview#troubleshooting).
For the full user lifecycle and the break-glass rules that apply whatever your IdP, see [SCIM provisioning](/guides/administration/scim/overview).